3.8 Section Management
A section is a unit of content within a book. You can add various types of content such as PDF, images, videos, and web links as sections.
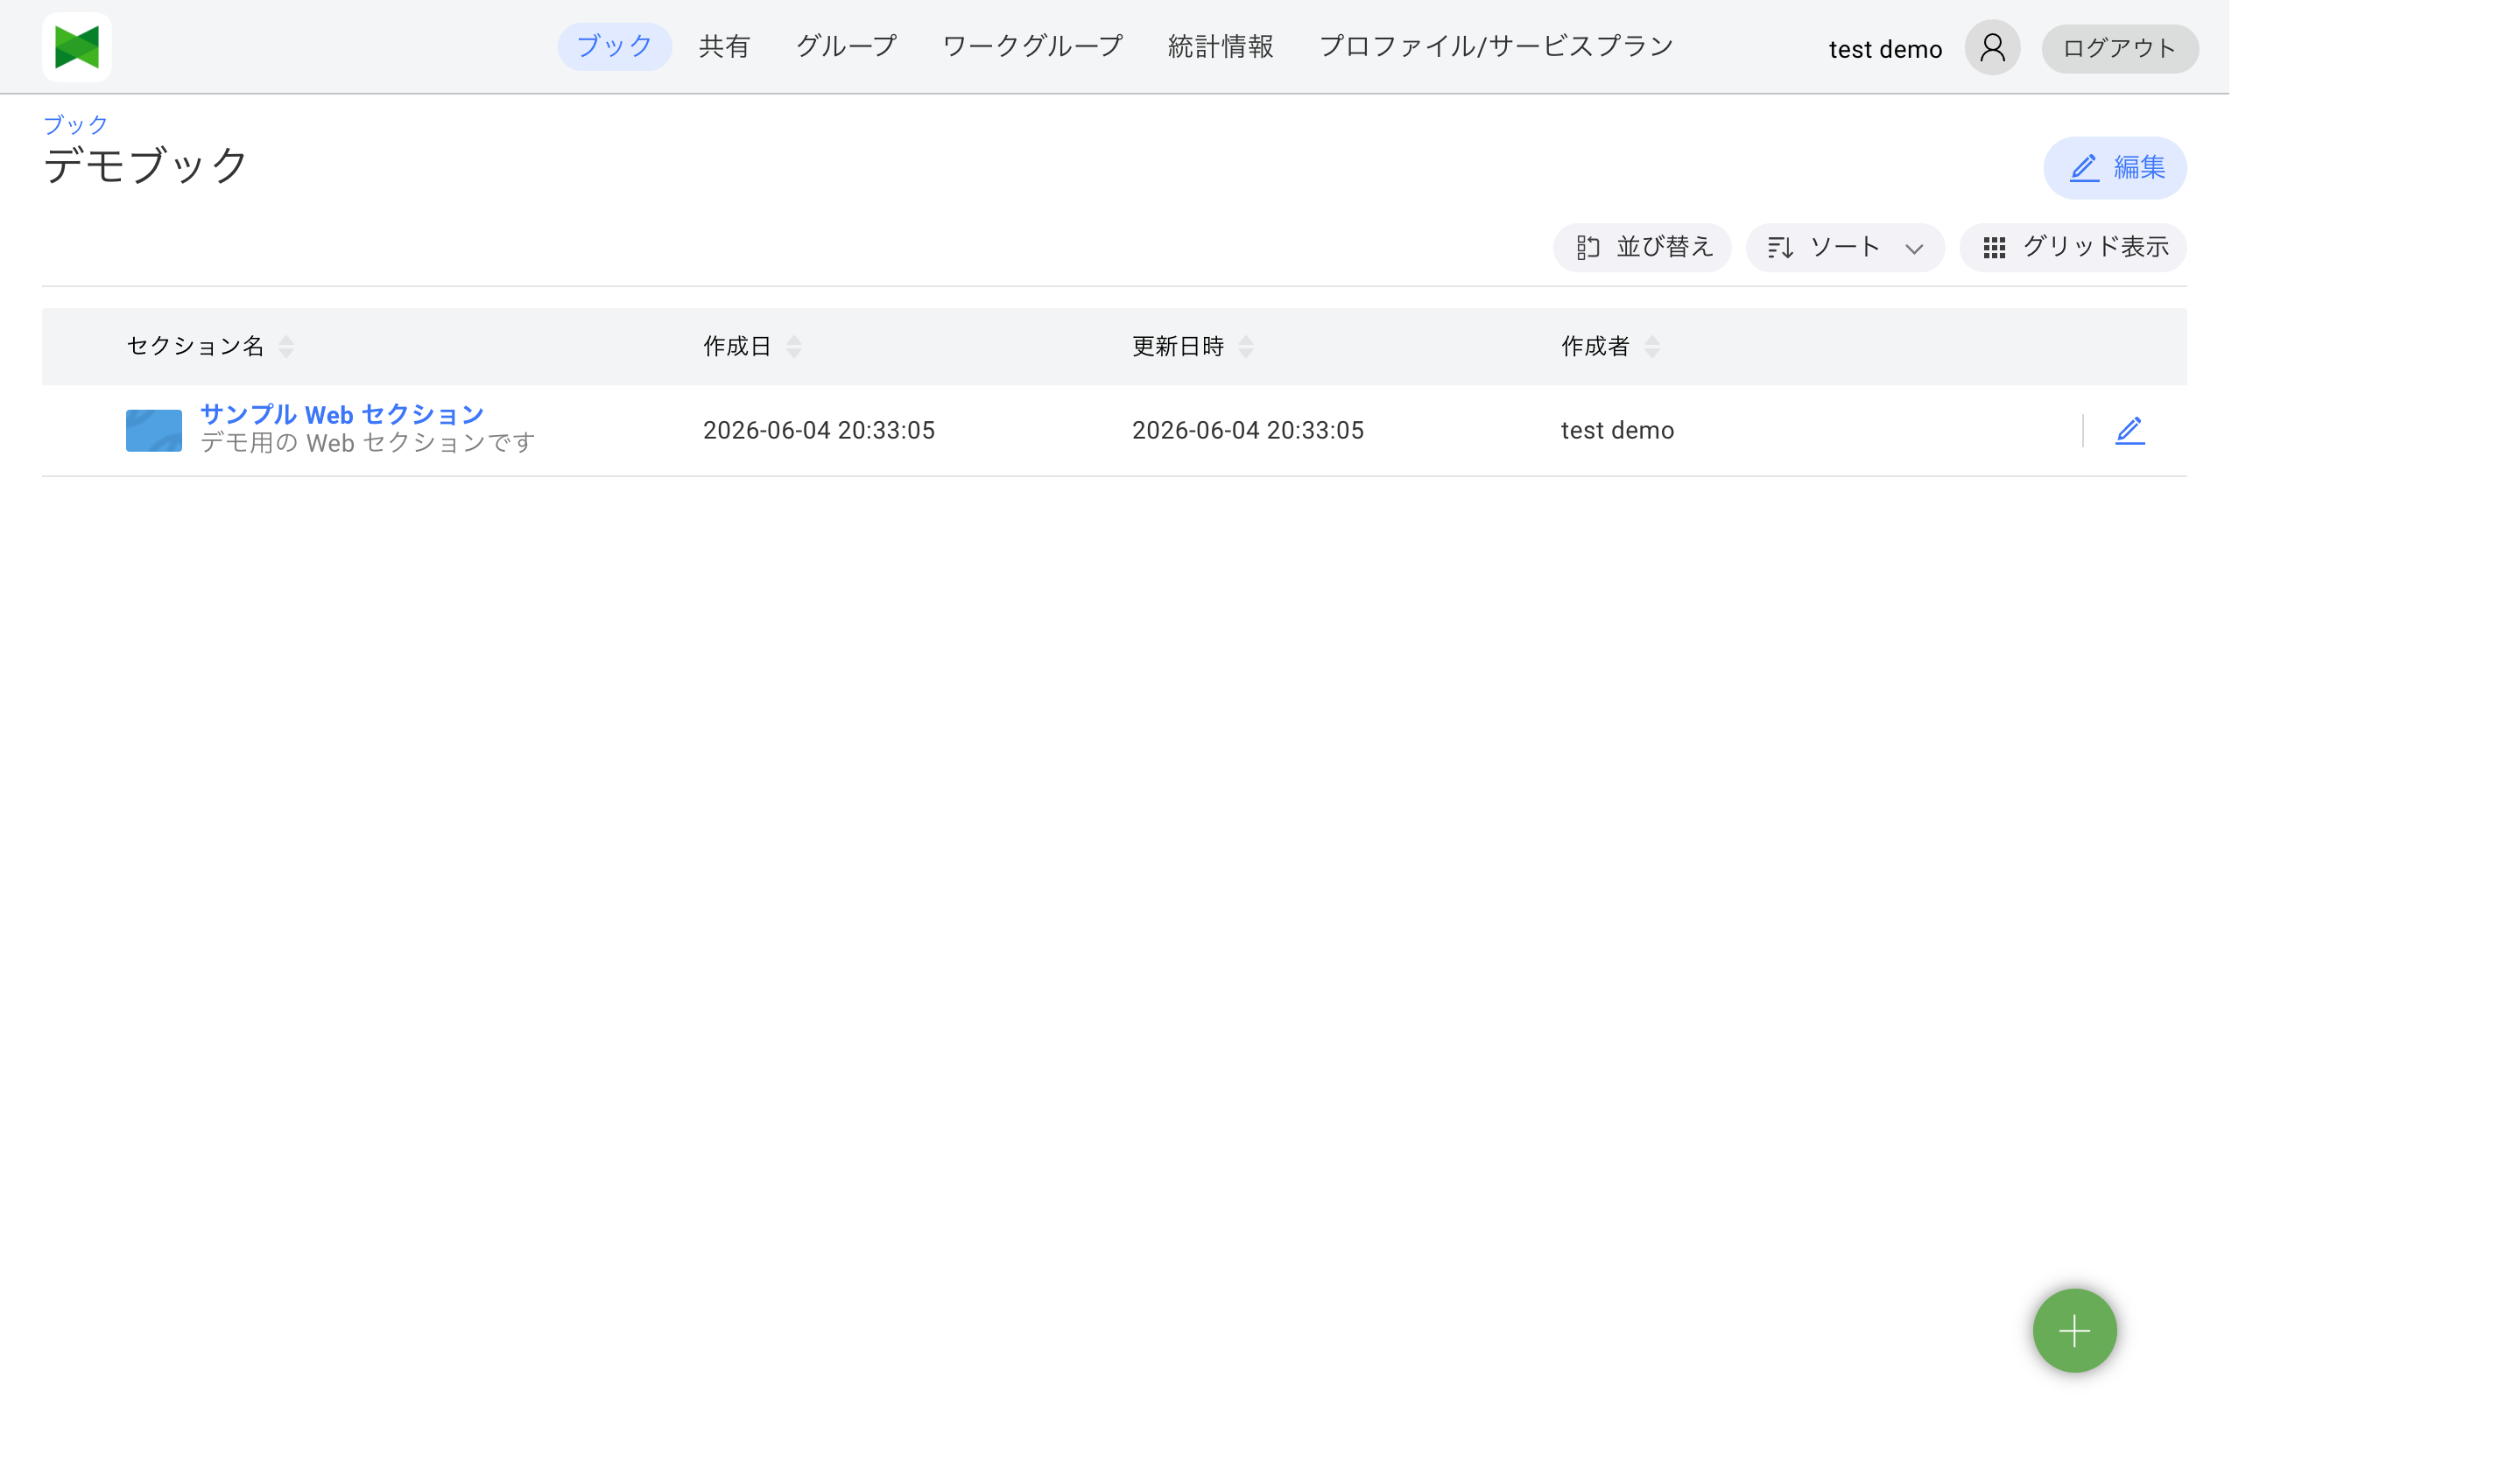
Section List Screen
Click on a book name in the book list to display the section list screen.
Screen Layout
- Back Button: Returns to the book list
- Book Information: Name and description of the currently displayed book
- Section List: Sections within the book displayed in tree format
- Toolbar: Buttons for adding and editing sections
Display Items
| Item | Description |
|---|---|
| Section Name | Name of the section |
| Type | Type of section (PDF, image, video, etc.) |
| Size | File size |
| Updated | Last updated date and time |
3.8.0 View Mode and Edit Mode
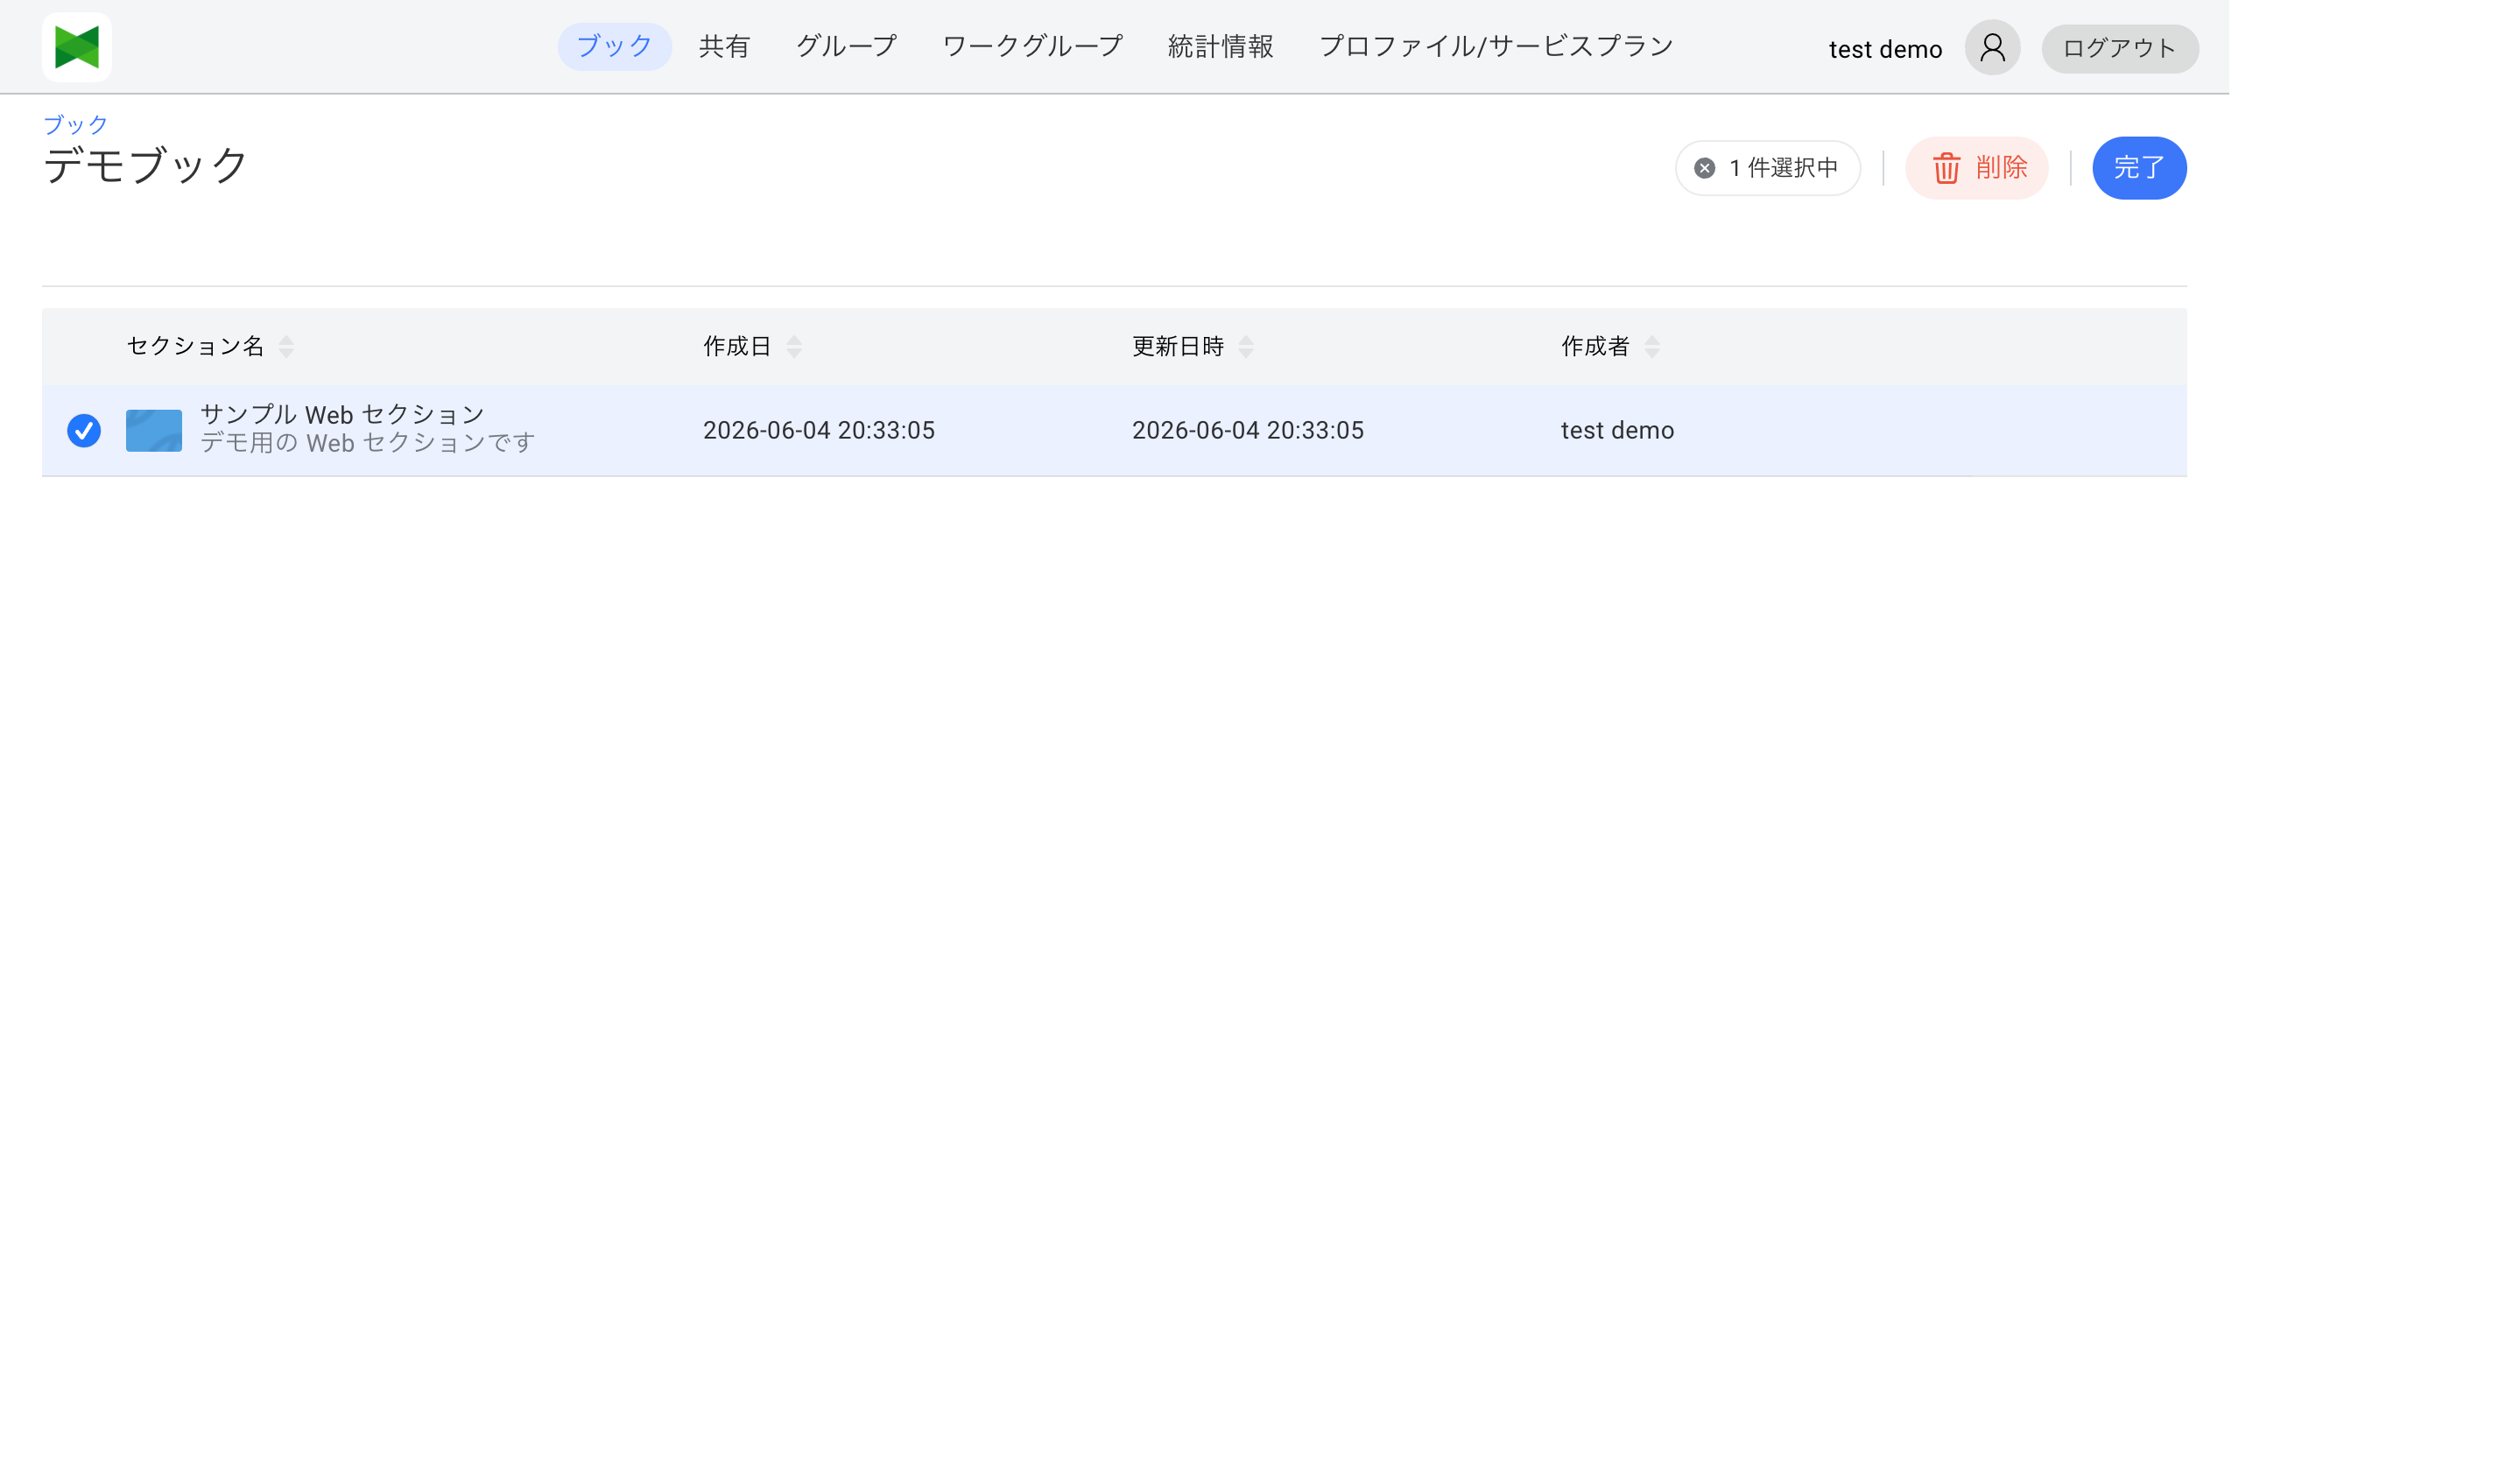
Like the book list, the section list is operated by switching between View mode and Edit mode.
View mode
Right after opening the section list, you are in View mode. The top right shows:
- Edit: Switch to Edit mode
- Reorder: Open the reorder dialog (see 3.8.4 Reordering Sections)
- Sort: Configure column sorting
- Grid view / List view: Toggle the appearance of the list
Edit mode
Clicking the Edit button switches to Edit mode, and the toolbar changes to:
- Remove: Bulk-remove the selected sections
- Done: Return to View mode
A checkbox appears at the start of each section row. Selecting at least one enables Remove and shows N selected at the top.
3.8.1 Creating Sections
To create a new section, click the Add button (+) at the bottom-right of the screen. A menu appears letting you choose the kind of section to add.
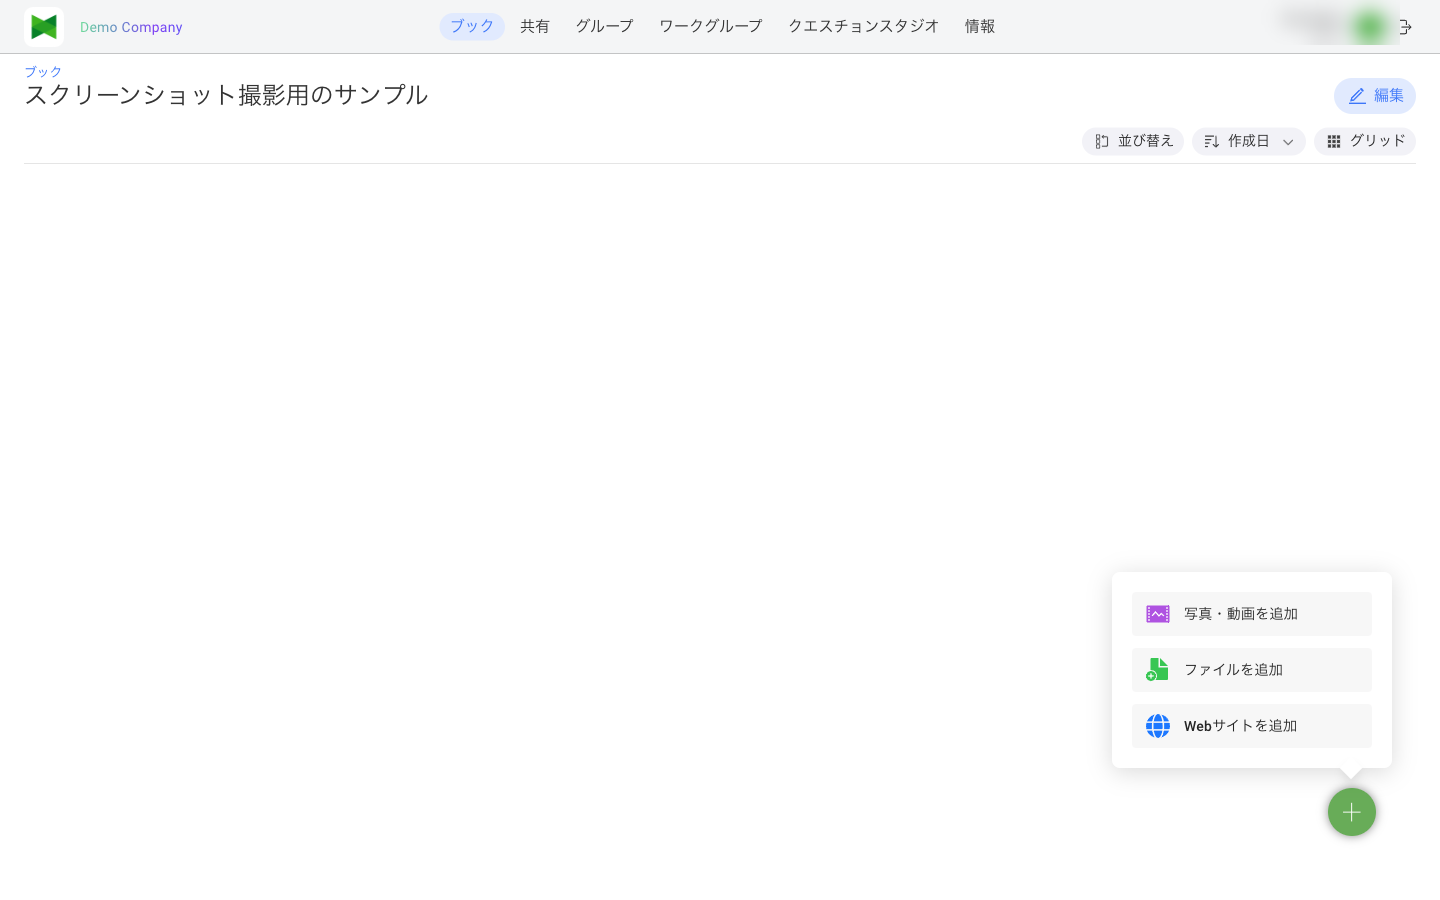
Menu Options
| Option | Corresponding section type |
|---|---|
| Add Photo/Movie | Creates a Photo Section or Movie Section from image files (JPEG, PNG, GIF, WebP, etc.) or video files (MP4, MOV, etc.) |
| Add File | Creates a PDF Section or Multi-file Section from PDF, Office documents, text, or other files |
| Add Website | Creates a Website Section from a given URL |
Note: Choosing Add Photo/Movie or Add File opens a file picker. Selecting a single file creates a single-typed section (Photo / Movie / PDF) matching the file's format; selecting multiple files creates a Multi-file Section that groups them into one section.
Creating a Photo Section
A Photo Section is created from a single image file.
- From the add-section menu, click Add Photo/Movie
- In the file picker, select exactly one image file (JPEG, PNG, GIF, WebP, etc.)
- When the upload completes, the section is created
- Edit the section name or description if needed, then click Save
Note: If you select two or more image files, they are grouped together as a Multi-file Section (see below) instead of separate Photo Sections.
Creating a Movie Section
A Movie Section is created from a single video file.
- From the add-section menu, click Add Photo/Movie
- In the file picker, select exactly one video file (MP4, MOV, etc.)
- When the upload completes, the section is created
- Edit the section name or description if needed, then click Save
Creating a Website Section
- From the add-section menu, click Add Website
- The New Web Section dialog appears
- Enter the following information:
| Item | Required | Description |
|---|---|---|
| Title | ○ | Name of the section |
| URL | ○ | URL of the web page |
| Description | - | Description of the section |
- Click the Save button
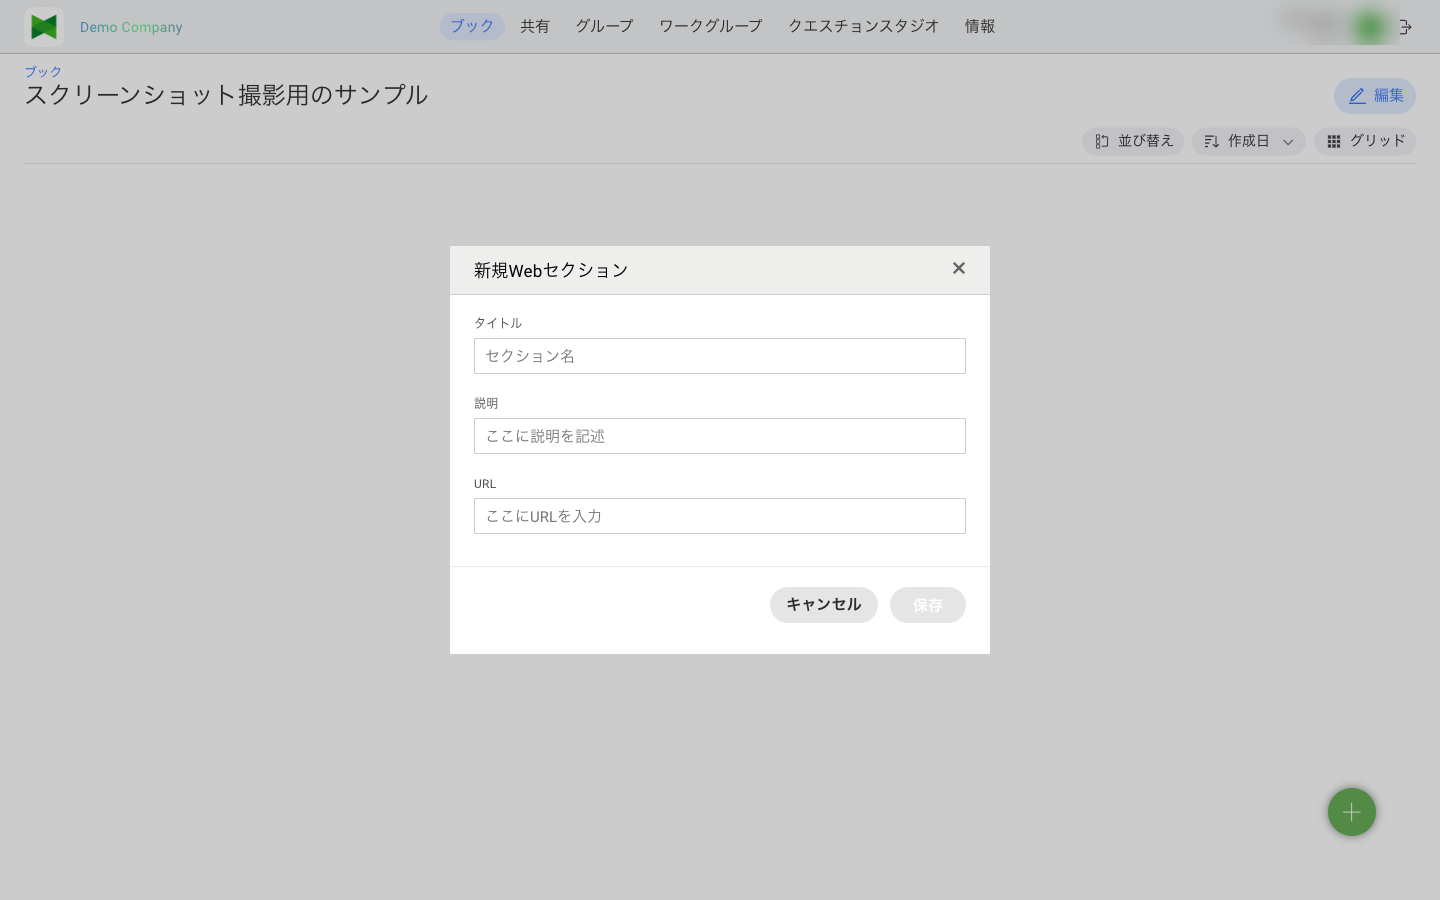
Tip: Website sections are convenient for linking to internal portals or external services.
Creating a PDF Section
A PDF Section is created from a single PDF file, or a single document file that is automatically converted to PDF.
- From the add-section menu, click Add File
- In the file picker, select exactly one PDF file (or a Word / Excel / PowerPoint file, which is auto-converted to PDF on the server)
- When the upload completes, the section is created (Office files are converted on the server before the section becomes viewable)
- Edit the section name or description if needed, then click Save
Note: If you select two or more files, they are grouped together as a Multi-file Section (see below) instead of separate PDF Sections.
Creating a Multi-file Section
A Multi-file Section groups multiple files and/or web pages into one section. The files can be of mixed types.
- From the add-section menu, click either Add Photo/Movie or Add File (a multi-file section can be created from either file picker)
- In the file picker, select two or more files at once
- The Edit Section dialog opens with the selected files listed as its content
- Enter the following information:
| Item | Required | Description |
|---|---|---|
| Title | ○ | Name of the section |
| Description | - | Description of the section |
- Optionally add more content:
- Files: Click the Add button to add more files
- Web pages: Click the Add Web button and enter a title and URL
- Edit the Title of each content item as needed
- Remove unwanted content using the Delete button (
 )
) - Click the Save button
Tip: Even when all files are of the same type (all images, all PDFs, etc.), selecting two or more in the file picker creates a Multi-file Section. This is useful for managing related documents (PDFs, images, videos) and web pages together.
Note: You cannot create a Multi-file Section that consists solely of web pages from scratch. First create the section by selecting two or more files, then follow 3.8.3 Editing and Removing Sections to remove the placeholder files and add web pages.
3.8.2 Supported File Formats
Supported File Formats List
| Category | Supported Formats |
|---|---|
| Documents | PDF, Word (.doc, .docx), Excel (.xls, .xlsx), PowerPoint (.ppt, .pptx), Pages, Numbers, Keynote, Text (.txt, .csv) |
| Images | JPEG, PNG, GIF, WebP |
| Videos | MP4, MOV, etc. |
| Audio | MP3, M4A, etc. |
Note: Office format files (Word, Excel, PowerPoint) are automatically converted to PDF.
Drag and Drop
You can also upload files by dragging and dropping them onto the browser screen.
3.8.3 Editing and Removing Sections
Editing a Section
- Click the Edit button (
 ) of the section you want to edit
 - The Edit Section dialog appears
- Modify the information
- Click the Save button
Editing Multi-file Sections
For multi-file sections, you can add/remove files and web pages, and change titles.
- Click the Edit button of the section
- The "Edit Section" dialog appears
- To add content:
- Files: Click the Add button to select files
- Web pages: Click the Add Web button and enter a title and URL
- Click the Delete button () to remove content
- Edit the title field to change content titles
- Click the Save button
Headline Actions
In a multi-file section, you can add Headlines to group inner content. A headline is a divider element with a title, description, and color (badge color).
When you hover over a headline row in section edit mode, the following action buttons appear:
| Icon | Action | Description |
|---|---|---|
| Color badge | Change color | Choose the headline's color (badge color) |
| Duplicate | Duplicate Headline | Insert a new headline right after the original, copying its title, description, and color |
| Delete headline | Delete the headline (content items below the headline are kept) |
Tip: Use Duplicate when you want to reuse the same style and color across multiple headlines. Create one headline as a template, then duplicate it and edit the contents.
Removing a Single Section
- Click the Remove button () of the section you want to remove
- A confirmation dialog appears
- Click the Remove button
Removing Multiple Sections at Once
- Click the Edit button at the top right to enter Edit mode (see 3.8.0 View Mode and Edit Mode)
- Select the checkboxes of the sections you want to remove
- Click the Remove button () at the top of the screen
- Click Remove in the confirmation dialog
- When finished, click Done to return to View mode
Note: Removing a section also removes the files within that section. This action cannot be undone.
3.8.4 Reordering Sections
You can change the display order of sections.
Reorder by Drag and Drop
- Drag the section you want to move
- Drop it at the desired position
Reorder Using the Dialog
- Click the Reorder button
- The Reorder dialog appears
- Change the order of sections using the up/down buttons
- Click the Save button