4. Share
The Share feature allows you to distribute books to specific users and groups. Shared books become viewable in the app.
Note: Share management features are only available to users with plans that include workgroup features (Enterprise, Business, Team) or users with administrator privileges (Owner/Admin).
4.1 Share List
Opening the Share tab displays a list of sharing settings.
Display Items
| Item | Description |
|---|---|
| Book Name | Name of the shared book |
| Sharing Member | Users and groups the book is shared with |
| Sharing Life Time | Start and end date/time of sharing |
Display Conditions
- Sharing settings for books you own
- If you are an administrator, sharing settings for all books
4.2 Adding a Share
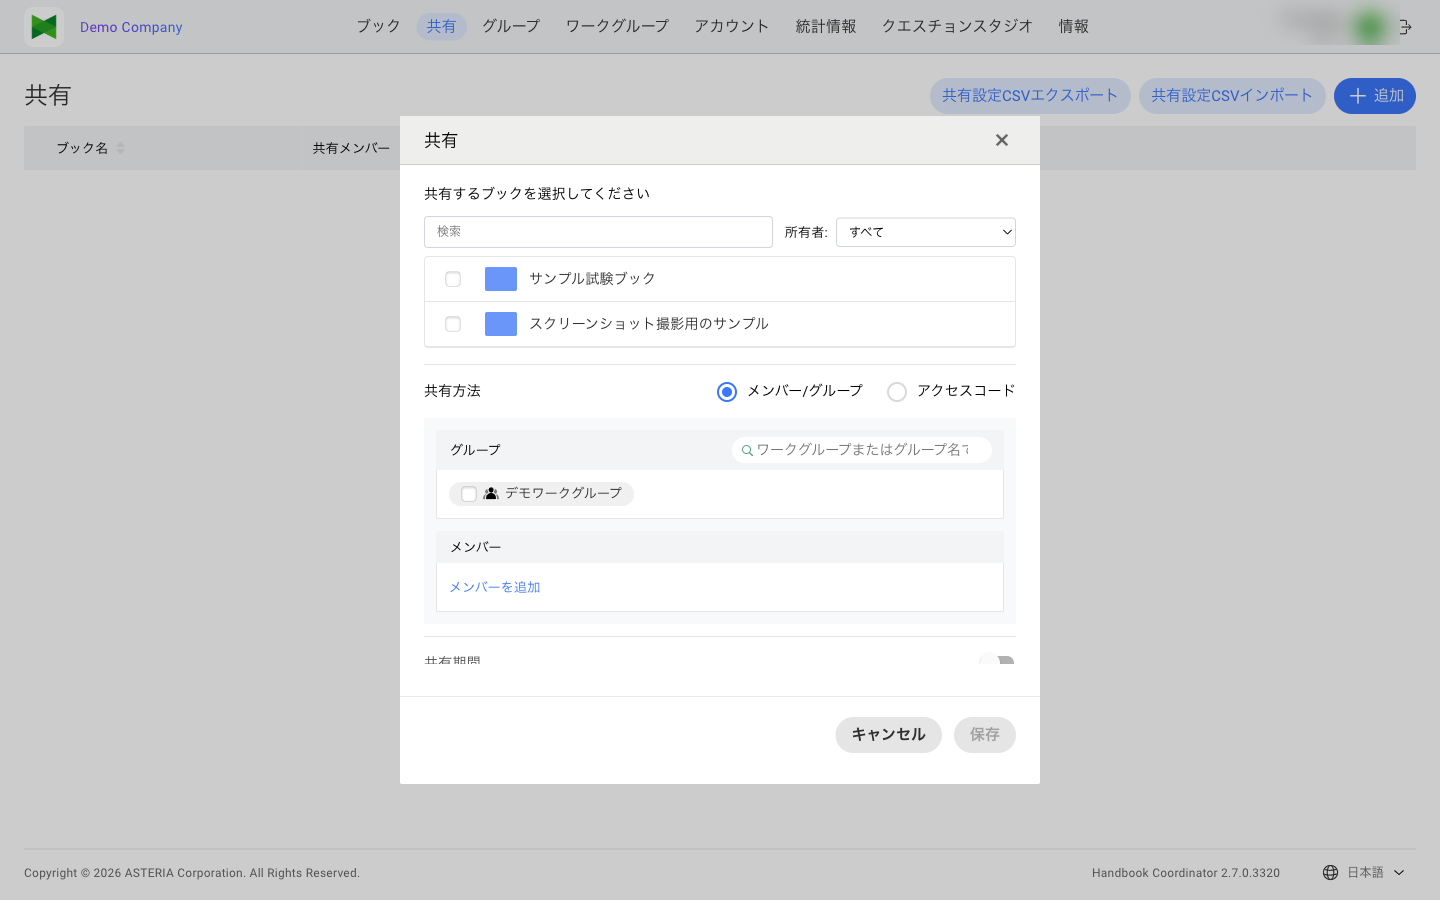
To configure a new share:
- Click the Add button
- The Add Share dialog appears
- Select the book to share
- Set the share destination (users, groups, or access code)
- Set the sharing duration if needed
- Click the Save button
Resizing the dialog
You can drag the left or right edge of the Add/Edit Share dialog to change its width (default 640px, minimum 540px). Widening the dialog makes long group/member lists easier to read.
Tip: When the dialog is narrower than the content, group/member permission names and the chips that represent share destinations now wrap to multiple lines instead of being truncated with an ellipsis.
4.3 Sharing with Users
To share a book with specific users:
- Select the Member tab in the Add Share dialog
- Select the users to share with:
- Search for usernames in the search box
- Select users from the list
- You can select multiple users
- Click the Save button
Searching for Users
You can search for users in the search box using:
- Username (email address)
- Last name
- First name
4.4 Sharing with Groups
To share a book with groups:
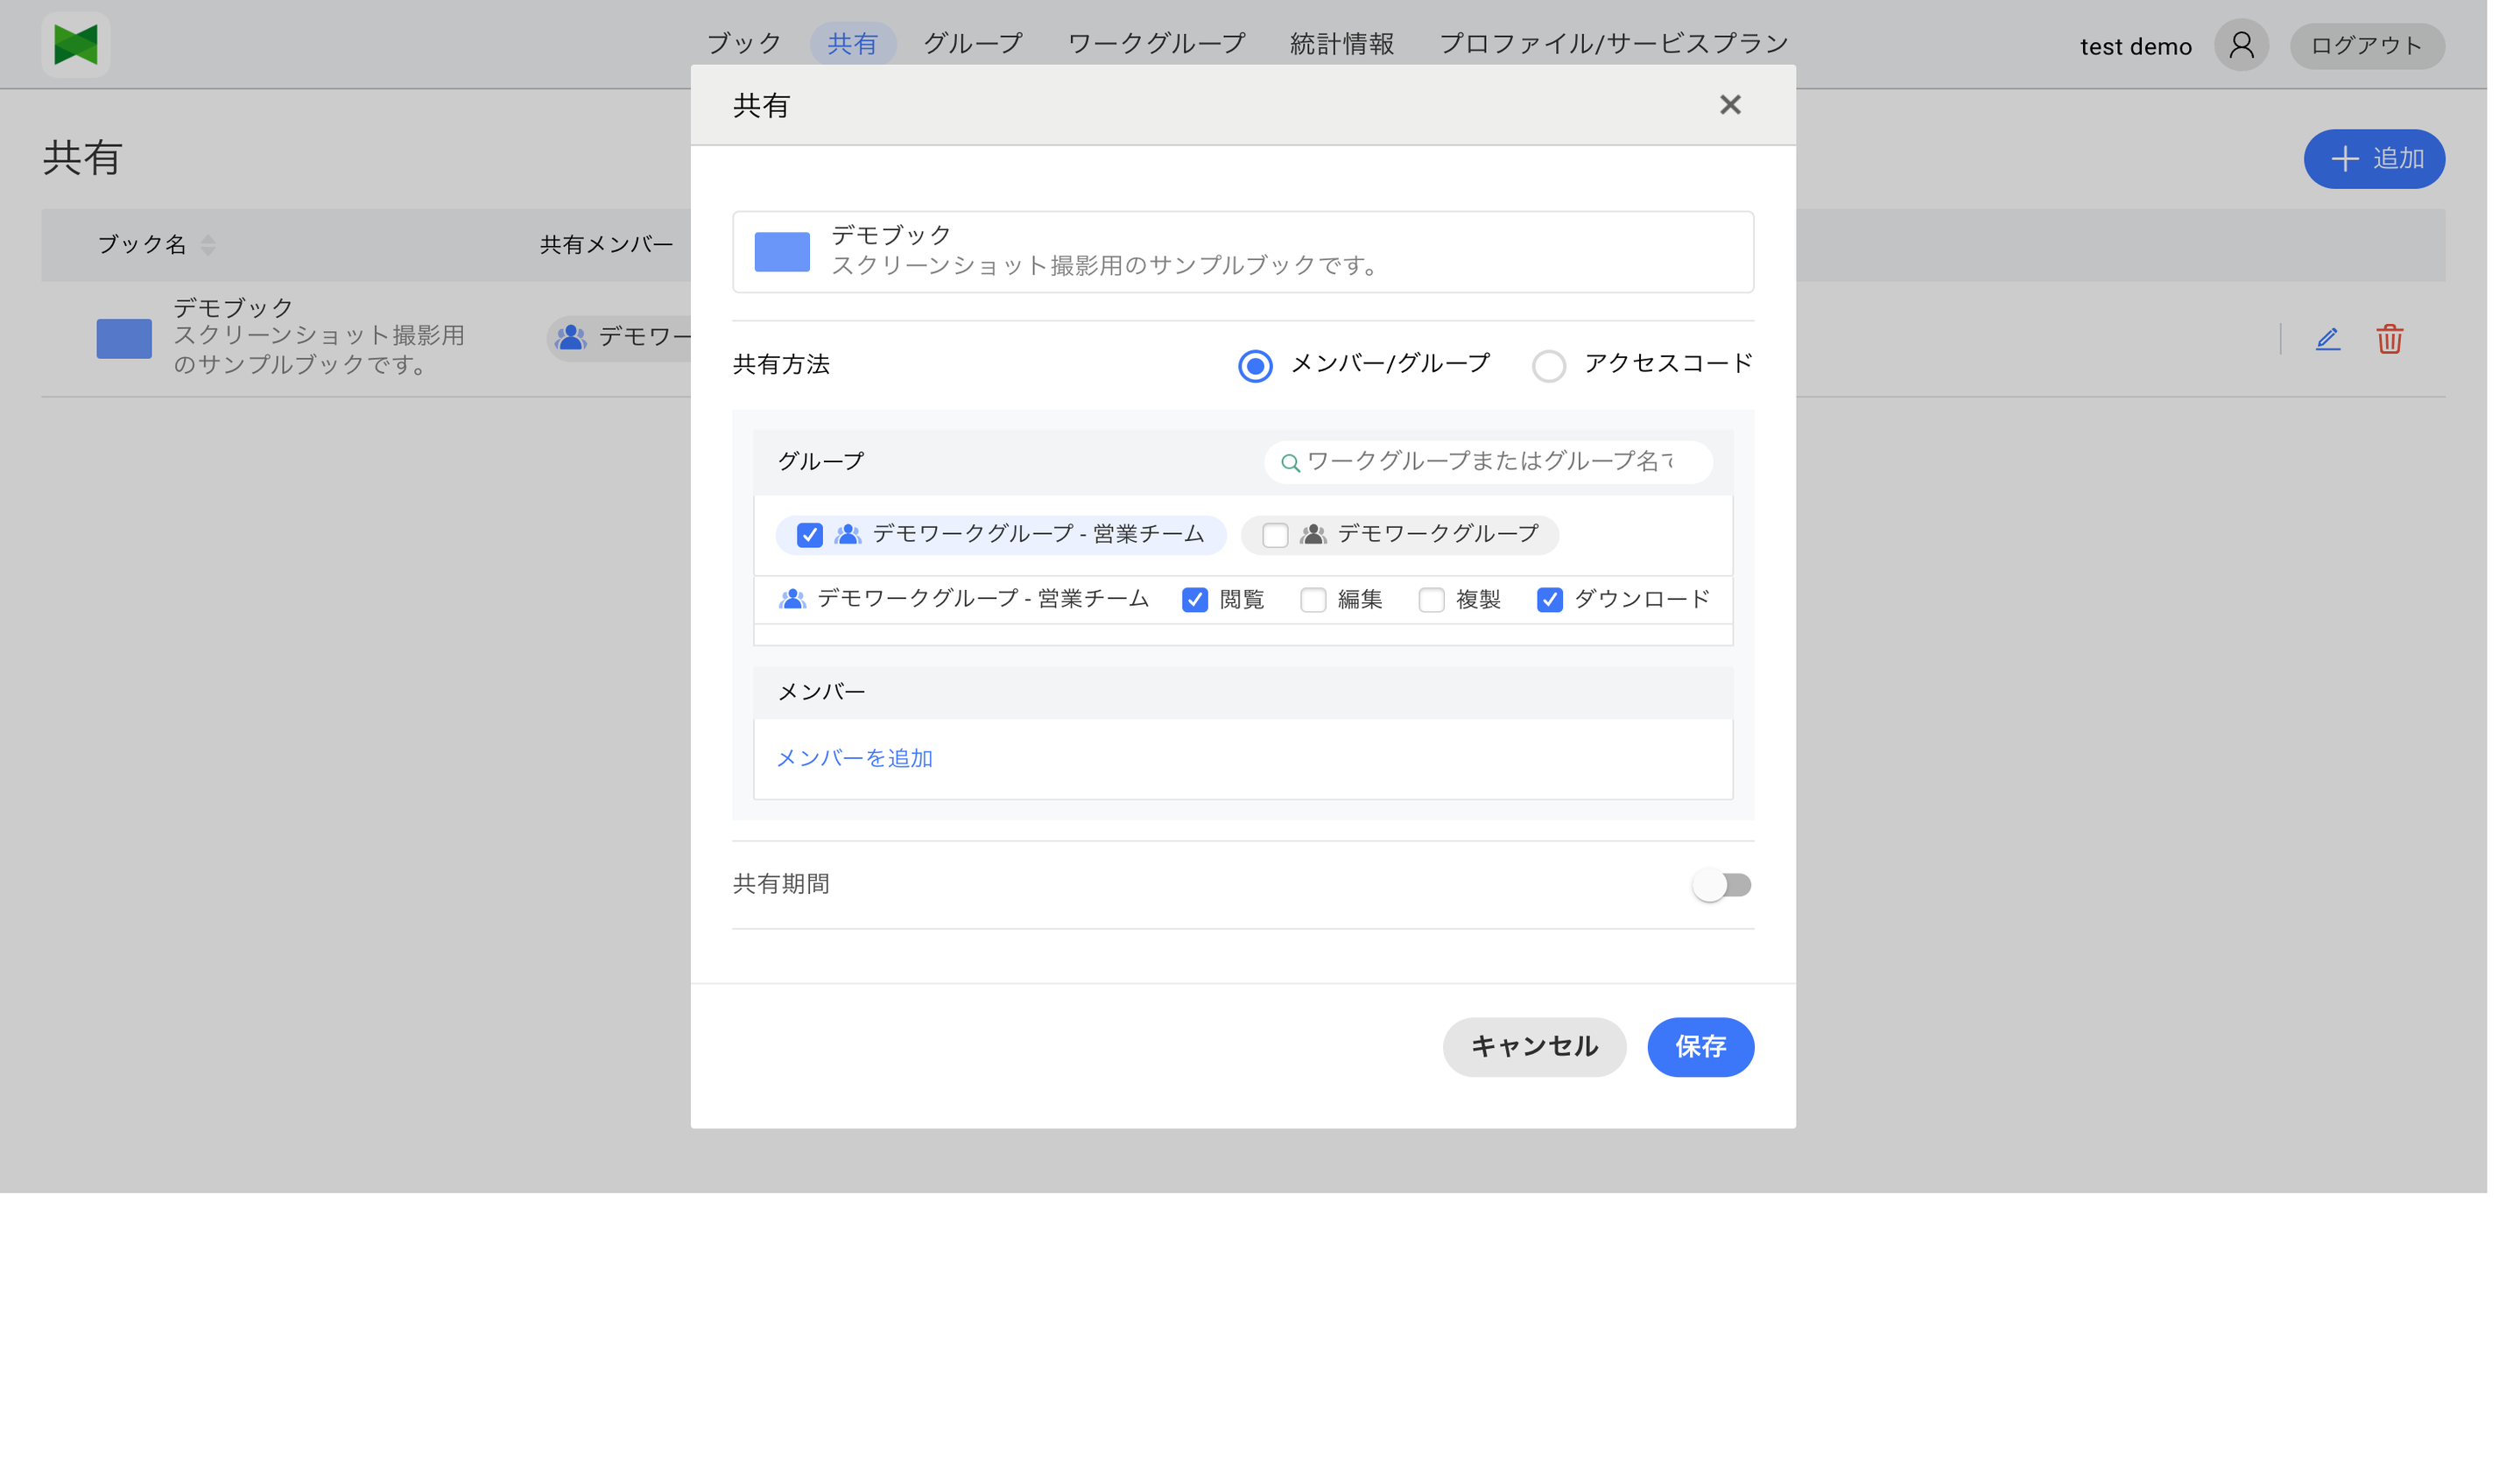
- Select the Group tab in the Add Share dialog
- Select the groups to share with
- Once a group is selected, the following permission checkboxes are shown inline in the dialog:
- View (ON by default)
- Edit
- Duplicate
- Download (ON by default)
- Adjust the permissions as needed
- You can select multiple groups
- Click the Save button
Tip: Sharing with groups is easy to manage as it automatically handles member additions and removals.
Filtering groups
When the group list is long, use the "Filter by workgroup or group name" search box at the top of the Group section to narrow down the list by workgroup name or group name.
Characteristics of Group Sharing
- When members are added to a group, they automatically become sharing targets
- When members are removed from a group, sharing is automatically revoked
- Sharing with a referenced group also includes members of reference groups
4.5 Sharing via Access Code
You can share a book with an unspecified number of users using an access code.
- Select the Access Code tab in the Add Share dialog
- Select an access code from the dropdown, or click the Generate Code button to create a new access code
- Click the Save button
Note: If no access code is selected, the Save button will be grayed out and cannot be clicked. Be sure to select or generate an access code before saving.
Checking the Access Code
In the share list, books shared via access code display "Shared by Access Code."
Displaying the QR Code
- Click the QR code button in the share list
- The QR code dialog appears
- You can print or save the QR code as an image
Users can access the book by scanning the QR code or entering the access code in the app.
4.6 Setting Sharing Duration
You can set a duration for sharing to make books viewable only during a specific period.
How to Set Sharing Duration
- Open the Sharing Life Time section in the Add/Edit Share dialog
- Set the start date/time
- Set the end date/time
- Click the Save button
Sharing Duration Behavior
| Status | Description |
|---|---|
| Before Start | Book is not displayed |
| During Period | Book is viewable |
| After End | Book is no longer displayed |
Tip: Useful for limited-time campaigns or training materials that should only be viewable during a specific period.
4.7 Editing and Removing Shares
Editing a Share
- Click the Edit button (
 ) of the share you want to edit in the share list
 - The Edit Share dialog appears
- Modify the settings:
- Add/remove share destinations
- Change sharing duration
- Enable/disable access code
- Click the Save button
Removing a Share
To remove sharing settings:
- Click the Delete button (
 ) of the share you want to remove in the share list
 - A confirmation dialog appears
- Click the Delete button
Note: Removing a share prevents shared users from accessing the book.
4.8 CSV Export / Import of Sharing Settings
Note: This section is only available on the dedicated server plan. On the cloud server plan, the Export and Import buttons do not appear in the Sharing page toolbar.
From the Sharing page toolbar, the per-book sharing settings (user shares, group shares, sharing period) can be exported / imported as CSV in bulk. This is intended for editing large numbers of shares in Excel, or for re-applying sharing settings right after a migration.
4.8.1 Export
- On the Sharing tab toolbar, click the Export button
- The Export dialog opens
- Choose the character encoding (UTF-8 / Shift_JIS) and optionally filter the target books
- Click Export to download the CSV file
What is exported
| User role | Target books |
|---|---|
| Admin / Owner | All books in the organization |
| Regular user | Books the user owns |
Books are listed in ascending order by book name. Books without any sharing settings are also included as rows (with empty sharing columns).
Note: Access-code sharing is always disabled on import, so it is intentionally excluded from the export. To preserve access-code settings, edit them directly from the Web UI instead of round-tripping through CSV.
4.8.2 CSV file format
Header row
The exported CSV uses the following 6 columns. On import, BookName is the only required column (other columns may be omitted).
| Column | Required | Description |
|---|---|---|
BookName |
Yes | Book name. Used to identify the target book on import |
SharedUsers |
— | List of user shares (cell format described below) |
SharedGroups |
— | List of group shares (cell format described below) |
EnableSharingDuration |
— | Whether the sharing period is enabled (true / false) |
SharingBeginsAt |
— | Sharing start datetime (RFC3339) |
SharingEndsAt |
— | Sharing end datetime (RFC3339) |
Note: To disambiguate when multiple books share the same name, you may optionally add a
BookUUIDcolumn. When present, the UUID takes precedence; empty cells or a missing column fall back to lookup byBookName.
How a row's target book is resolved on import
- Each row is first resolved by
BookUUID(if provided) - If
BookUUIDis empty or the column is absent, the row is resolved byBookName- Exactly one match in the database: the row is applied to that book automatically
- Multiple matches in the database: the wizard's step 2 shows the candidate books and lets you pick which one to apply for each row
- No match: the row fails with an error
- If the CSV itself has multiple rows with the same
BookName, the wizard's step 2 reports it as a duplicate and import is blocked until the CSV is fixed
Separator hierarchy
| Level | Character | Purpose |
|---|---|---|
| CSV columns | , (comma) |
Standard CSV |
| Inside a cell | ; (semicolon) |
Separates multiple users / groups |
| Permission tokens | + (plus) |
Separates multiple tokens such as edit+copy |
Using + to separate permission tokens avoids confusion with CSV commas in Excel. For backward compatibility, permission tokens are also read when separated by , (e.g. edit,copy).
SharedUsers / SharedGroups cell format
Each share target uses one of the following forms:
<target name>
<target name>:<permission tokens>
- The target name and permission tokens are separated by a colon
:(only the first colon is significant) - If the permission is omitted, it is treated as
view(read-only) - Multiple targets are separated by
;
Example
BookName,SharedUsers,SharedGroups,EnableSharingDuration,SharingBeginsAt,SharingEndsAt
Sales Manual,user1@example.com;user2@example.com:edit+copy,Sales - Newcomers:view+noDownload,false,,
Training,admin@example.com:edit,Marketing,false,,
Tip: The sample includes representative row patterns such as user-only shares, group-only shares, time-limited shares, and rows left unchanged (both cells empty). For real workflows we recommend exporting first and then editing the resulting file.
Group display names
Groups use the same display name as in the export.
- Normal group:
{Workgroup name} - {Group name} - A workgroup's default group: just
{Workgroup name}
When multiple groups share a display name, use the exact value from the exported CSV to identify them unambiguously.
Permission tokens
| Token | Aliases (on import) | Meaning |
|---|---|---|
view |
read |
View |
edit |
write |
Edit (View is granted implicitly) |
copy |
dup / duplicate |
Duplicate |
noDownload |
nodownload |
Download prohibited |
Sharing period
| Column | Value |
|---|---|
EnableSharingDuration |
Enabled when true / 1 / yes; disabled when false / 0 / no / empty |
SharingBeginsAt / SharingEndsAt |
RFC3339 format (e.g. 2026-06-01T09:00:00+09:00) |
If EnableSharingDuration is true, both begin and end are required. If the begin is later than the end, the row fails validation.
4.8.3 Import
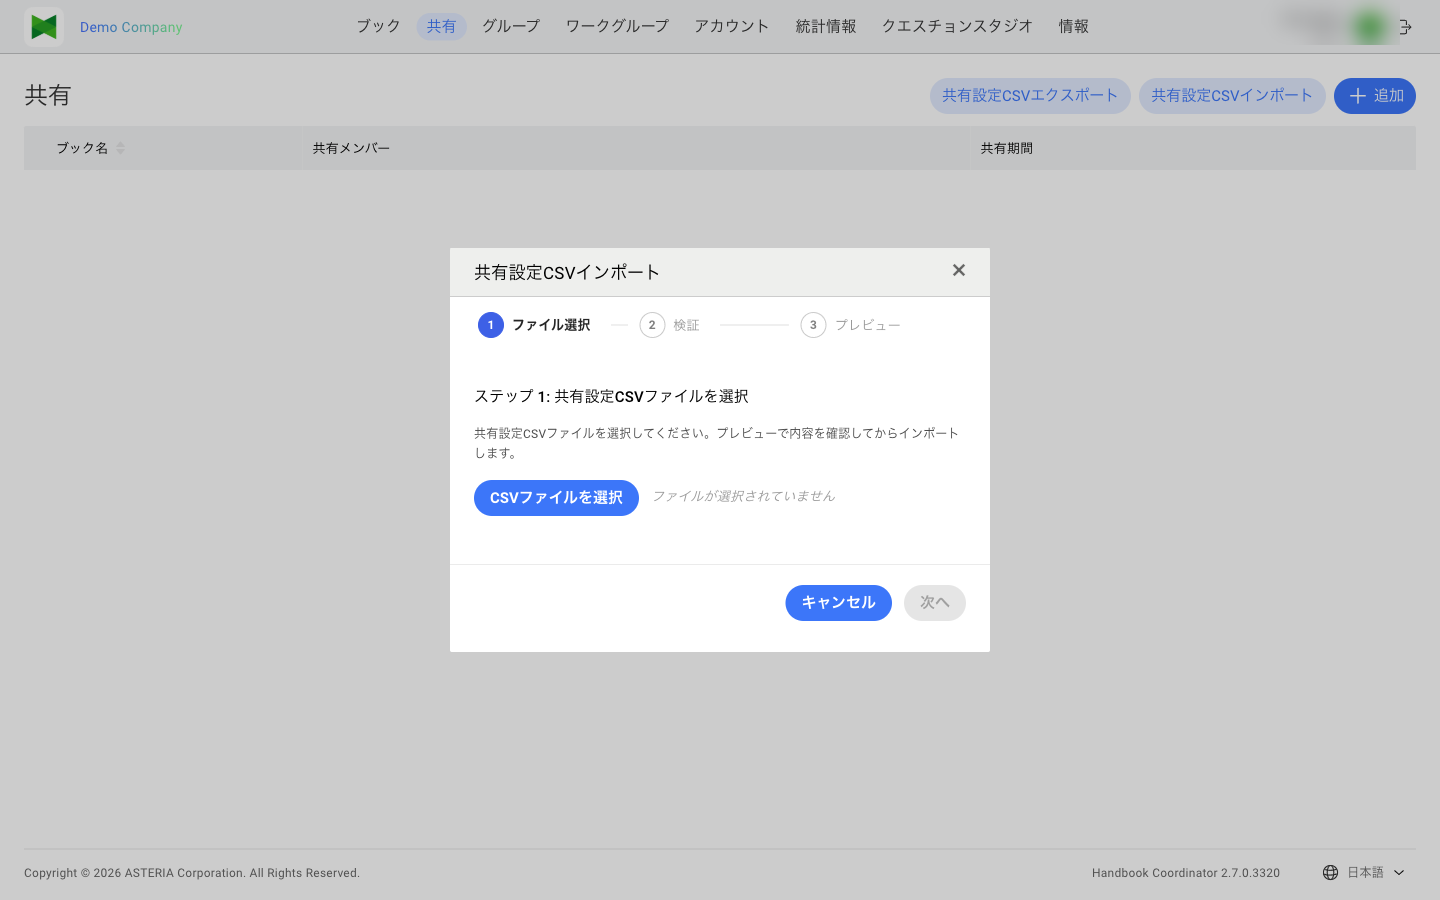
- On the Sharing tab toolbar, click the Import button
- The Import wizard appears (3 steps)
- Step 1: Select file — Choose the CSV file
- Step 2: Validate — Validation errors and duplicate book names are shown inline. Fix the CSV and re-upload if any errors appear
- Step 3: Preview — On successful validation, the sharing changes to be applied are listed
- Confirm the preview and click the Import button
4.8.4 Apply rules
| Condition | Behavior |
|---|---|
Both SharedUsers and SharedGroups are empty |
The row is skipped (the book's existing share settings are not changed) |
| At least one of them has a value | The row is applied — the book's existing user / group shares are completely replaced by the CSV values |
- User shares / Group shares: the CSV values become the new list. Existing shares not present in the CSV are removed
- Sharing period: updated from
EnableSharingDuration/SharingBeginsAt/SharingEndsAt - Access-code sharing: always disabled on import
Note: Import is processed in a single transaction. If even one row fails validation, the entire import is aborted. Fix the offending rows and run the import again.
Note: After a successful import, share targets receive the same notifications as a regular share update. Plan for the notification impact when applying bulk changes.
4.9 Sharing Notes
Editing and Sharing
- Shared books can still be edited
- Edits are immediately reflected to shared users
Sharing Permissions
- Book owners can freely modify sharing settings
- Administrators can manage sharing settings for all books within their workgroup
Content Permission Settings
In sharing settings, you can configure the following content permissions for shared users:
| Permission | Description |
|---|---|
| View | Can only view content |
| Edit | Can edit content |
| Duplicate | Can duplicate content |
Important (About Memo Feature): In the "Memo" feature available on iOS/Mac apps, when shared users add memos to section content, the system internally copies the section to store the memo. Therefore, if you want to allow shared users to use the Memo feature, you must grant the "Duplicate" permission in addition to the "Edit" permission.
Sharing Limits
- There is no limit to the number of share destinations per book
- However, a large number of sharing settings may affect performance