6. Workgroup
A workgroup is a feature for managing users and content at the organization or team level. By creating a workgroup and inviting members, you can share books within the team.
Note: Workgroup management features (creation, settings changes, member invitations, etc.) are only available to users with plans that include workgroup features (Enterprise, Business, Team) or users with administrator privileges (Owner/Admin).
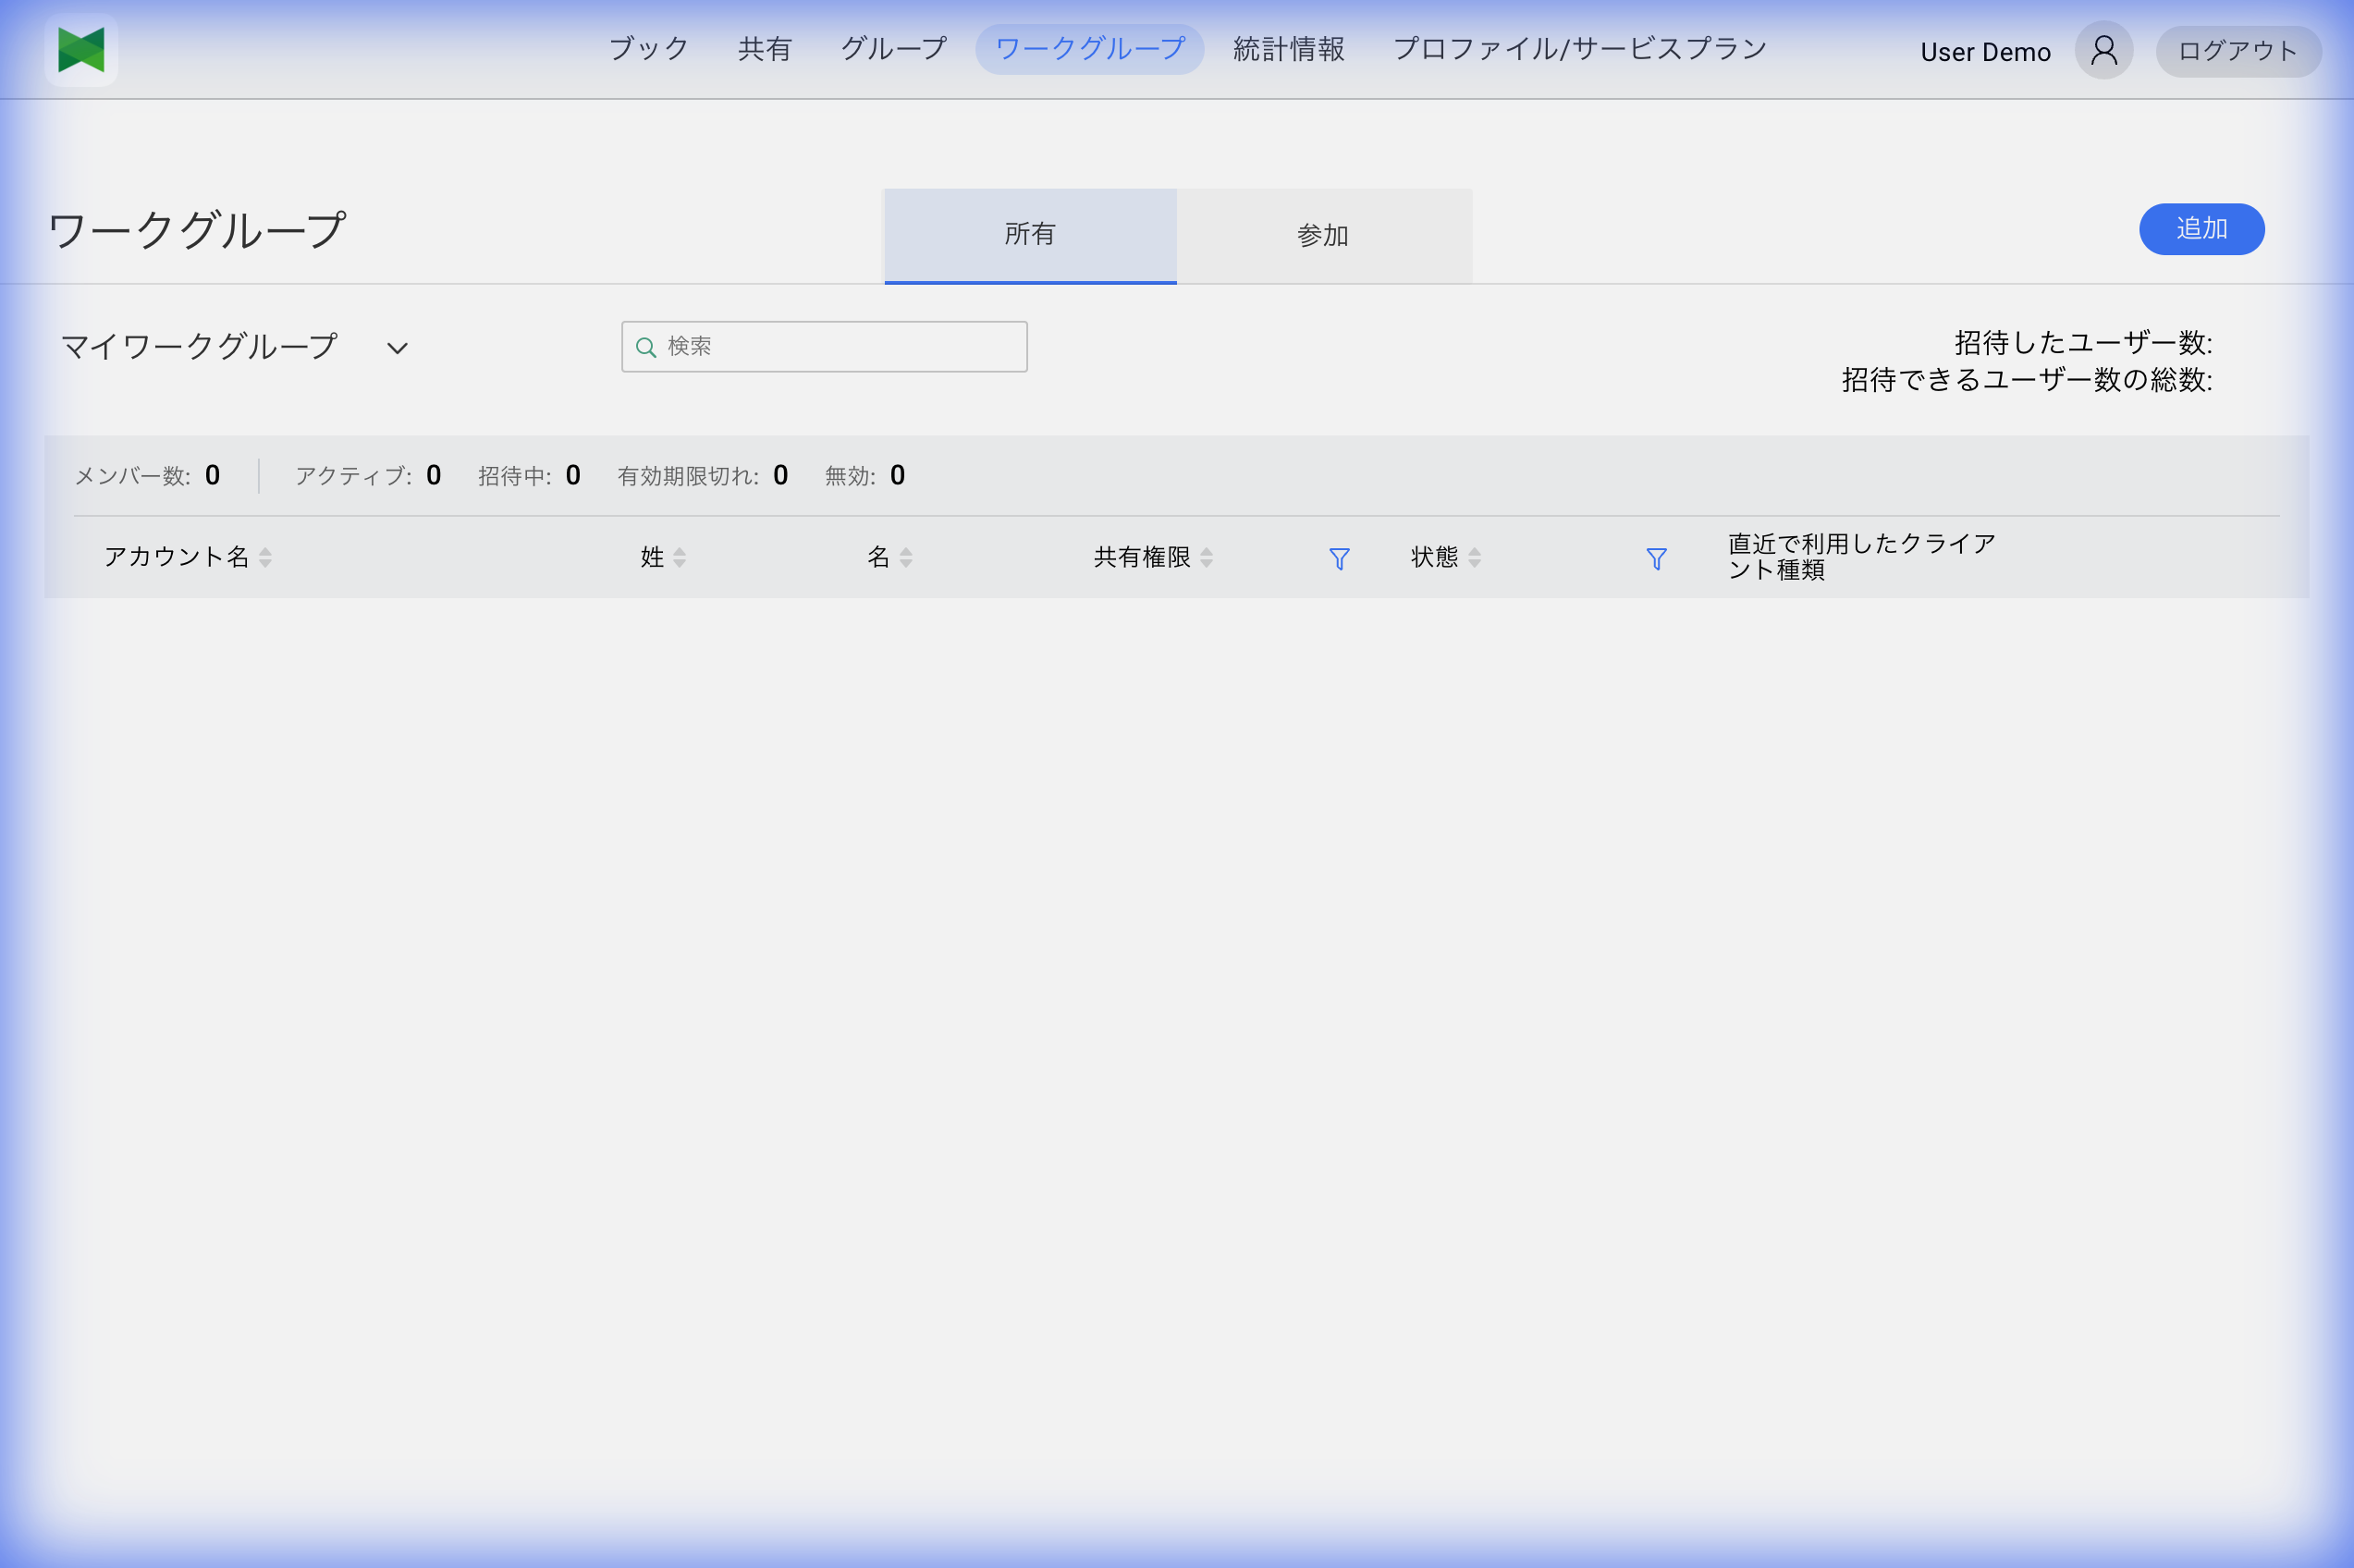
6.1 Workgroup List
Opening the Workgroup tab displays a list of workgroups.
Display Modes
- Owned Workgroup: Workgroups you have created (own)
- Joined Workgroup: Workgroups you have joined via invitation
You can switch between displays using the tabs at the top of the screen.
6.2 Owned and Joined Workgroups
Owned Workgroup
Workgroups you have created. The following operations are available:
- Change workgroup settings
- Invite/remove members
- Change member roles
- Delete workgroup
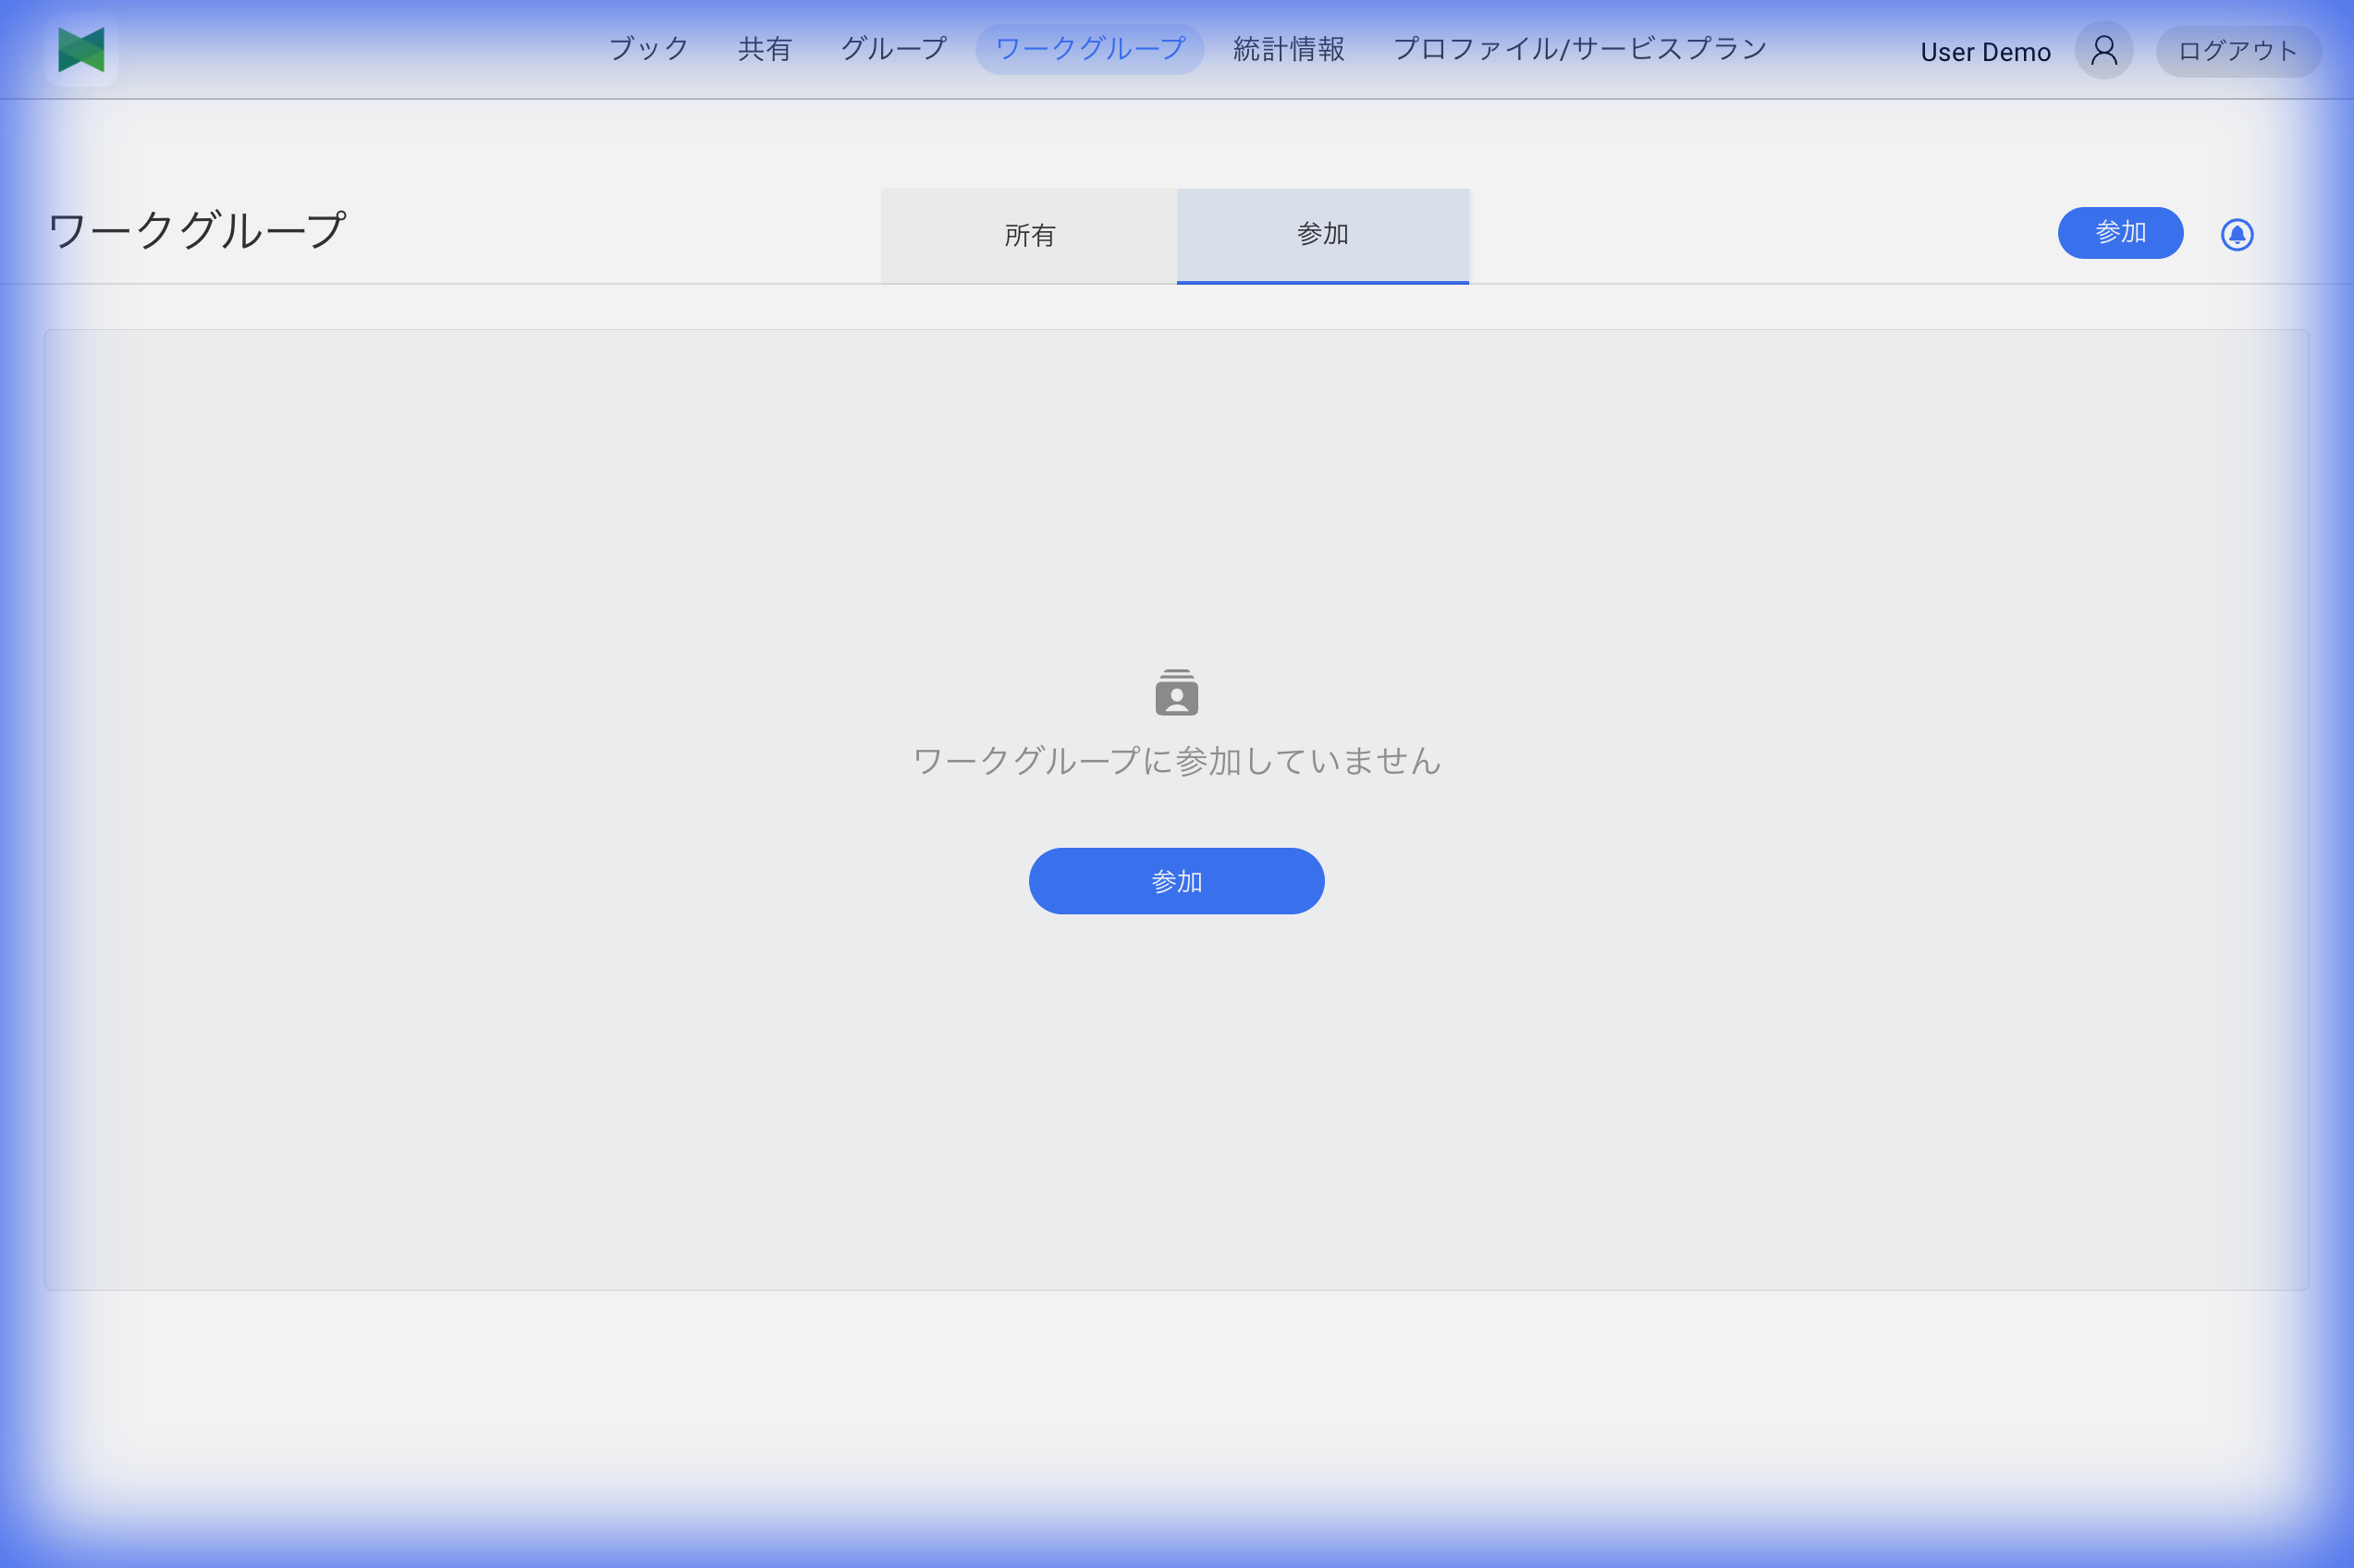
Joined Workgroup
Workgroups you have joined via invitation. Available operations vary by sharing privilege.
| Sharing Privilege | Description | Available Operations |
|---|---|---|
| Manage sharing privilege | Can share books to the workgroup | Invite members, change sharing privileges, share books, etc. |
| With sharing privilege | Can share books to the workgroup | Share books |
| No sharing privilege | Can view shared books | View shared books |
6.3 Creating a Workgroup
To create a new workgroup:
- Select the Owned tab and click the Add button
- The Add Workgroup dialog appears
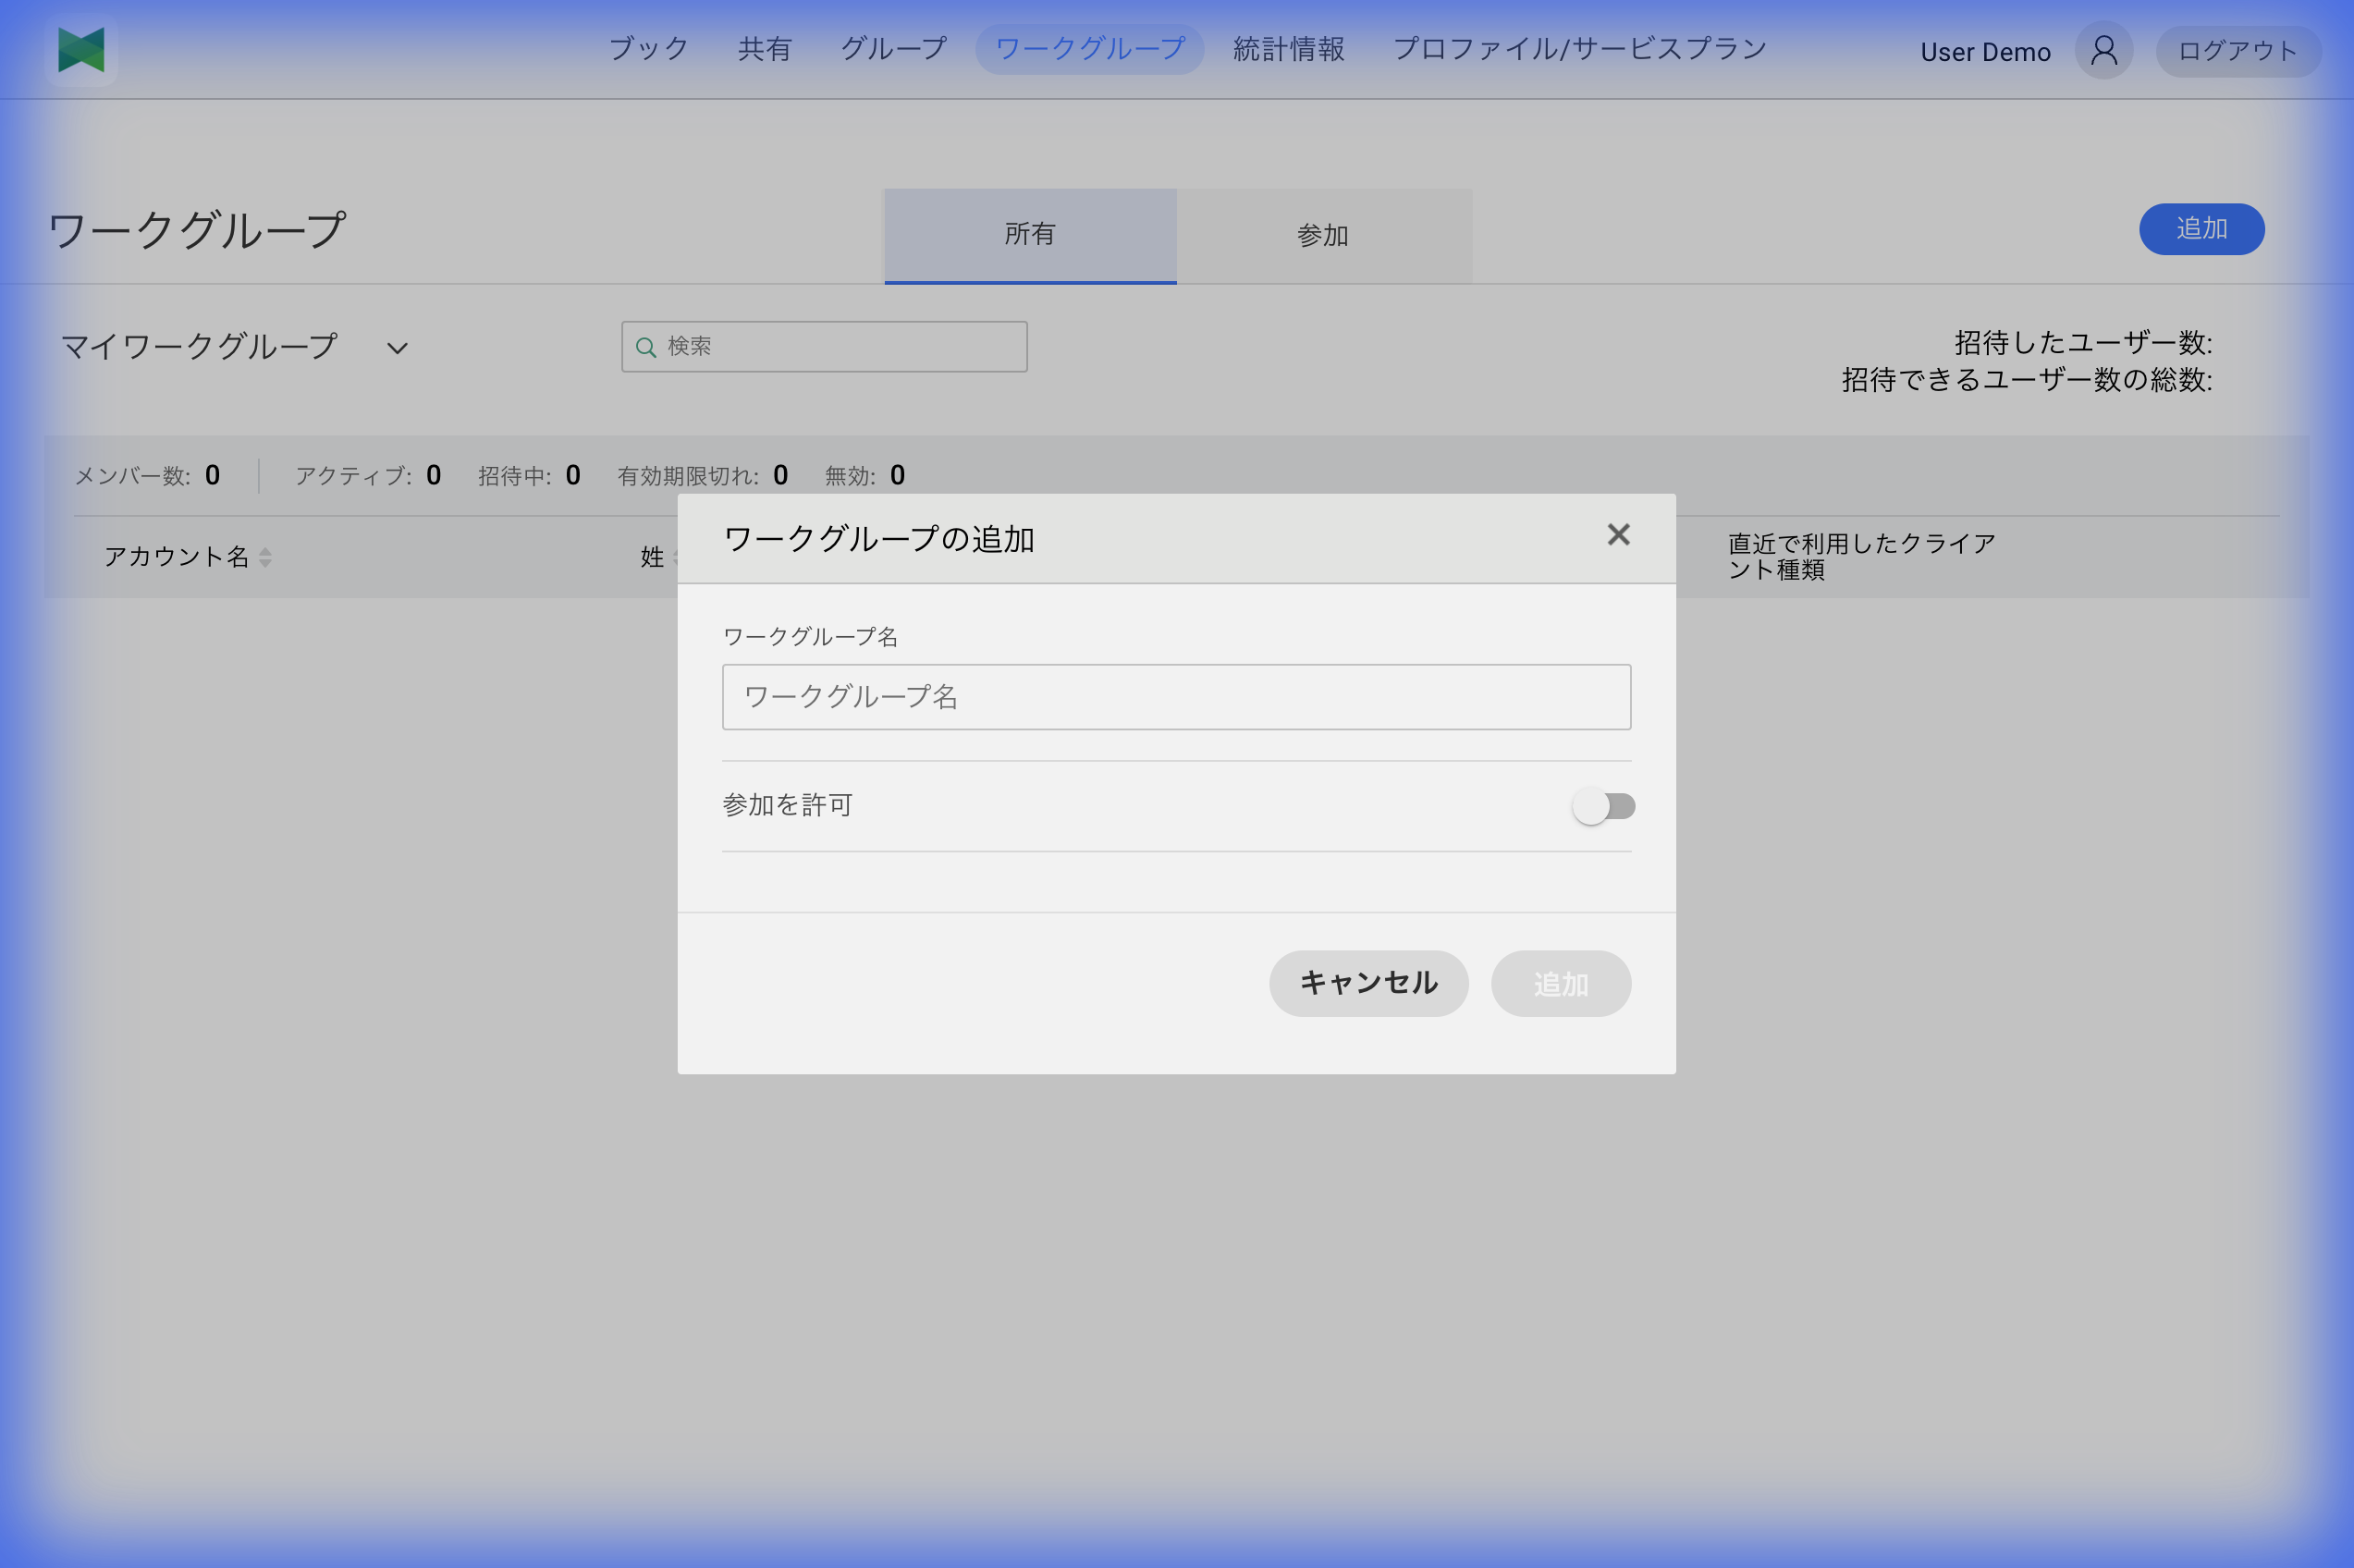
- Enter the following information:
| Item | Required | Description |
|---|---|---|
| Workgroup Name | ○ | Name of the workgroup |
| Allow Participate | - | ON: Participate mode (join requests via QR code or search allowed), OFF: Invite mode (invitation only) *Cloud version only |
| Auto Approve | - | Automatically approve join requests (Only displayed when "Allow Participate" is ON) *Cloud version only |
- Click the Create button
Allow Participate Setting
- Participate (Public): Anyone can send a join request
- Invite (Private): Only invited users can join
Workgroup Creation Limits
The number of workgroups you can create varies by plan.
| Plan | Max Workgroups |
|---|---|
| Free | 1 |
| Personal | 1 |
| Team | 5 |
| Business | Unlimited |
| Enterprise | Unlimited |
Note: Once you reach the limit, you cannot create new workgroups. If you see the message "too many workgroups", please consider upgrading your plan.
About "My Workgroup"
My Workgroup is a personal workgroup that is automatically created for you when your account is created. Its purpose and behavior are different from a normal workgroup.
In one line: My Workgroup is not a team — it is your personal, direct-message-like sharing space. Think of it like the "Inbox + Address book" of an email client, the "Friends list" of LINE, or the "Shared with me" folder in Google Drive.
Differences from a normal workgroup
| Item | My Workgroup | Normal workgroup |
|---|---|---|
| Who is it for? | You and personal members you invited (1-on-1 counterparts) | Teams / departments — multi-person collaboration |
| Owner | Always yourself (cannot be changed or deleted) | Anyone can create, transfer ownership, or delete |
| Member roles | editor / reader only | admin / editor / reader |
| Books shown | Per-user shares (you ↔ someone) and your own books | Books shared via workgroup share, access-code share, or organization-group share |
| Main purpose | "Hand a book to / receive a book from a specific person, one-to-one" | "Manage books collaboratively as a team" |
Main uses
- One-to-one exchanges with individual users — Books you shared with someone directly, and books someone shared with you directly, are collected here
- Member management separated from teams — Members you invited (editor / reader) can be managed separately from your team workgroups
Difference in which books appear
- A normal workgroup only shows books shared via workgroup share / access-code share / organization-group share.
- Direct (per-user) shares appear only in My Workgroup — they are not shown in normal workgroups.
When to use it
- When you want to hand a book off, one time, to someone who is not part of any established team
- When you want to see all the books that were shared with you personally in one place
- When you want to distribute a book to a handful of people under your own management, without exposing it to a team
Constraints
My Workgroup differs from a normal workgroup in the following ways:
- You cannot delete it or transfer ownership
- The workgroup toolbar icons (Delete / Settings / Invite / Import / Export / QR code, etc.) are not shown
- Member roles are limited to editor / reader (admin cannot be granted)
If you want to invite members and use a workgroup as a team, create a separate workgroup with the Add button.
Workgroup Member Limits
The number of members you can invite to each workgroup also varies by plan.
| Plan | Max Members |
|---|---|
| Free | 3 |
| Personal | 5 |
| Team | 6+ (can be increased with plan) |
| Business | 50+ (can be increased with plan) |
| Enterprise | Configured per plan |
Note: The member count does not include the workgroup owner.
6.4 Joining a Workgroup
Joining via Invitation (Cloud Version)
You can accept an invitation in either of the following ways.
Option A: From the join link in the invitation email (recommended)
- Receive an invitation email
- Click the link in the email
- Once logged in, you are automatically joined to the workgroup
Option B: Enter the invitation code from the notification
- After logging in, open the Workgroup tab
- Select the Joined Workgroups tab
- Click the invitation notification bell (🔔) at the top right
- In the invitation notification dialog, click Accept
- Enter the 6-digit invitation code from the invitation email
- Click Send to join the workgroup
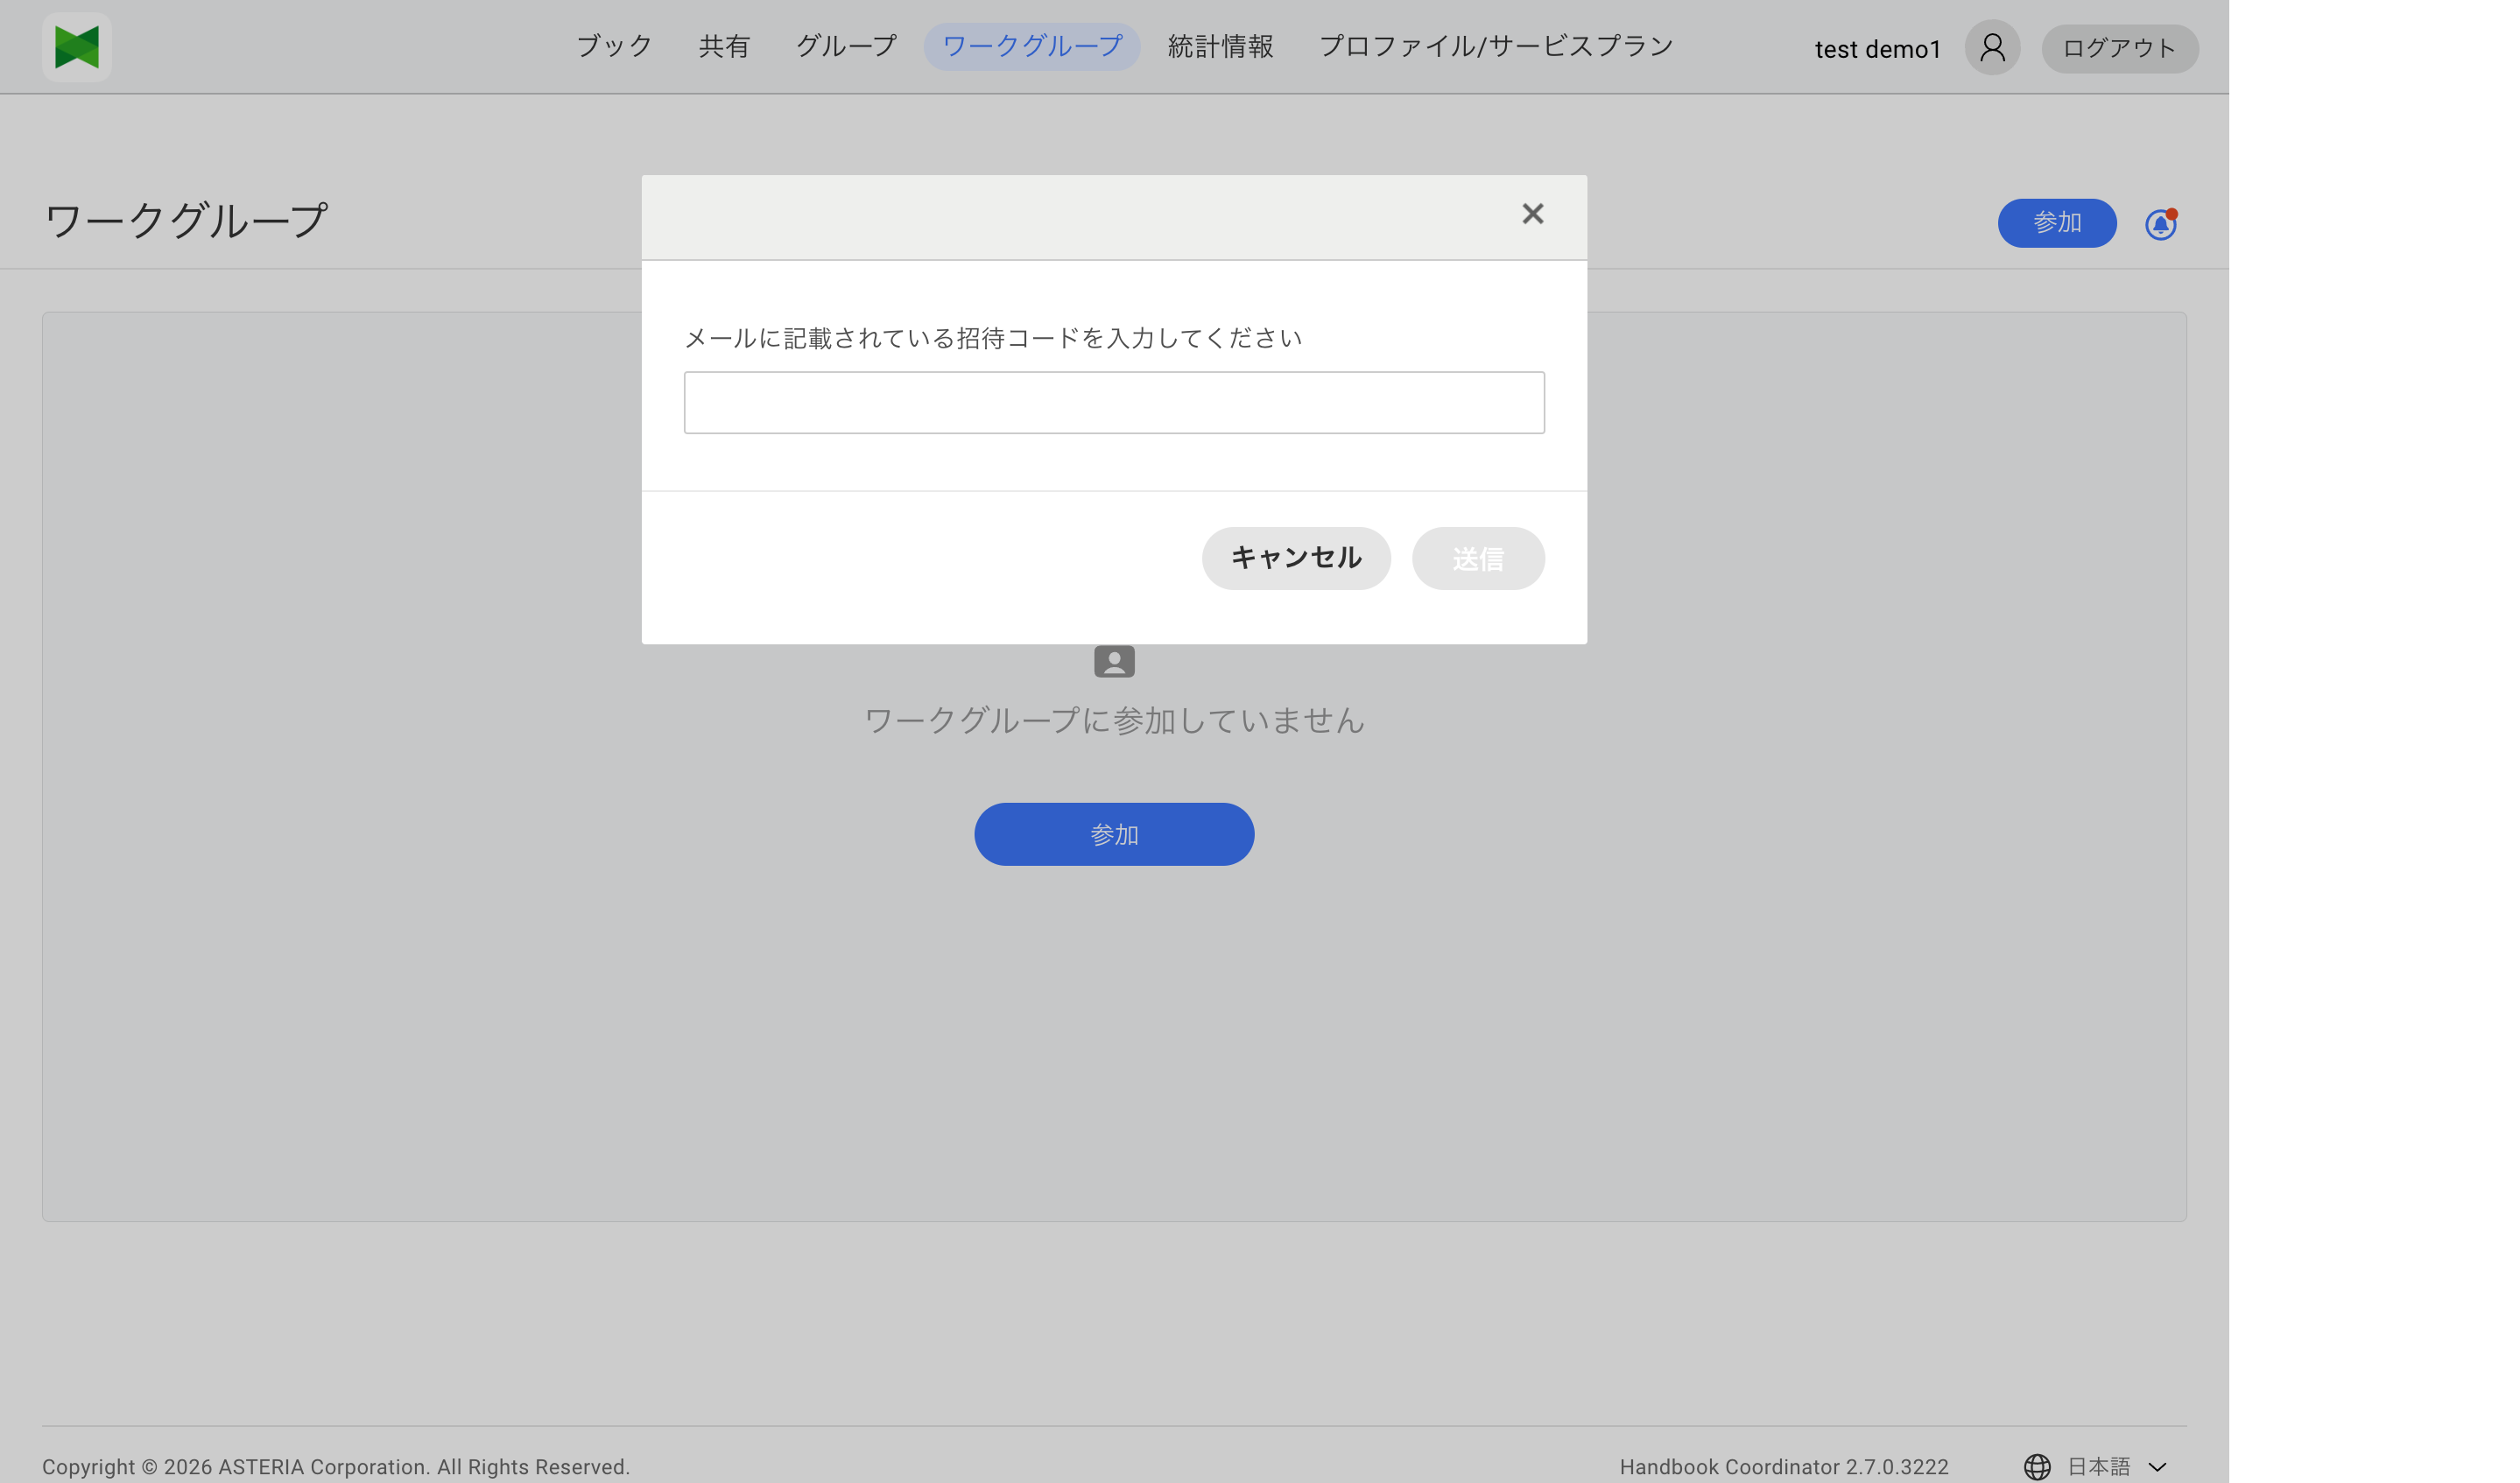
Note: The invitation code appears only in the invitation email. It cannot be looked up from the owner's member list (only resending the email is possible).
Join Request (Cloud Version)
You can send join requests to public workgroups.
- Select the Joined tab and click the Join button
- The Join Workgroup dialog appears
- Enter the workgroup ID or name you want to join
- Click the Join button
- You can join once the workgroup owner or admin approves
Checking Invitation Notifications (Cloud Version)
- Select the Joined tab and click the Notification button
- The Invitation Notification dialog appears
- Accept or Reject the invitation
6.5 Workgroup Settings
To change workgroup settings:
- Click the Settings button (
 ) in the workgroup list
 - The Workgroup Settings dialog appears
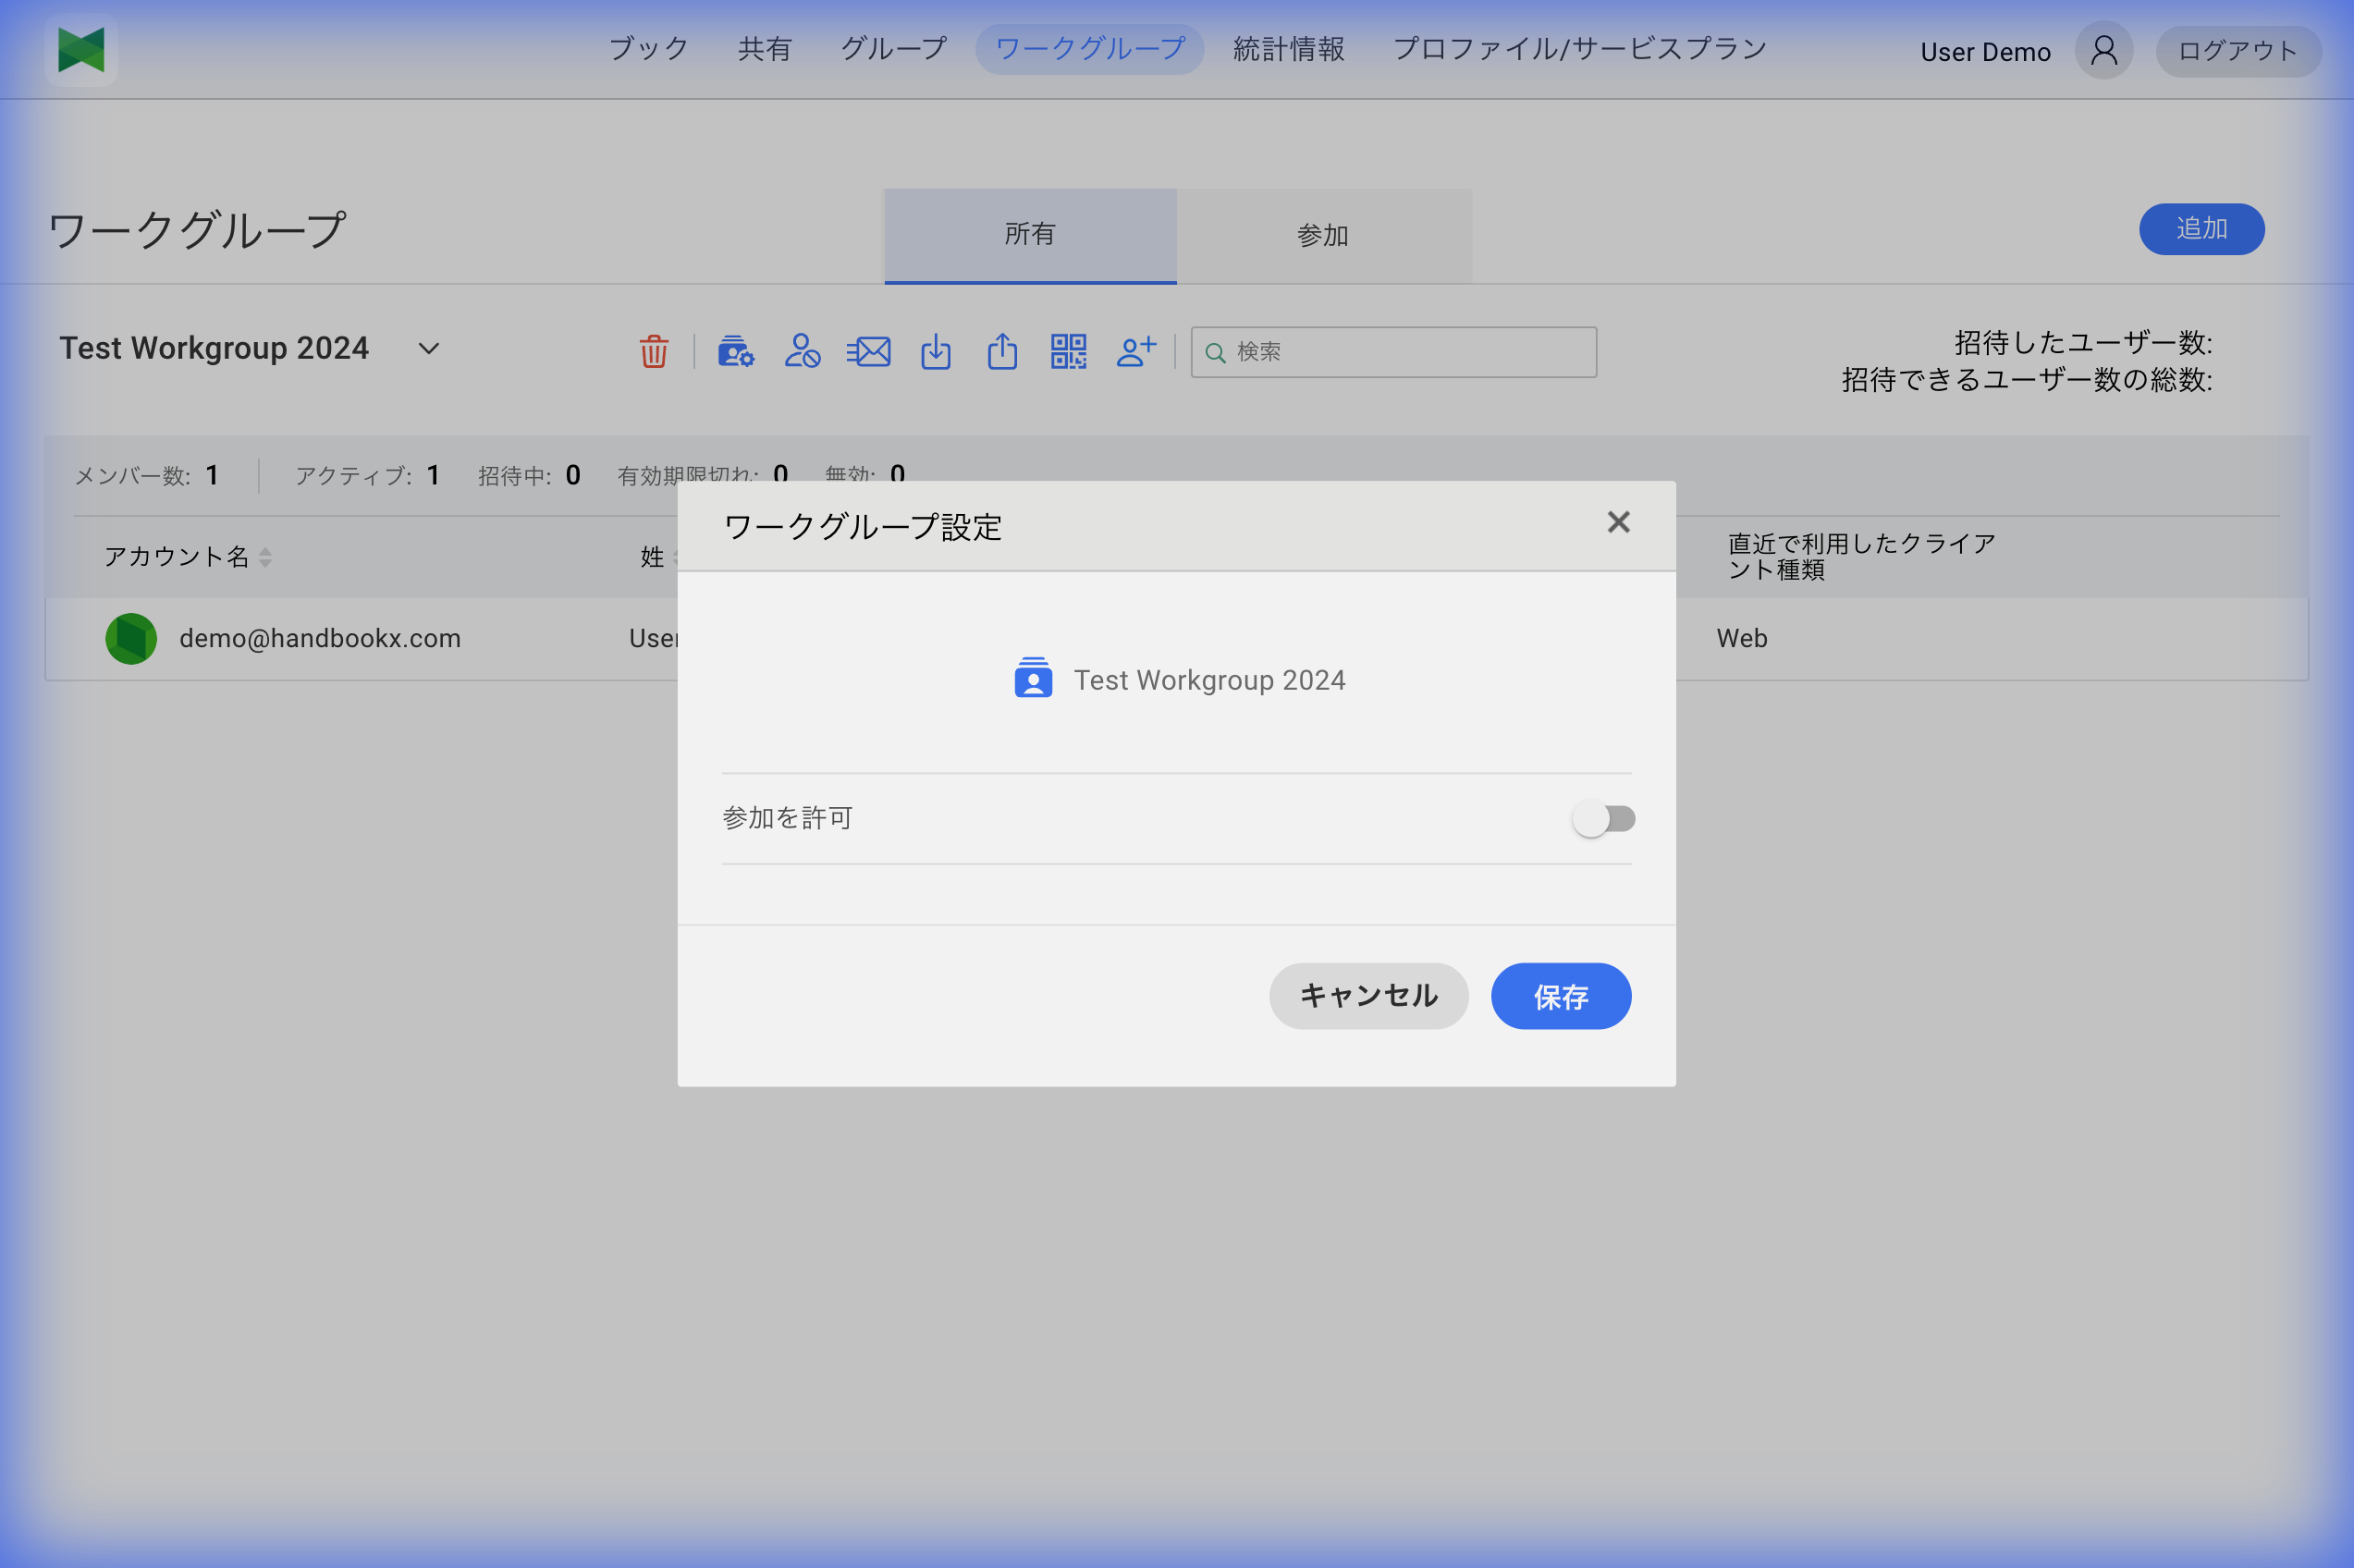
- Modify the settings
- Click the Save button
Configurable Settings (Cloud version only)
| Item | Description |
|---|---|
| Allow Participate | ON: Participate mode (join requests via QR code or search allowed), OFF: Invite mode (invitation only) |
| Auto Approve | Automatically approve join requests (Only displayed when "Allow Participate" is ON) |
6.6 Member Management
For details on member management, see 6.6 Member Management.
6.7 Importing and Exporting Users
Importing Users
You can bulk import users from a CSV file.
- Click the Import button (
 )
) - The Import dialog appears
- Select a CSV file
- Preview the content
- Click the Import button
CSV error display: When the CSV has syntax or validation errors, the Import dialog now shows a red-icon error card with the error message and a hint that explains what to fix (e.g. required column names, required fields). Update the CSV based on the message and try again.
CSV File Format
Important: The CSV header (column names) must use the exact English labels shown below. Other label names are not supported.
Cloud Version CSV Format (7 columns)
Mailaddress,Firstname,Lastname,Department,Role,State,Groups
user1@example.com,Taro,Yamada,Sales,editor,accepted,
user2@example.com,Hanako,Suzuki,Engineering,reader,accepted,Team1(Sales)
user3@example.com,Ichiro,Sato,,admin,accepted,
| Column Name | Required | Description |
|---|---|---|
| Mailaddress | ○ | User's email address |
| Firstname | - | User's first name |
| Lastname | - | User's last name |
| Department | - | Department (optional, may be empty). Added in Coordinator 2.7 |
| Role | - | Sharing privilege: admin/editor/reader (default: reader) admin=Manage sharing privilege, editor=With sharing privilege, reader=No sharing privilege |
| State | - | User's state: accepted (invitation accepted) / invited (pending), etc. |
| Groups | - | Groups to assign. Examples: ・ Team1(Sales) — Team1 under Sales WG・ Team1<Division(Sales);Team2(Support) — < indicates parent → child, ; for multiple groupsRenamed from the old OrganizationGroup column in Coordinator 2.7 |
Main changes in Coordinator 2.7: - Added the Department column as the 4th column - Renamed the OrganizationGroup column to Groups (now supports hierarchical paths) - Removed the Password column (it had always been ignored on the cloud server plan)
Dedicated Server CSV Format (4 columns)
For dedicated server version, a simplified 4-column format is used.
Mailaddress,Role,OrganizationGroup,Password
user1@example.com,editor,,Password123
user2@example.com,reader,,Password456
user3@example.com,admin,,Password789
| Column Name | Required | Description |
|---|---|---|
| Mailaddress | ○ | Username (does not need to be email format) |
| Role | - | Sharing privilege: admin/editor/reader (default: reader) |
| OrganizationGroup | - | Organization group (usually empty) |
| Password | - | Initial password |
![]() Download sample CSV file for Dedicated Server
Download sample CSV file for Dedicated Server
Note: On the dedicated server plan, the import performed from the Accounts tab uses a different 7-column format (
UserName,Firstname,Lastname,Department,Password,Workgroups,Groups). For details, see 7.5 Importing Accounts.
Password Requirements: - Length: 8-32 characters - Allowed characters: Any characters including letters (uppercase/lowercase), numbers, and symbols
Differences between Cloud and Dedicated Server versions (workgroup bulk import): - Cloud version: 7-column format, Firstname/Lastname/Department/Groups are used, Mailaddress must be in email format - Dedicated Server: 4-column format, Password can be set as initial password, Mailaddress can be any username (not required to be email format)
Notes for creating CSV files: - Each data row must have the same number of columns (comma-separated) as the header row - Do not include empty lines at the end of the file (this will cause errors) - Even for empty columns, do not omit the commas - For cloud version, it is recommended to specify
acceptedfor the State field
Exporting Users (Cloud Version)
You can export workgroup member information as a CSV file.
- Click the Export button (
 )
) - A CSV file is downloaded
The exported CSV uses the same format as import (Mailaddress,Firstname,Lastname,Department,Role,State,Groups).
Tip: You can edit the exported CSV file and re-import it to perform bulk updates.
6.8 QR Code Invitation
Note: This feature is only available in the cloud version.
You can easily invite users using a QR code.
- Click the QR Code button
- The QR Code dialog appears
- Print or save the QR code as an image
Users can scan the QR code in the app to send a join request.
6.9 Device ID Restrictions (Dedicated Server Only)
A feature that allows access only from specific device IDs. Administrators can approve or deny device IDs that users have logged in from, allowing only permitted devices to access the workgroup.
Note: Device ID restriction is only available in the dedicated server version with specific plans (plans with the devid feature enabled). It is not available in the cloud version.
Difference Between "Device ID Restrictions" and "Platform Restrictions"
Handbook X Coordinator has two types of device restriction features. It's important to understand the differences as they can be easily confused.
| Item | Device ID Restrictions (This Section) | Platform Restrictions (See 7.7) |
|---|---|---|
| Restriction Unit | Per individual device | Per platform (OS type) |
| Setting Location | Workgroup > Device Restrictions | Accounts > Device Restrictions |
| Scope | Per workgroup | Per account (user) |
| Restriction Method | Approve/deny logged-in device IDs | Allow/prohibit iOS/Android/Windows/Browser |
| Availability | Dedicated server (with devid feature) | Dedicated server |
| Use Case | Allow only specific company-issued devices | "Prohibit access from smartphones", etc. |
Example: Device ID Restrictions - Yamada's "iPhone A" → Allowed - Yamada's "iPhone B" → Denied (personal device) - Suzuki's "iPad C" → Allowed
Example: Platform Restrictions - Yamada → iOS prohibited (no access from any iPhone/iPad) - Suzuki → Browser prohibited (no access from PC browsers)
Tip: For platform restrictions, see 7.7 Device Restrictions Settings.
Enabling Device ID Restrictions
- Click workgroup settings ()
- Turn on "Use access restriction by device ID"
- Click the Save button

When this setting is enabled, an "Allowed Device IDs" column will appear in the workgroup member list.
Managing Device IDs
- Click the Device Restrictions button
- The "Device Usage Restrictions" dialog appears
- A list of devices that each user has logged in from is displayed:
- Account Name
- Devices (Device ID and access permission status)
- Click a device to toggle between enabled/disabled
- You can perform bulk operations on multiple devices:
- Enable selected devices: Enable all devices for selected users
- Disable selected devices: Disable all devices for selected users
- Enable All for the workgroup: Enable all devices for all users
- Disable All for the workgroup: Disable all devices for all users
Device ID Registration Flow
- A user logs in to the workgroup from the app
- The device ID is automatically recorded at login
- Administrator reviews the device IDs in the device restrictions screen
- Administrator allows or denies each device ID
- Only allowed device IDs can access the workgroup
Note: In workgroups with device ID restrictions enabled, access from devices not approved by the administrator is not possible. If logging in from a new device, please request approval from the administrator.
6.10 Leaving a Workgroup
To leave a workgroup you have joined:
- Select the Joined tab and select the workgroup you want to leave
- Click the Quit button on your row in the member list
- Click Quit in the confirmation dialog
Note: After leaving, you will no longer be able to access books in that workgroup.
6.11 Deleting a Workgroup
To delete a workgroup you own:
- Select the Owned tab and select the workgroup you want to delete
- Click the Delete button (
 )
) - The confirmation dialog appears
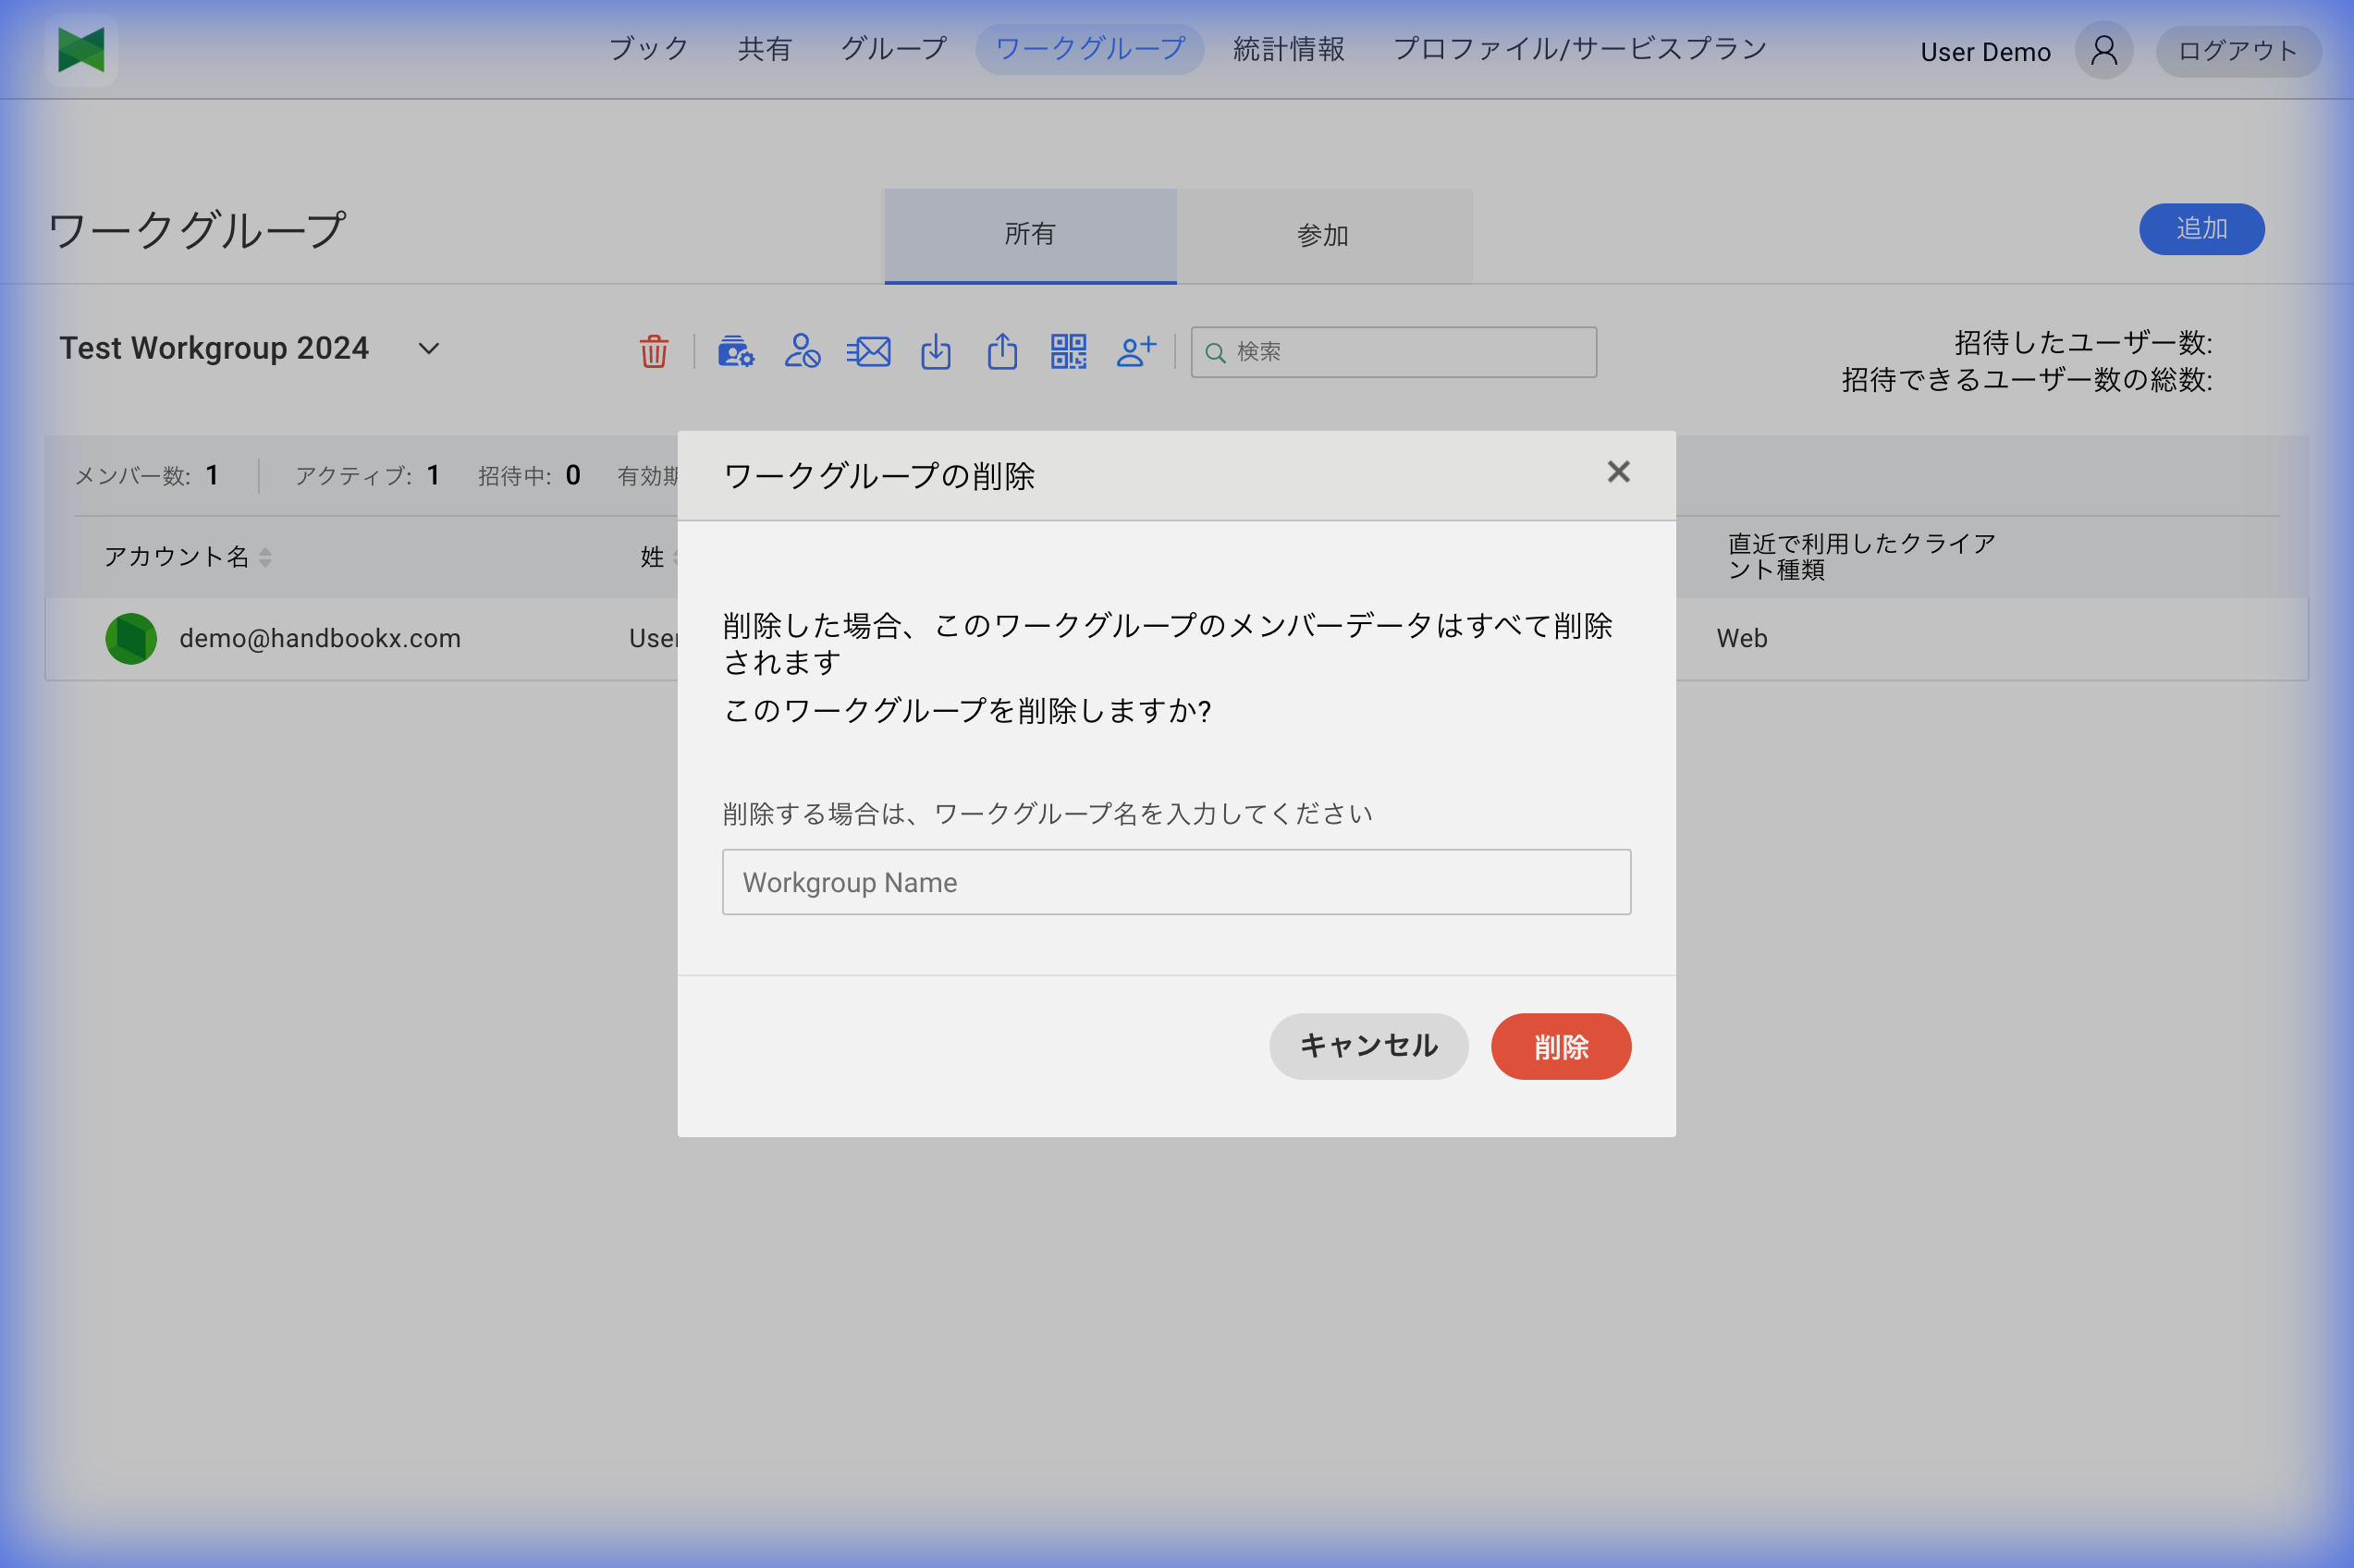
- Enter the workgroup name and click Delete
Note: Deleting a workgroup also deletes: - All books in the workgroup - All sharing settings - All groups
This action cannot be undone.