7. Accounts (Dedicated Server)
The Accounts tab allows you to manage user accounts in a dedicated server environment.
Note: The Accounts tab is only available to users with administrator privileges (Owner or Admin) on the dedicated server plan. It is not displayed on the cloud server plan. This tab will not be displayed if you do not have administrator privileges.
About Account Permission and Sharing Privilege
Handbook X Coordinator has two distinct permission systems: Account Permission and Sharing Privilege. These are independent concepts used for different purposes.
Account Permission (Organization Level)
Account permission indicates the permission level across the entire organization. It is set in the Accounts tab and determines the scope of system-wide operations.
| Account Permission | Description |
|---|---|
| Owner | Organization owner. Can use all features |
| Admin | Can use management features such as account management and statistics viewing |
| Editor | Standard user. Can create and edit books |
| Editor (Export Prohibited) (NoEx) | User with export functionality restricted |
| Read-only (Reader) | View-only user |
Note: The internal keys (
normal/noex/reader) are unchanged, but starting from Coordinator 2.7 the UI labels have been unified as Editor / Editor (Export Prohibited) / Read-only. Wherever older documentation says "Normal / NoEx / Reader", read it as the new labels above.
Sharing Privilege (Workgroup Level)
Sharing privilege indicates the permission for book sharing within each workgroup. It is set in workgroup member management and determines the scope of sharing operations within that workgroup.
| Sharing Privilege | Description |
|---|---|
| Owner | Workgroup owner. Has all sharing privileges |
| Manage sharing privilege | Can manage book sharing settings |
| With sharing privilege | Can share books |
| No sharing privilege | Cannot share books (view only) |
Relationship Between the Two Permissions
- Account permission and sharing privilege are set independently
- The same user can have "Editor" account permission but be a "Manage sharing privilege" member in a specific workgroup
- Conversely, even with "Admin" account permission, they have no privileges in workgroups they haven't joined
- The actual scope of available operations is determined by considering both permissions
Example: If User A has "Editor" account permission and "Manage sharing privilege" in Workgroup X: - Accounts tab: Not displayed (account permission is not "Admin" or higher) - Sharing settings in Workgroup X: Can manage (has manage sharing privilege) - Member invitation in Workgroup X: Possible (has manage sharing privilege)
For details, see "About Sharing Privileges" in 6.6 Member Management.
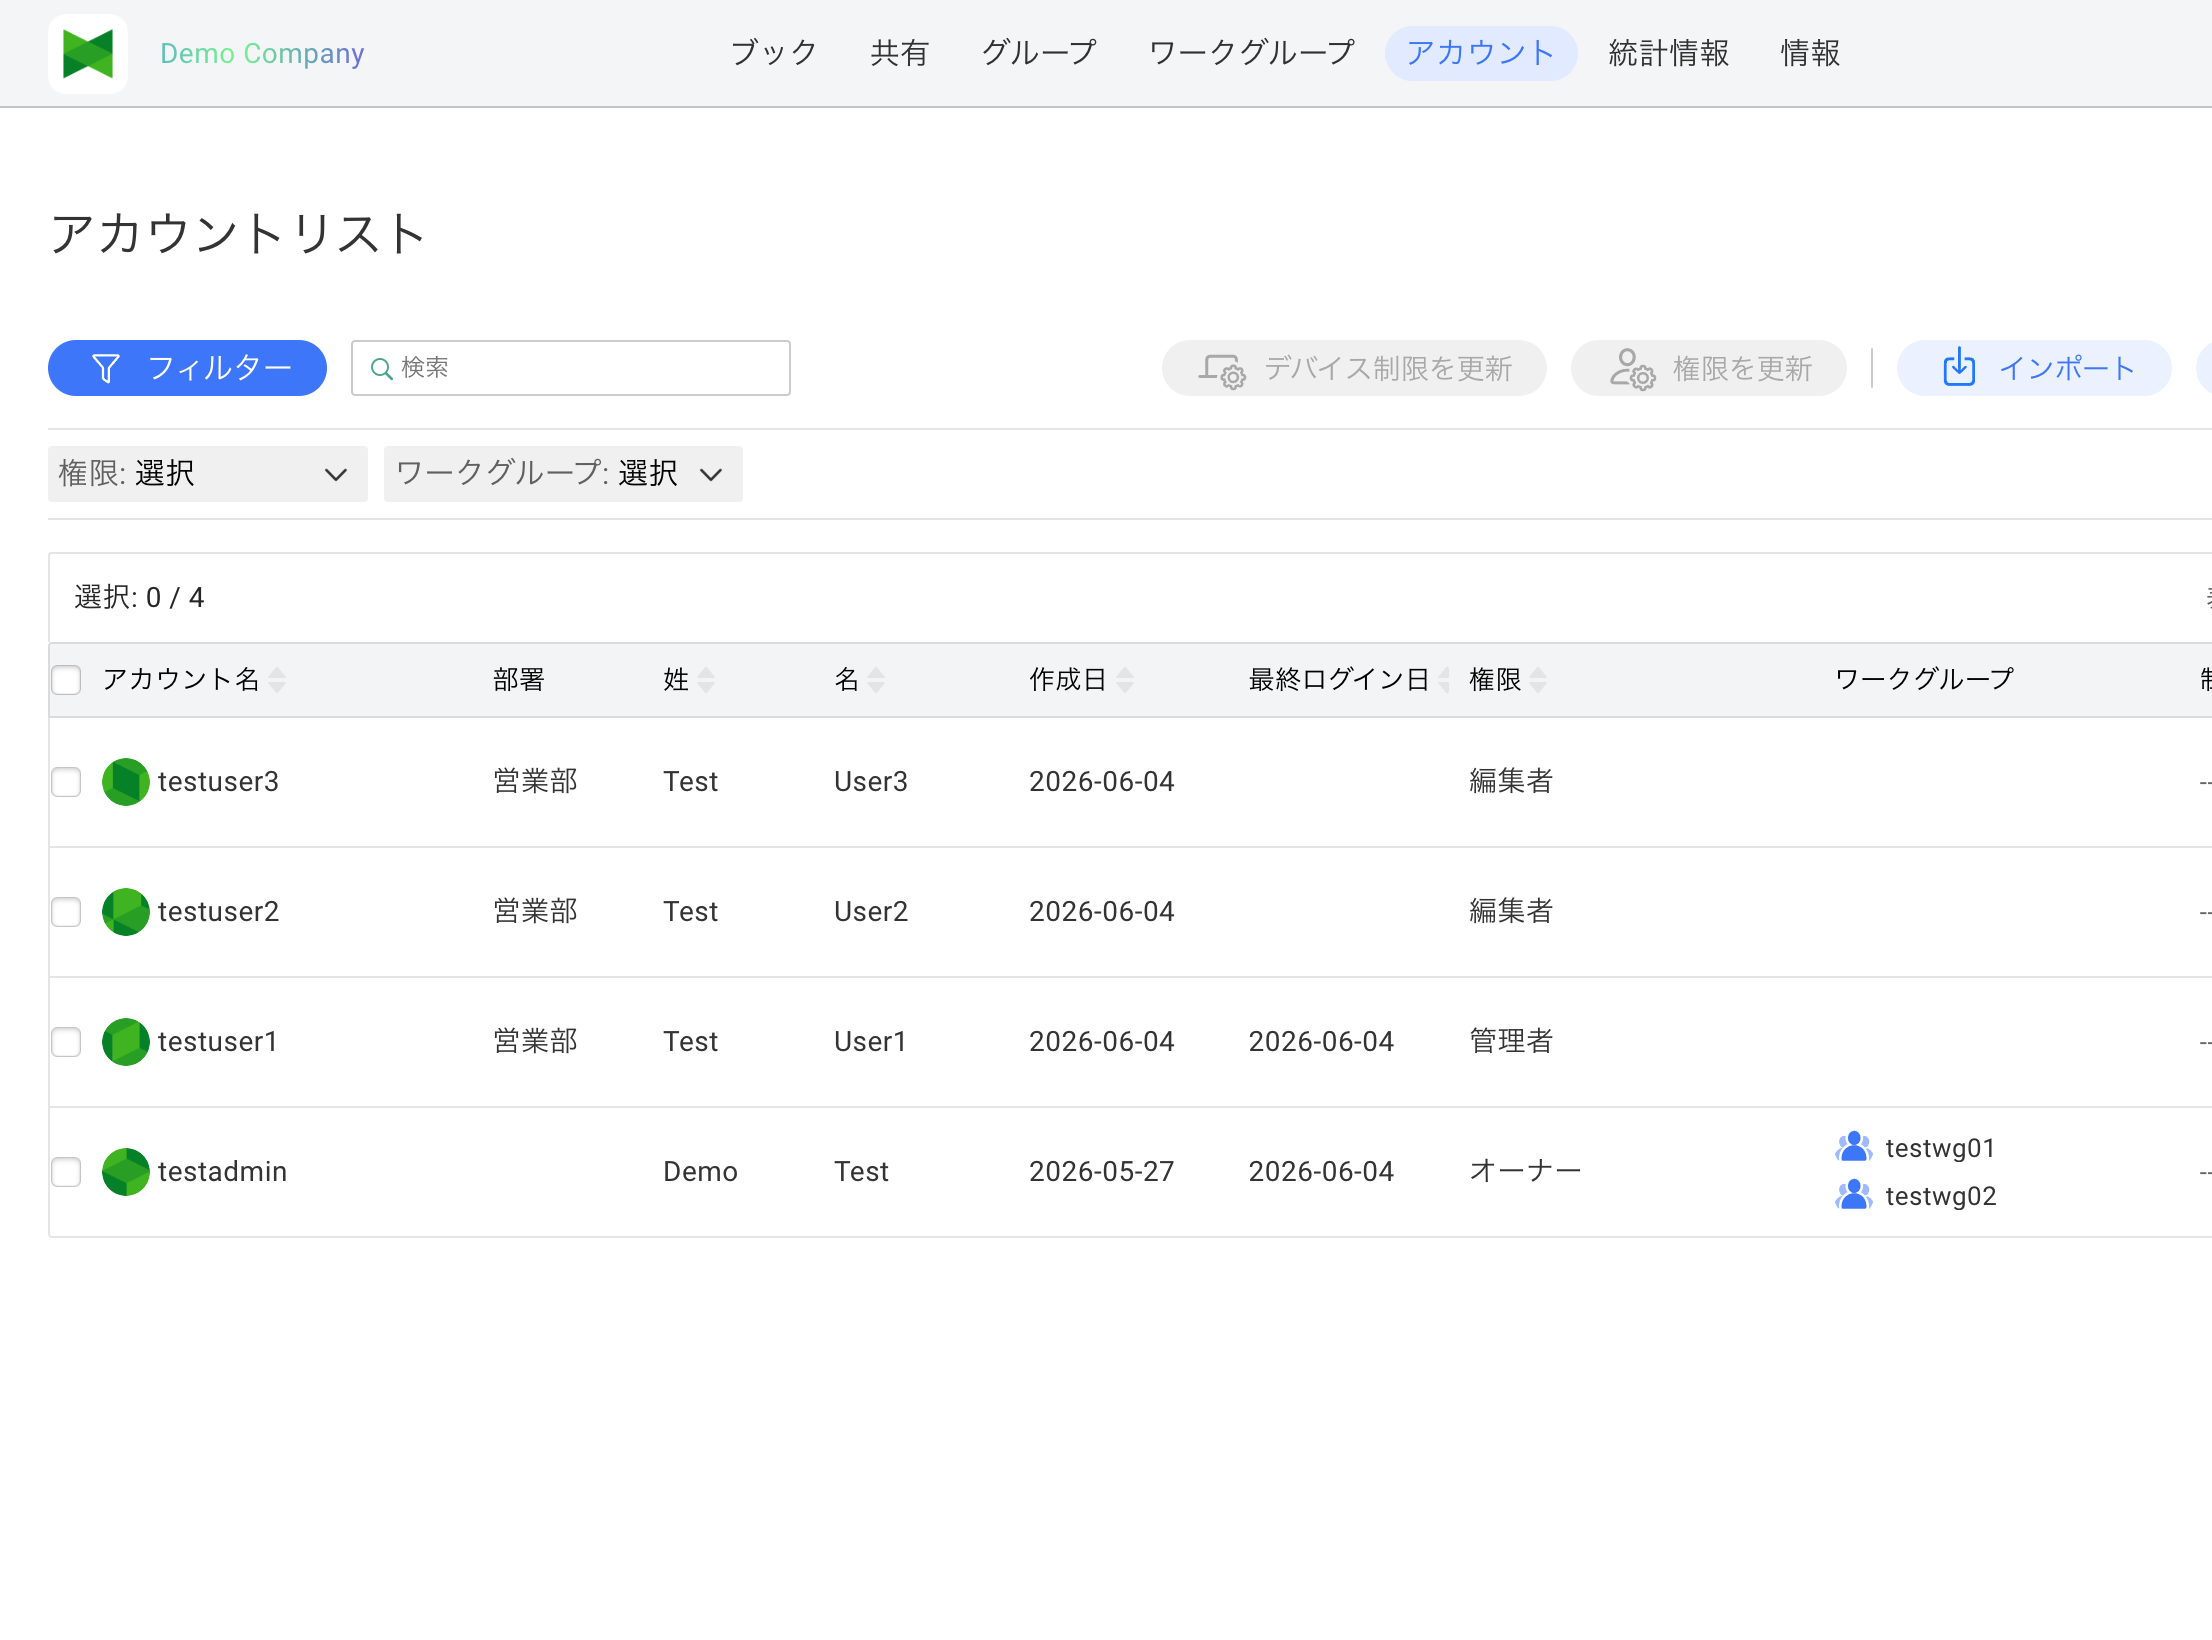
7.1 Account List
Opening the Accounts tab displays a list of registered accounts.
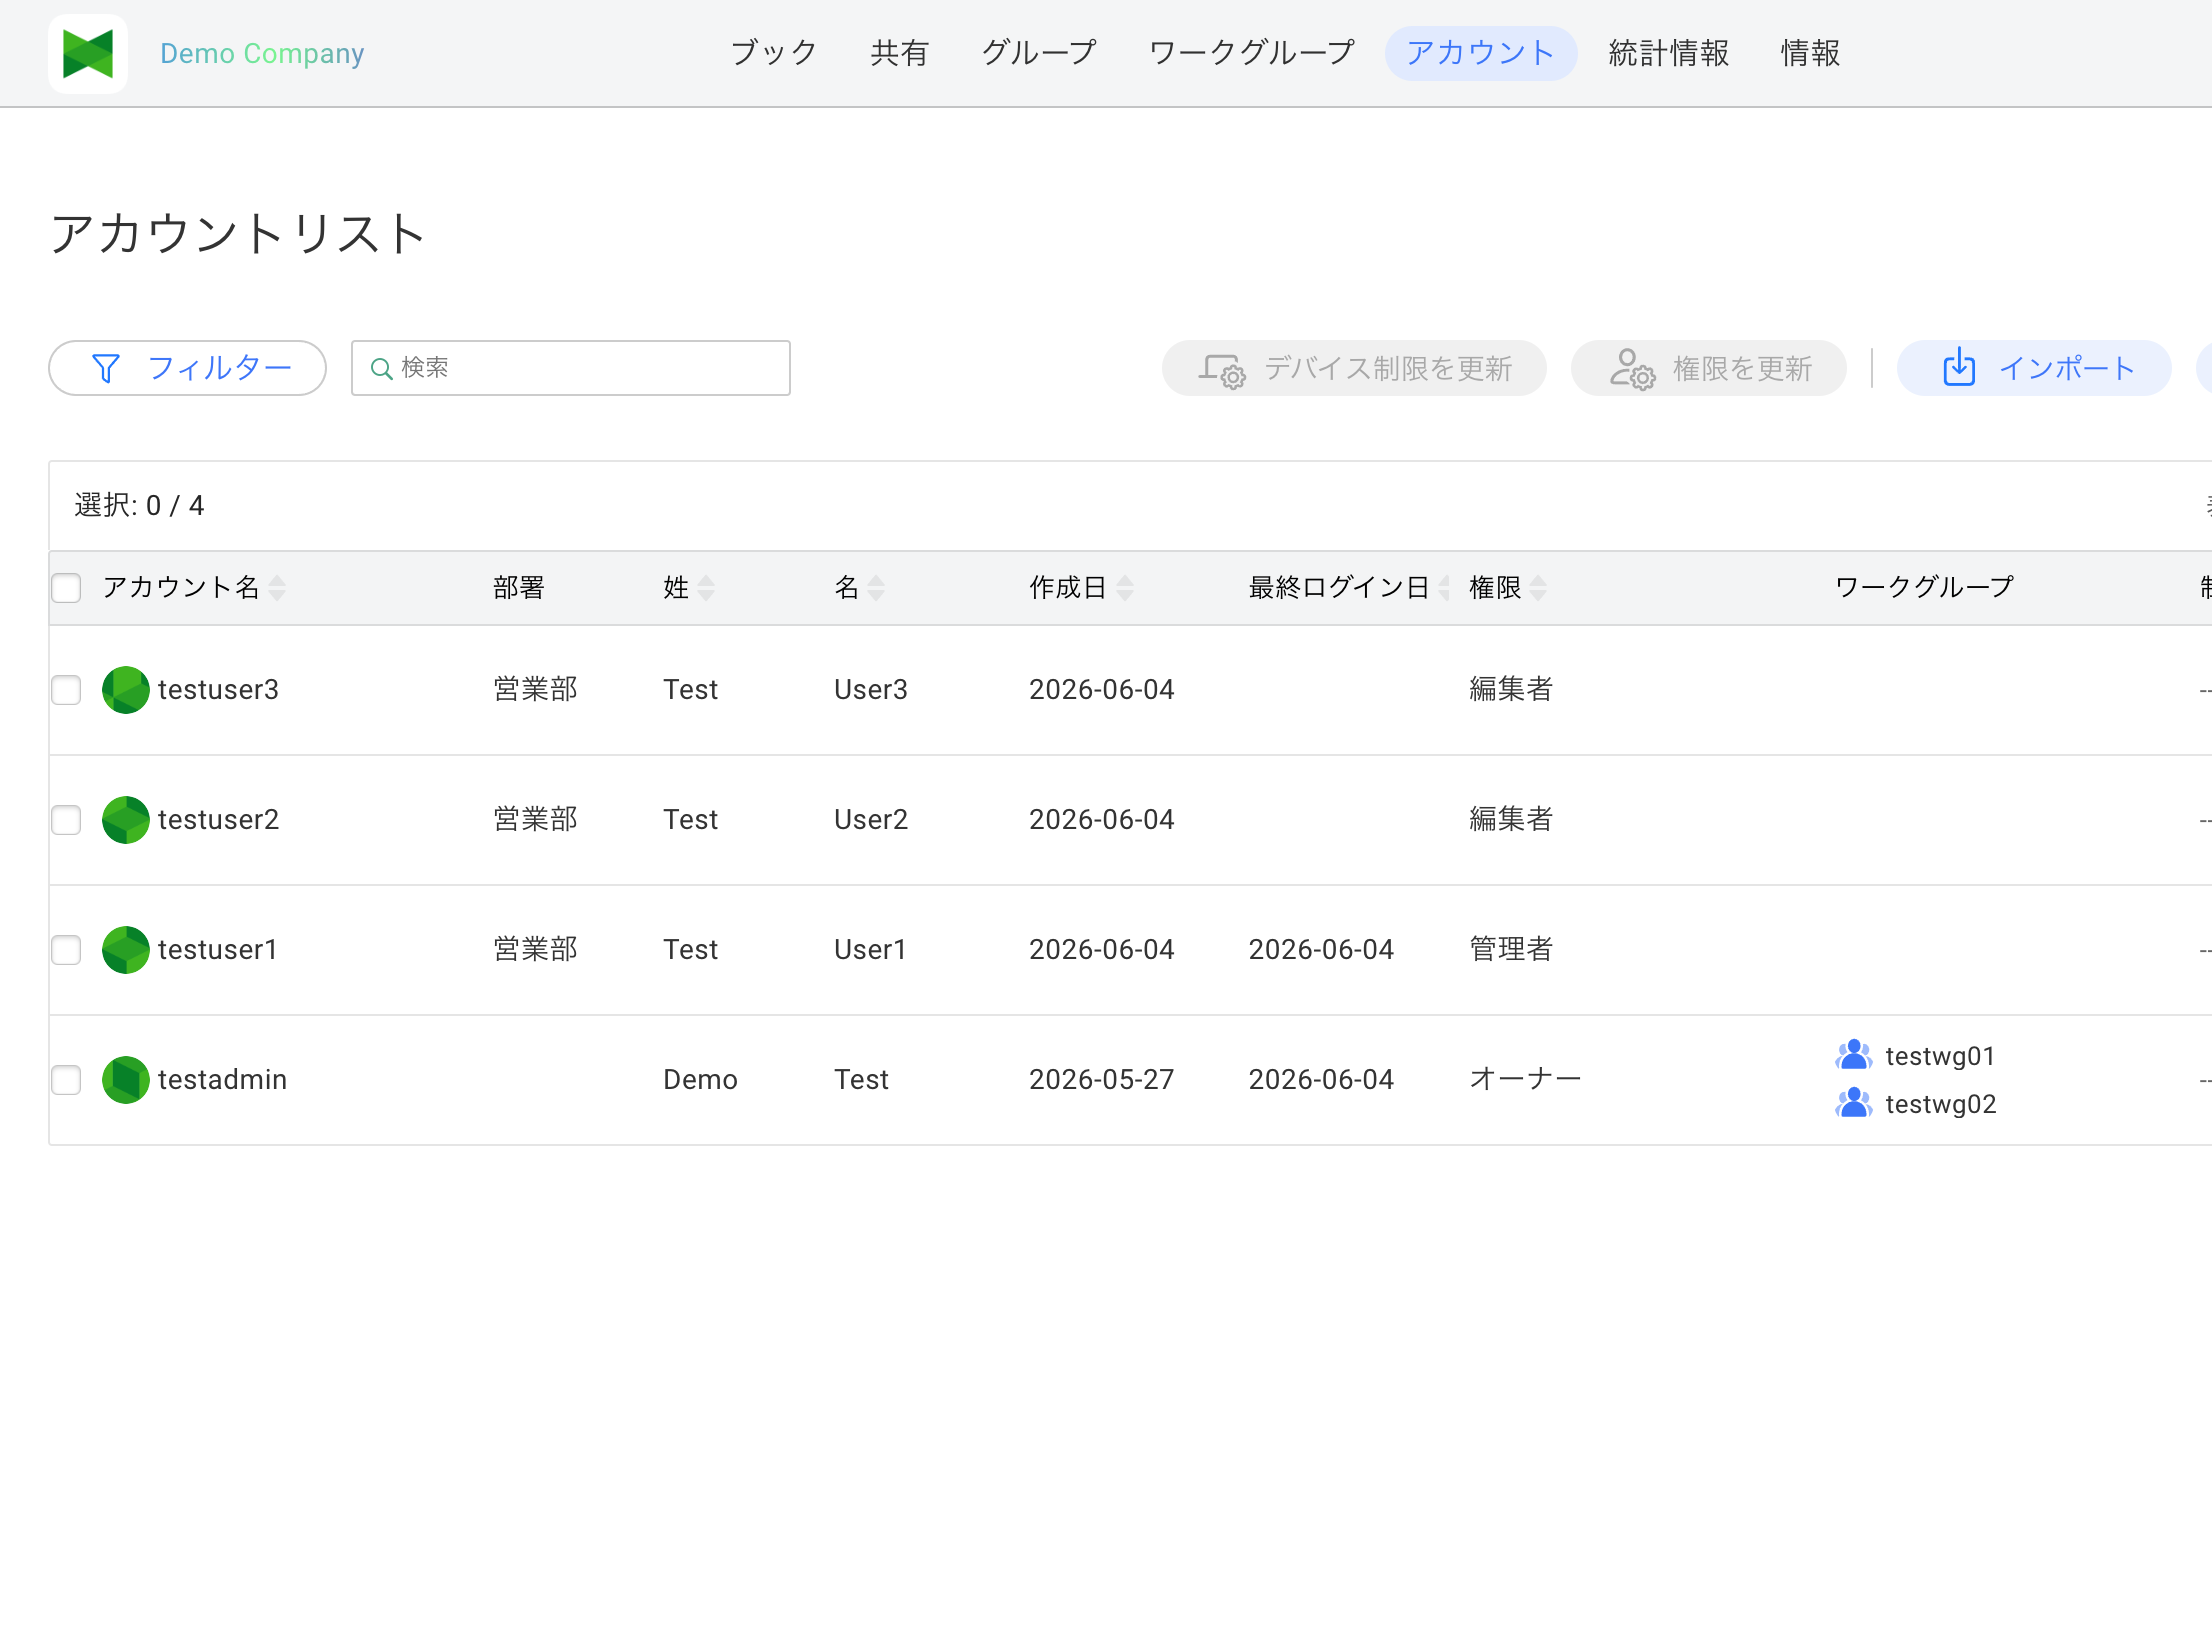
Display Items
| Item | Description |
|---|---|
| Account Name | User's account name (does not need to be email format) |
| Department | User's department (synced automatically from the profile) |
| Last Name | User's last name |
| First Name | User's first name |
| Created Date | Date the account was created |
| Last Login Date | Date of last login |
| Permission | Account's permission level |
| Workgroup | Workgroups the user belongs to |
| Restricted Device | Device restriction settings |
Note: Starting from version 2.7, account names no longer need to be in email format. The display column has also been renamed from "Account ID" to "Account Name".
Selected Account Count
The selected account count and total account count are displayed at the top of the screen.
Selected: 3 / 150
Sorting
Click on any column header to sort by that column.
7.2 Adding an Account
To create a new account:
- Click the Add button
- The Create Account dialog appears
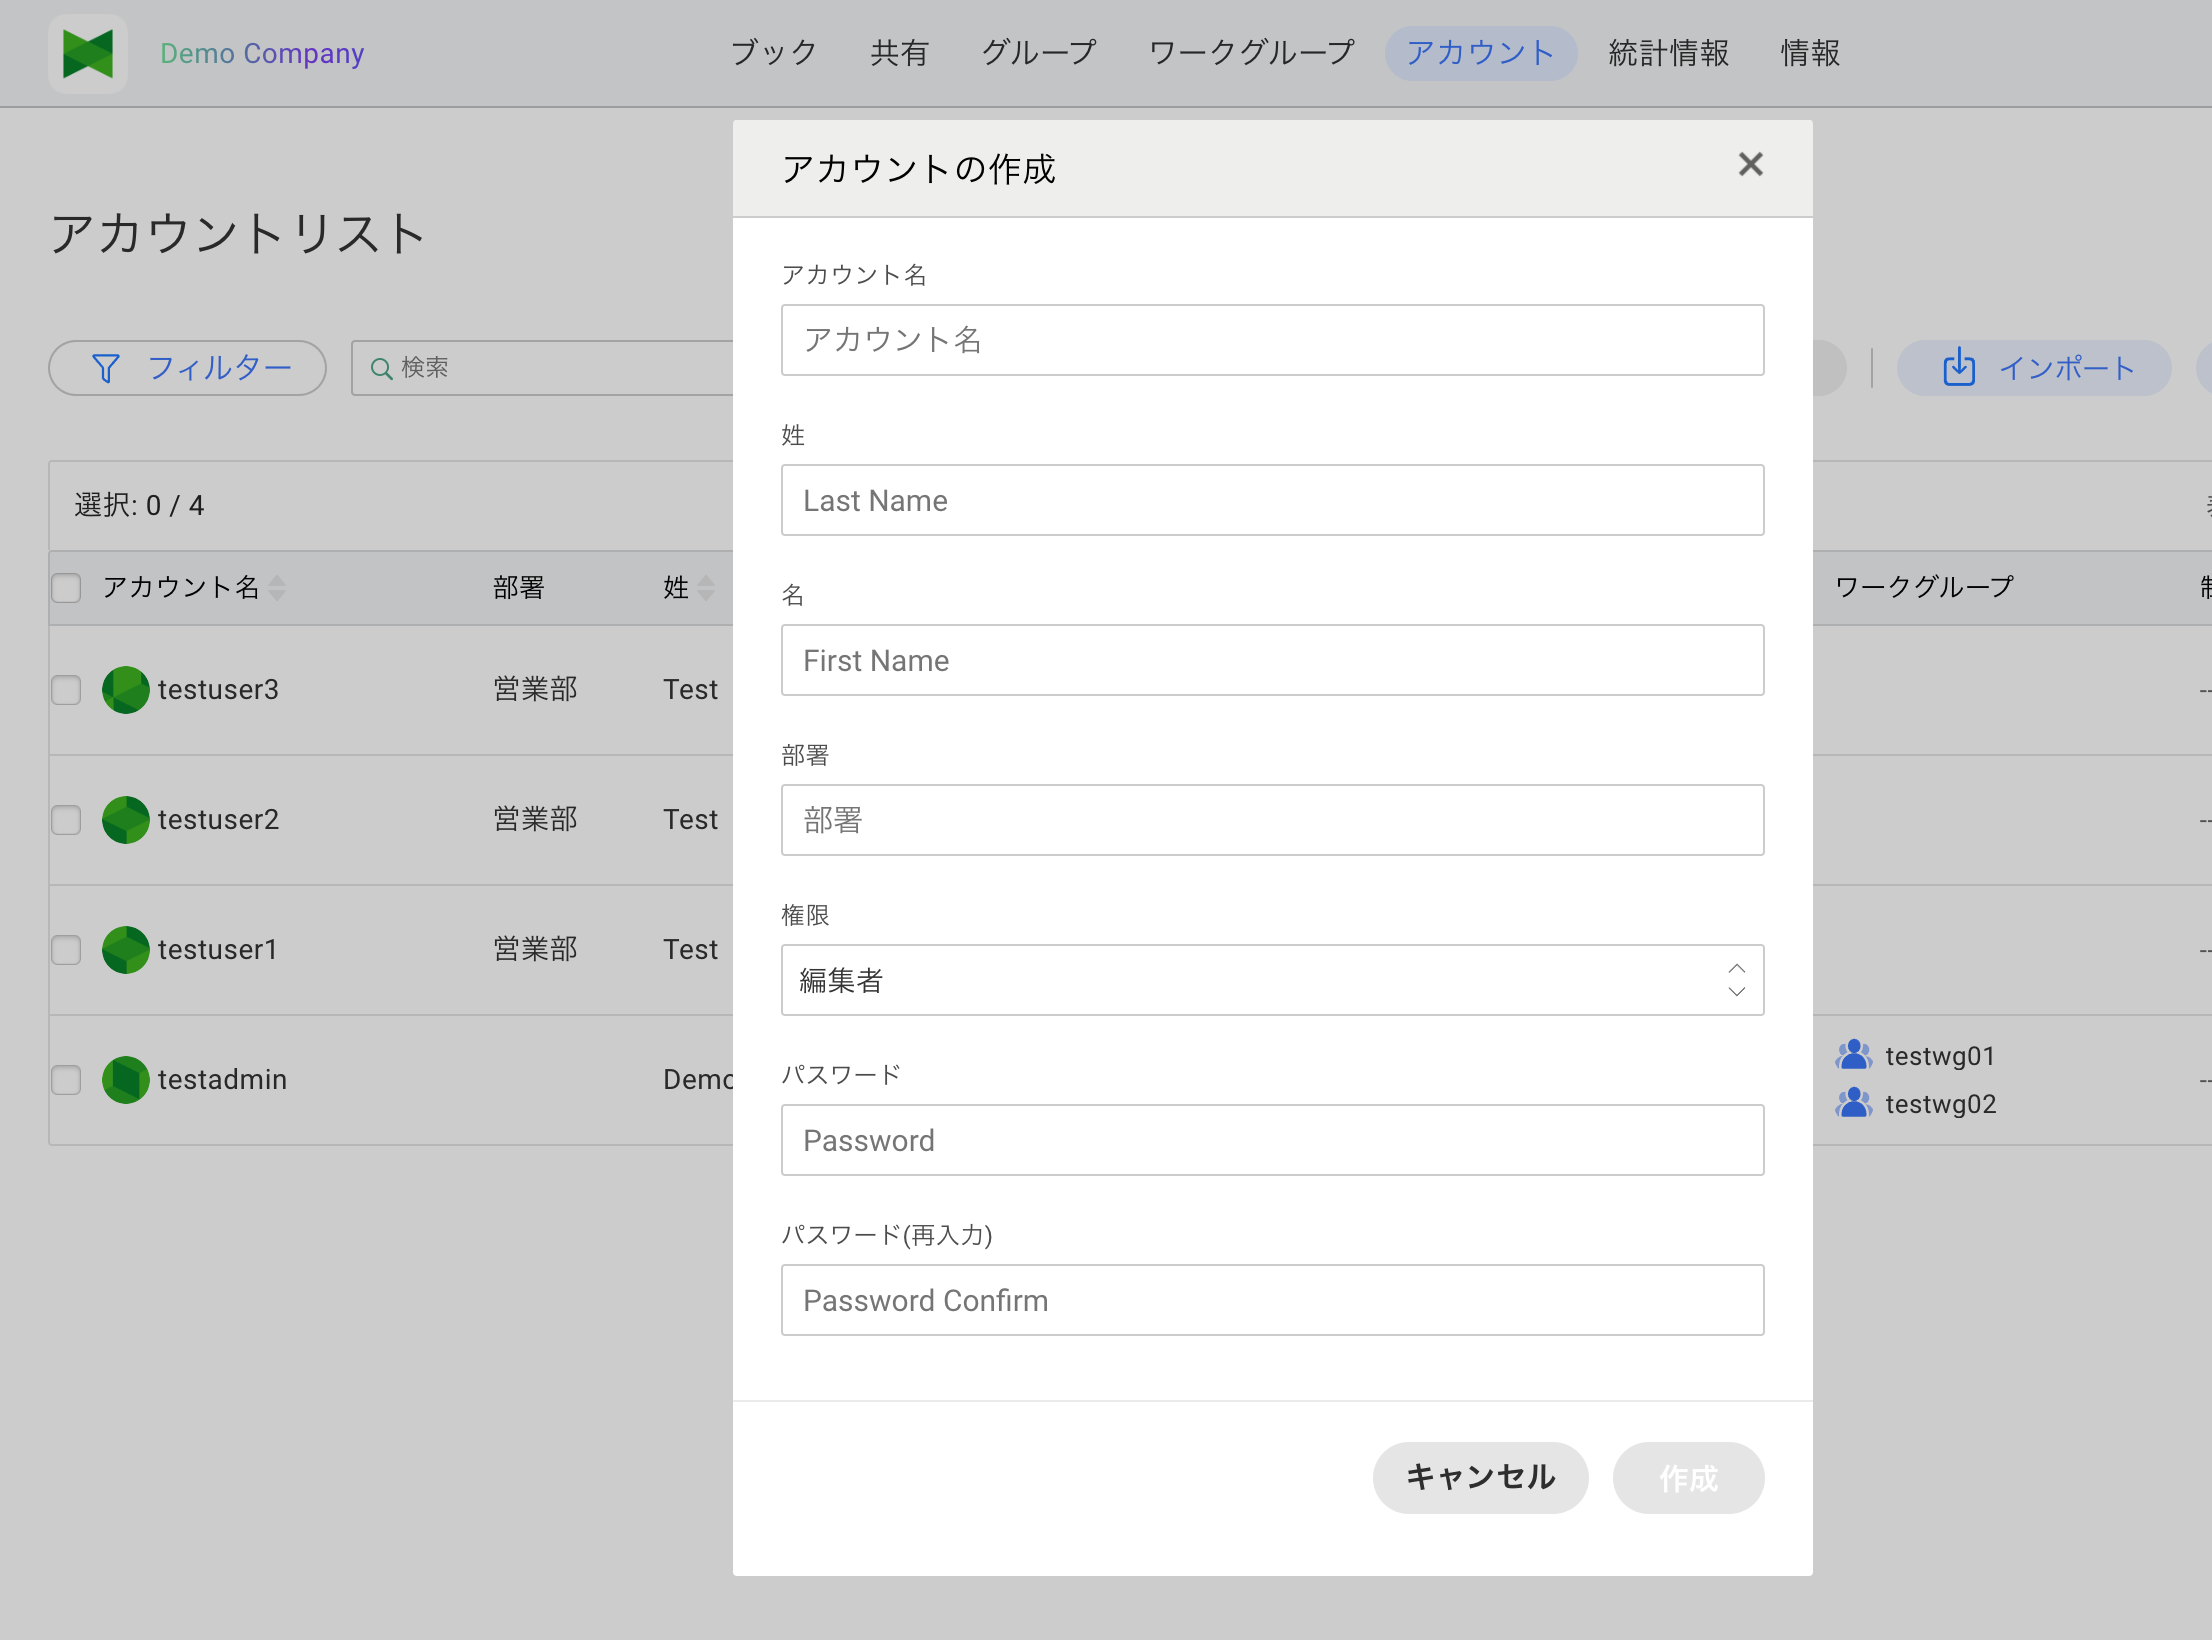
- Enter the following information:
| Item | Required | Description |
|---|---|---|
| Account Name | ○ | User's account name (does not need to be email format) |
| Last Name | ○ | User's last name |
| First Name | ○ | User's first name |
| Department | - | User's department (optional) |
| Permission | ○ | Account's permission level (default: Editor) |
| Password | ○ | Initial password |
| Password (re-enter) | ○ | Re-enter the same password for confirmation |
- Click the Create button
Note: You cannot assign workgroups directly from the Create dialog. To assign workgroups, use Editing an Account or Importing Accounts after creation.
Permission Levels
| Permission | Description |
|---|---|
| Owner | Organization owner. All features available |
| Admin | User with administrative privileges |
| Editor | Standard user |
| Editor (Export Prohibited) (NoEx) | User with restricted export functionality |
| Read-only (Reader) | View-only user |
Note: Starting from Coordinator 2.7, the UI labels for permissions have changed as follows (the internal keys are unchanged): - Normal → Editor - NoEx → Editor (Export Prohibited) - Reader → Read-only
Wherever older wording remains in this manual, read it as the new labels above.
7.3 Editing an Account
To edit an existing account:
- Click the Edit button (
 ) of the account you want to edit in the account list
 - The Edit Account dialog appears
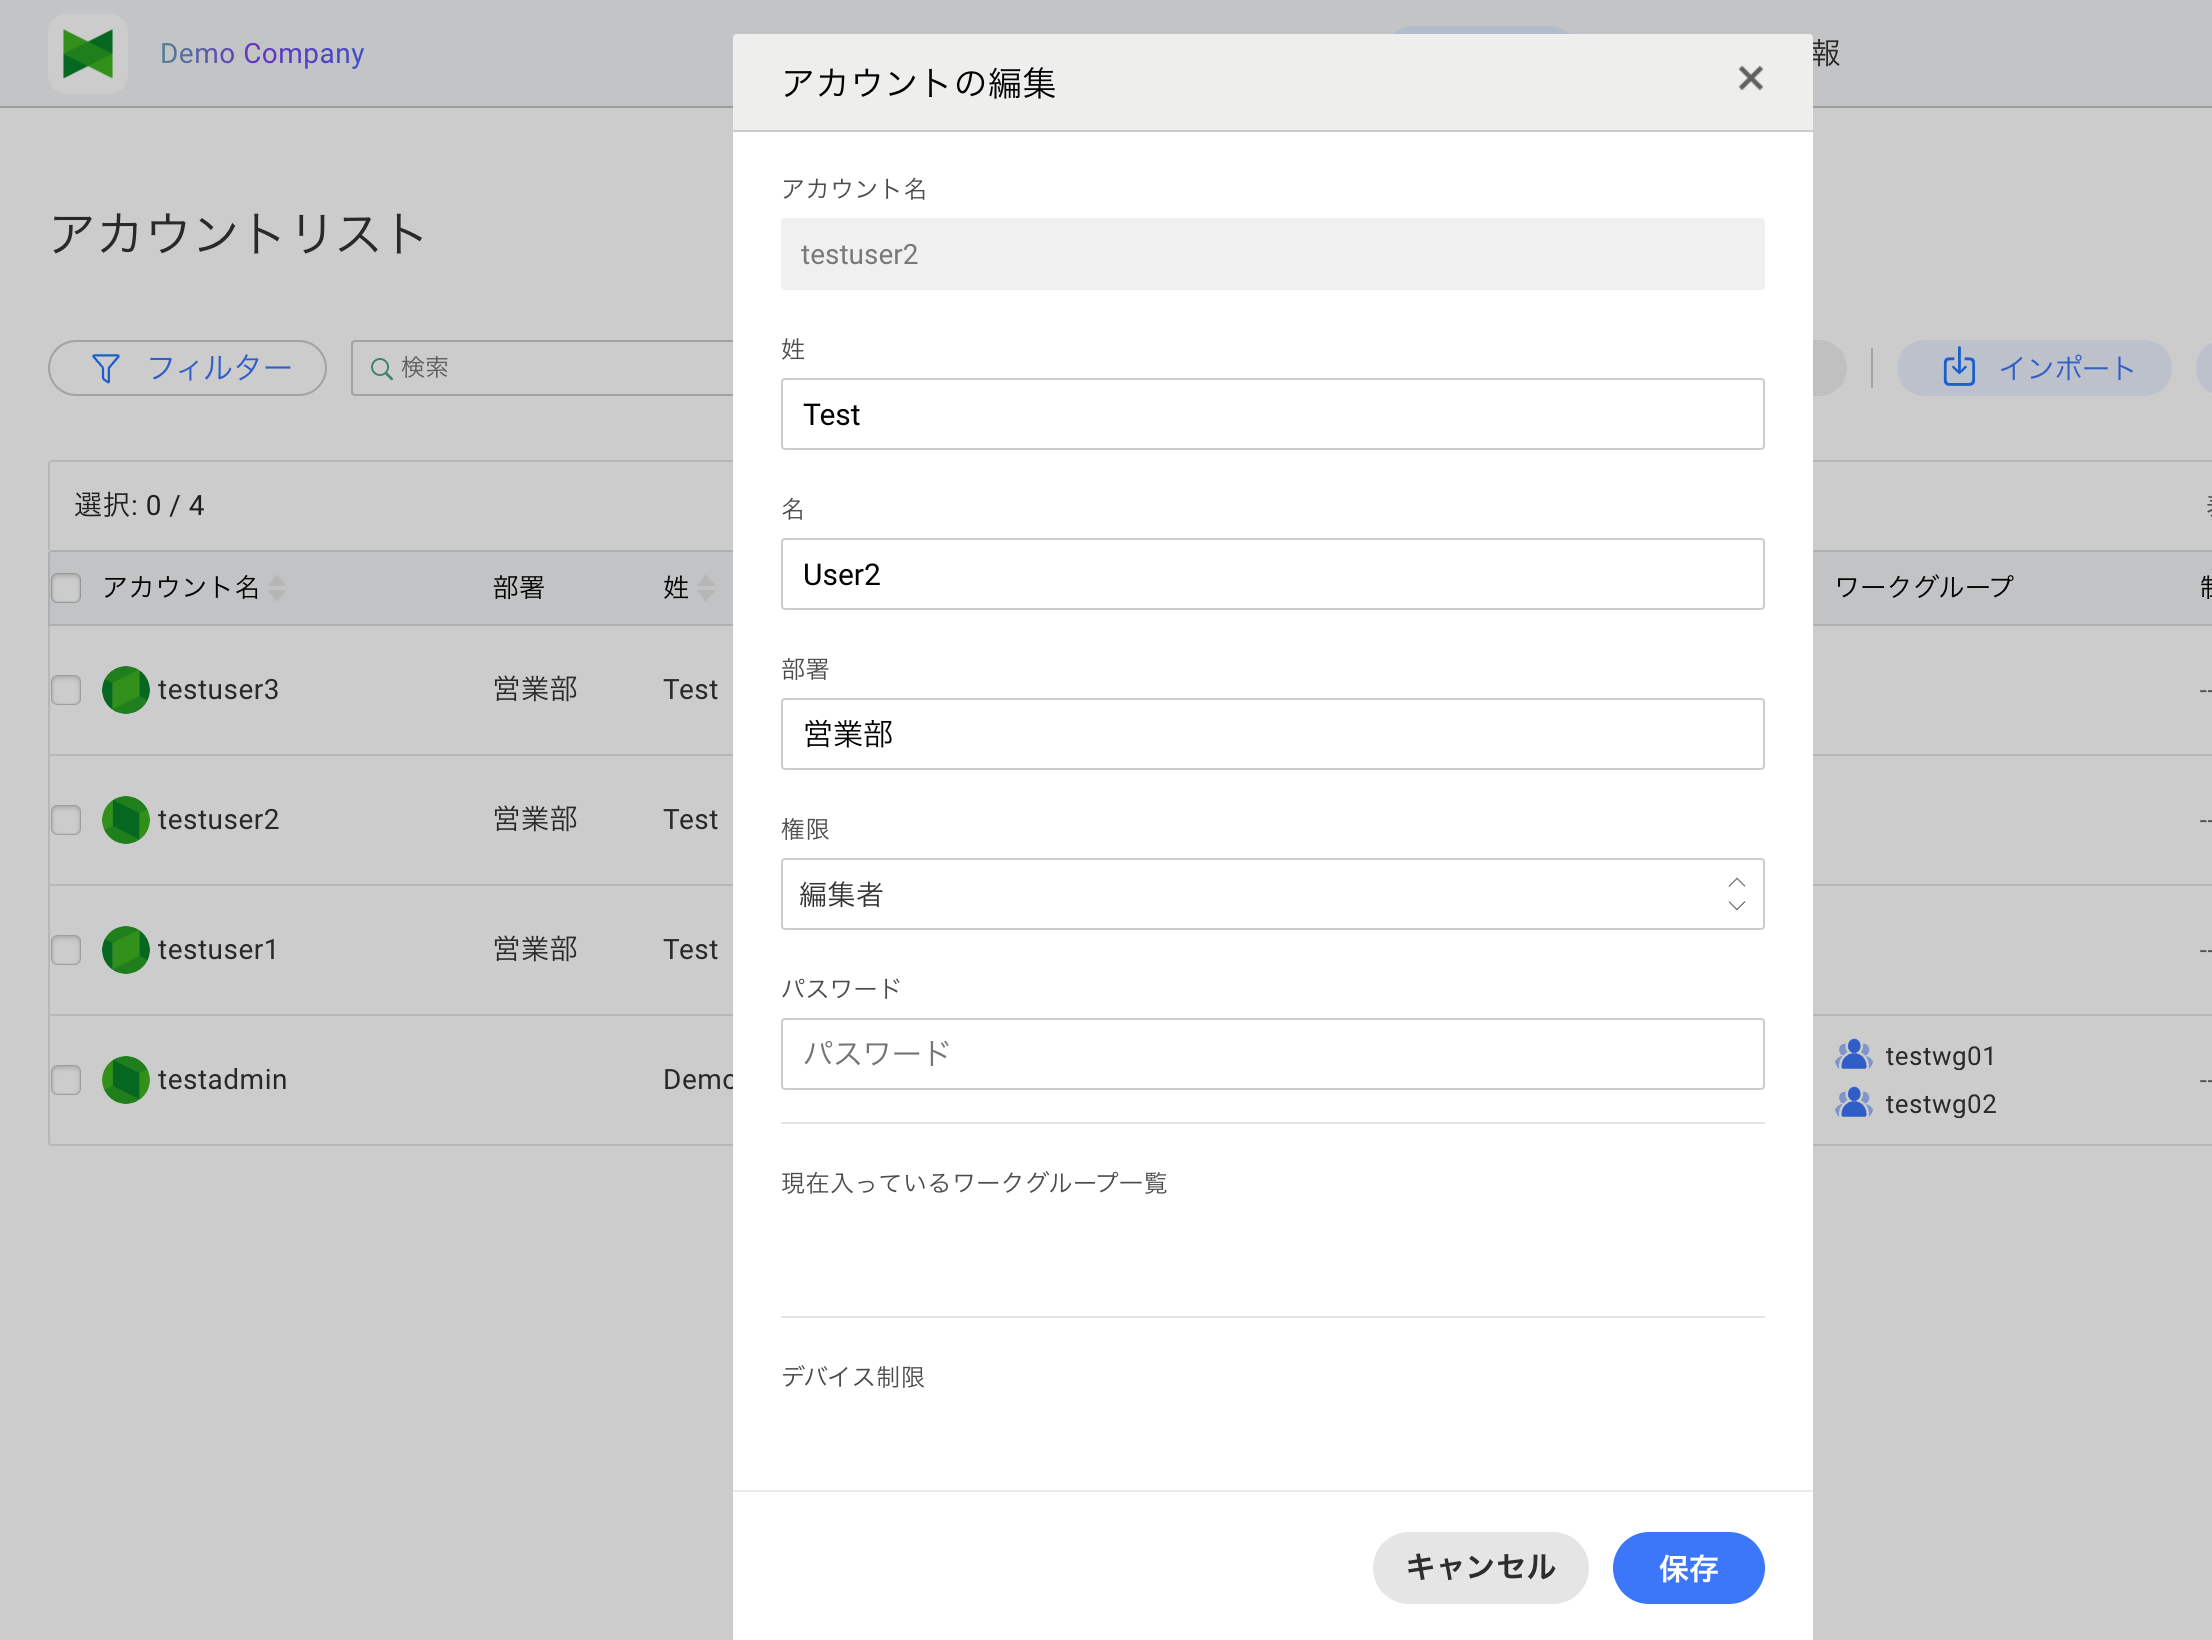
- Modify the information
- Click the Save button
Editable Items
- Password (leave blank to keep the current password)
- Last name / First name
- Department
- Permission
- Device restrictions
The bottom of the dialog shows the list of workgroups the user currently belongs to. Workgroups cannot be changed directly from this dialog (change them from the Workgroup tab or via CSV import).
Note: The account name cannot be changed.
Note: When you edit an Owner account, the role drop-down is shown as grayed-out (read-only) and cannot be changed. To transfer ownership, use the contract owner transfer flow (see: 9.2 Admin Settings (dedicated server, contract owner)).
Resetting the Password
- Open the Edit Account dialog
- Enter a new password in the Password field
- Click the Save button
If left blank, the current password is preserved.
7.4 Removing an Account
To remove an account:
- Click the Remove button (
 ) of the account you want to remove in the account list
 - A confirmation dialog appears
- Click the Remove button
Note: Removing an account also removes: - All books owned by the user - Sharing settings for the user
This action cannot be undone.
Note: The owner account cannot be removed.
7.5 Importing Accounts
You can bulk import or update accounts from a CSV file.
- Click the Import button (
 ) in the toolbar
 - The Import dialog appears
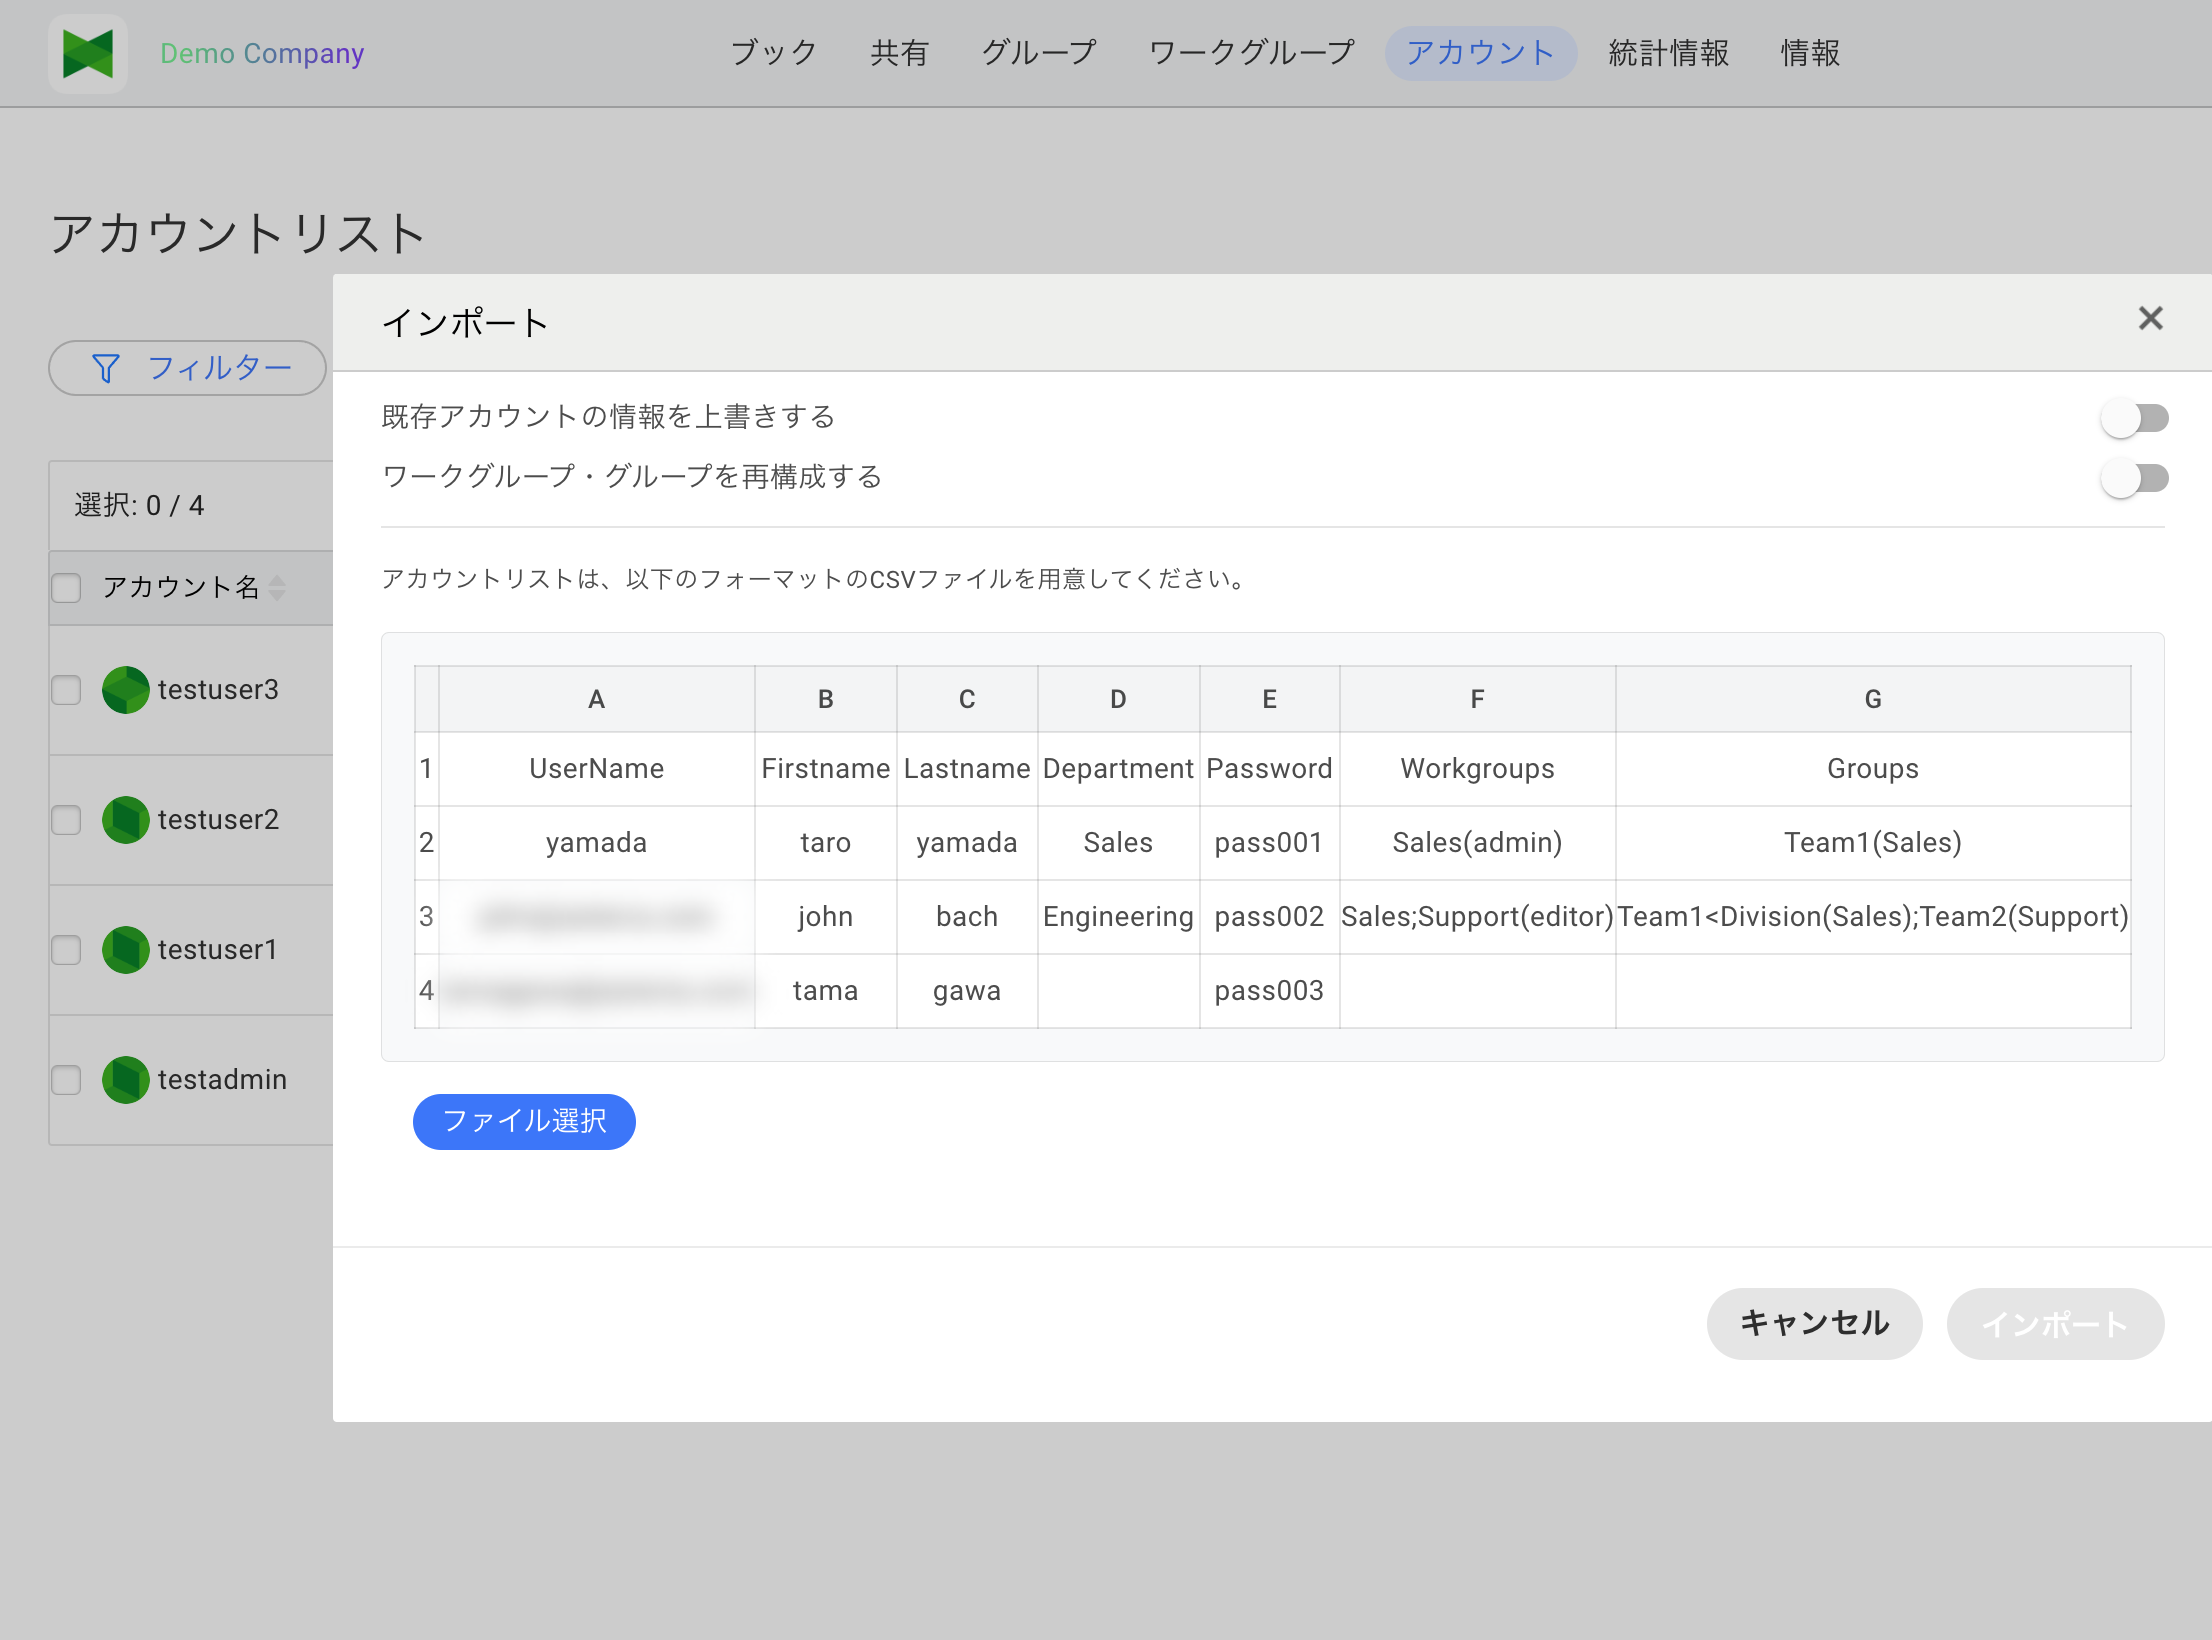
- (Optionally) configure the two toggles at the top of the dialog (described below)
- Pick a CSV file with Select File
- Review the preview
- Click the Import button
Import behavior toggles (added in 2.7)
The two toggles at the top of the dialog are both OFF by default.
| Toggle | OFF (default) | ON |
|---|---|---|
| Overwrite existing accounts | Existing accounts are skipped | First/last name, department, password, and permission of existing accounts are overwritten with CSV values |
| Reconfigure workgroups and groups | Memberships from the Workgroups / Groups columns are added only |
Memberships are fully replaced with the CSV values (the user is removed from any workgroup/group not listed in the CSV) |
Note: Before 2.7, import was strictly for new account creation and existing accounts were always skipped. Starting from 2.7, the toggles above let you update existing accounts as well.
CSV File Format
Important: The CSV header (column names) must use the exact English labels shown below. Other label names are not supported.
UserName,Firstname,Lastname,Department,Password,Workgroups,Groups
yamada,Taro,Yamada,Sales,pass001,Sales(admin),Team1(Sales)
suzuki,Hanako,Suzuki,Engineering,pass002,Sales;Support(editor),Team1<Division(Sales);Team2(Support)
sato,Ichiro,Sato,,pass003,,
| Column Name (English only) | Required | Description |
|---|---|---|
| UserName | ○ | Account name (does not need to be email format). Renamed from the old Mailaddress. |
| Firstname | ○ | User's first name (cannot be empty) |
| Lastname | ○ | User's last name (cannot be empty) |
| Department | - | Department (optional, may be empty) |
| Password | ○ | Initial password (only applied when overwriting an existing account) |
| Workgroups | - | Workgroups to join and their roles. Examples: ・ Sales(admin) — Join Sales WG as admin・ Sales;Support(editor) — Multiple WGs separated by ;, role in (role)Role: owner / admin / editor / reader |
| Groups | - | Groups including hierarchy. Examples: ・ Team1(Sales) — Team1 under Sales WG・ Team1<Division(Sales) — < indicates parent → child・ Team1<Division(Sales);Team2(Support) — ; for multiple groups |
Password Requirements: - Length: 8-32 characters - Allowed characters: Any characters including letters (uppercase/lowercase), numbers, and symbols
Import Notes
- UserName, Firstname, Lastname, and Password must always have values
- Each data row must have the same number of columns (7 columns, comma-separated) as the header
- Do not include a trailing empty line at the end of the file (this will cause errors)
- Importing a large number of accounts may take time
- The old 4-column format (
Mailaddress, Firstname, Lastname, Password) can still be imported if you rename theMailaddressheader toUserName(Department / Workgroups / Groups are treated as empty)
Import Behavior Matrix
| Situation | Overwrite OFF / Reconfigure OFF (default) | Overwrite ON / Reconfigure OFF | Overwrite ON / Reconfigure ON |
|---|---|---|---|
| Account does not exist | Created as new | Created as new | Created as new |
| Account already exists | Skipped | Last/first name, department, password, permission are updated (WG/Group is add-only) | Last/first name, department, password, permission are updated, and WG/Group is reconfigured exactly per CSV |
| Existing account not in CSV | (no change) | (no change) | (no change) |
7.6 Exporting Accounts
You can export the account list as a CSV file.
- Click the Export button (
 ) in the toolbar
 - A CSV file is downloaded (file name format:
Accounts_YYYYMMDD.csv)
Exported CSV format (9 columns)
UserName,Firstname,Lastname,Department,Password,DeviceID,Language,Workgroups,Groups
| Column | Description |
|---|---|
| UserName | Account name |
| Firstname | User's first name |
| Lastname | User's last name |
| Department | Department |
| Password | (Always empty on export — passwords are never exported) |
| DeviceID | Device IDs allowed by device restrictions (multiple values separated by ;) |
| Language | User's preferred language (e.g. ja / en) |
| Workgroups | Workgroups the user belongs to with their roles. Same format as Import |
| Groups | Groups the user belongs to. Same format as Import |
Difference from the import format: Export adds two extra columns,
DeviceIDandLanguage. A CSV containing these columns can be re-imported without errors, but in the current version import ignores them (only the 7 columns shown in the import dialog are applied).Tip: You can mass-update existing accounts by editing the exported CSV and importing it with Overwrite existing accounts turned ON. Leave the
Passwordcolumn empty if you do not want to change passwords.
7.7 Setting Permissions
You can bulk change permissions for multiple accounts.
- Select the checkboxes of accounts you want to change
- Click the Permissions button in the toolbar
- The Update Permission dialog appears
- Select a new permission
- Click the Change button
Features by Permission
| Feature | Owner | Admin | Editor | Editor (Export Prohibited) | Read-only |
|---|---|---|---|---|---|
| View books | ○ | ○ | ○ | ○ | ○ |
| Create/edit books | ○ | ○ | ○ | ○ | - |
| Export content | ○ | ○ | ○ | - | - |
| Sharing settings | ○ | ○ | - | - | - |
| Group management | ○ | ○ | - | - | - |
| Workgroup management | ○ | ○ | - | - | - |
| Account management | ○ | ○ | - | - | - |
| View statistics | ○ | ○ | - | - | - |
| System Information (edit organization name, etc.) | ○ | - | - | - | - |
Note: "System Information" is the tab name on the dedicated server plan. On the cloud server plan it is displayed as "Profile / Service Plan" and accessible to all users, but some features such as editing the organization name are available only to the Owner.
7.8 Setting Device Restrictions (Platform Restrictions)
You can bulk set device restrictions for multiple accounts. This feature is a platform restriction that prohibits access from specific platforms (OS types).
- Select the checkboxes of accounts you want to configure
- Click the Device Restrictions button in the toolbar
- The Device Restrictions dialog appears
- Select platforms to restrict:
- iPhone
- iPad (includes Mac)
- Android
- Windows
- Browser
- Click the Confirm button
Note: Previous versions exposed a single "iOS/iPad" option. From version 2.7 (June 2026 update), iPhone and iPad can be restricted independently. Accounts that previously had "iOS/iPad" restricted are loaded with both iPhone and iPad pre-selected.
Difference Between "Platform Restrictions" and "Device ID Restrictions"
Handbook X Coordinator has two types of device restriction features. It's important to understand the differences as they can be easily confused.
| Item | Platform Restrictions (This Section) | Device ID Restrictions (See 6.9) |
|---|---|---|
| Restriction Unit | Per platform (OS type) | Per individual device |
| Setting Location | Accounts > Device Restrictions | Workgroup > Device Restrictions |
| Scope | Per account (user) | Per workgroup |
| Restriction Method | Allow/prohibit iOS/Android/Windows/Browser | Approve/deny logged-in device IDs |
| Availability | Dedicated server plan | Dedicated server plan (with devid feature) |
| Use Case | "Prohibit access from smartphones", etc. | Allow only specific company-issued devices |
Example: Platform Restrictions (This Feature) - Yamada → iPhone prohibited (no access from iPhone; iPad / Mac still allowed) - Suzuki → Browser prohibited (no access from PC browsers)
Example: Device ID Restrictions - Yamada's "iPhone A" → Allowed - Yamada's "iPhone B" → Denied (personal device) - Suzuki's "iPad C" → Allowed
Tip: For device ID restrictions, see 6.9 Device ID Restrictions.
Device Restriction Behavior
Access from selected platforms is prohibited.
| Restriction Option | Target Devices |
|---|---|
| iPhone | iPhone (iOS app) |
| iPad | iPad, and Mac (recognized as iPad due to Mac Catalyst app) |
| Android | Android smartphones and tablets |
| Windows | Windows PC |
| Browser | Access from web browsers |
Example 1: If only "iPhone" is selected - Access from iPhone app: Not allowed - Access from iPad app: Allowed - Access from Mac app: Allowed - Access from Android app: Allowed - Access from Windows app: Allowed - Access from browser: Allowed
Example 2: If "iPhone", "iPad", and "Browser" are selected - Access from iPhone / iPad / Mac app: Not allowed - Access from Android app: Allowed - Access from Windows app: Allowed - Access from browser: Not allowed
7.9 Filtering and Searching
Search
Enter keywords in the search box in the toolbar to search for accounts.
Search targets: - Email address - Last name - First name
Opening / Closing the Filter
Clicking the toolbar Filter button toggles an inline filter row for "Permission" and "Workgroup" above the account list. Click it again to close.
Filter by Permission
- Click Permission: Select ▽
- Select permissions to display (multiple selection available):
- Owner
- Admin
- Editor
- Editor (Export Prohibited)
- Read-only
- Only accounts with selected permissions are displayed
Filter by Workgroup
- Click Workgroup: Select ▽
- Select workgroups to display (multiple selection available)
- Only accounts belonging to selected workgroups are displayed
Clearing the Filter
To clear the filter, deselect each filter, or click the Filter button again to close the row.
7.10 Sending an Invitation Email
You can send an invitation email to newly created accounts.
- Open the Edit Account dialog
- Click the Send Invitation button
- An email with login information is sent to the user
Note: The invitation email does not include the password. Communicate the password separately.
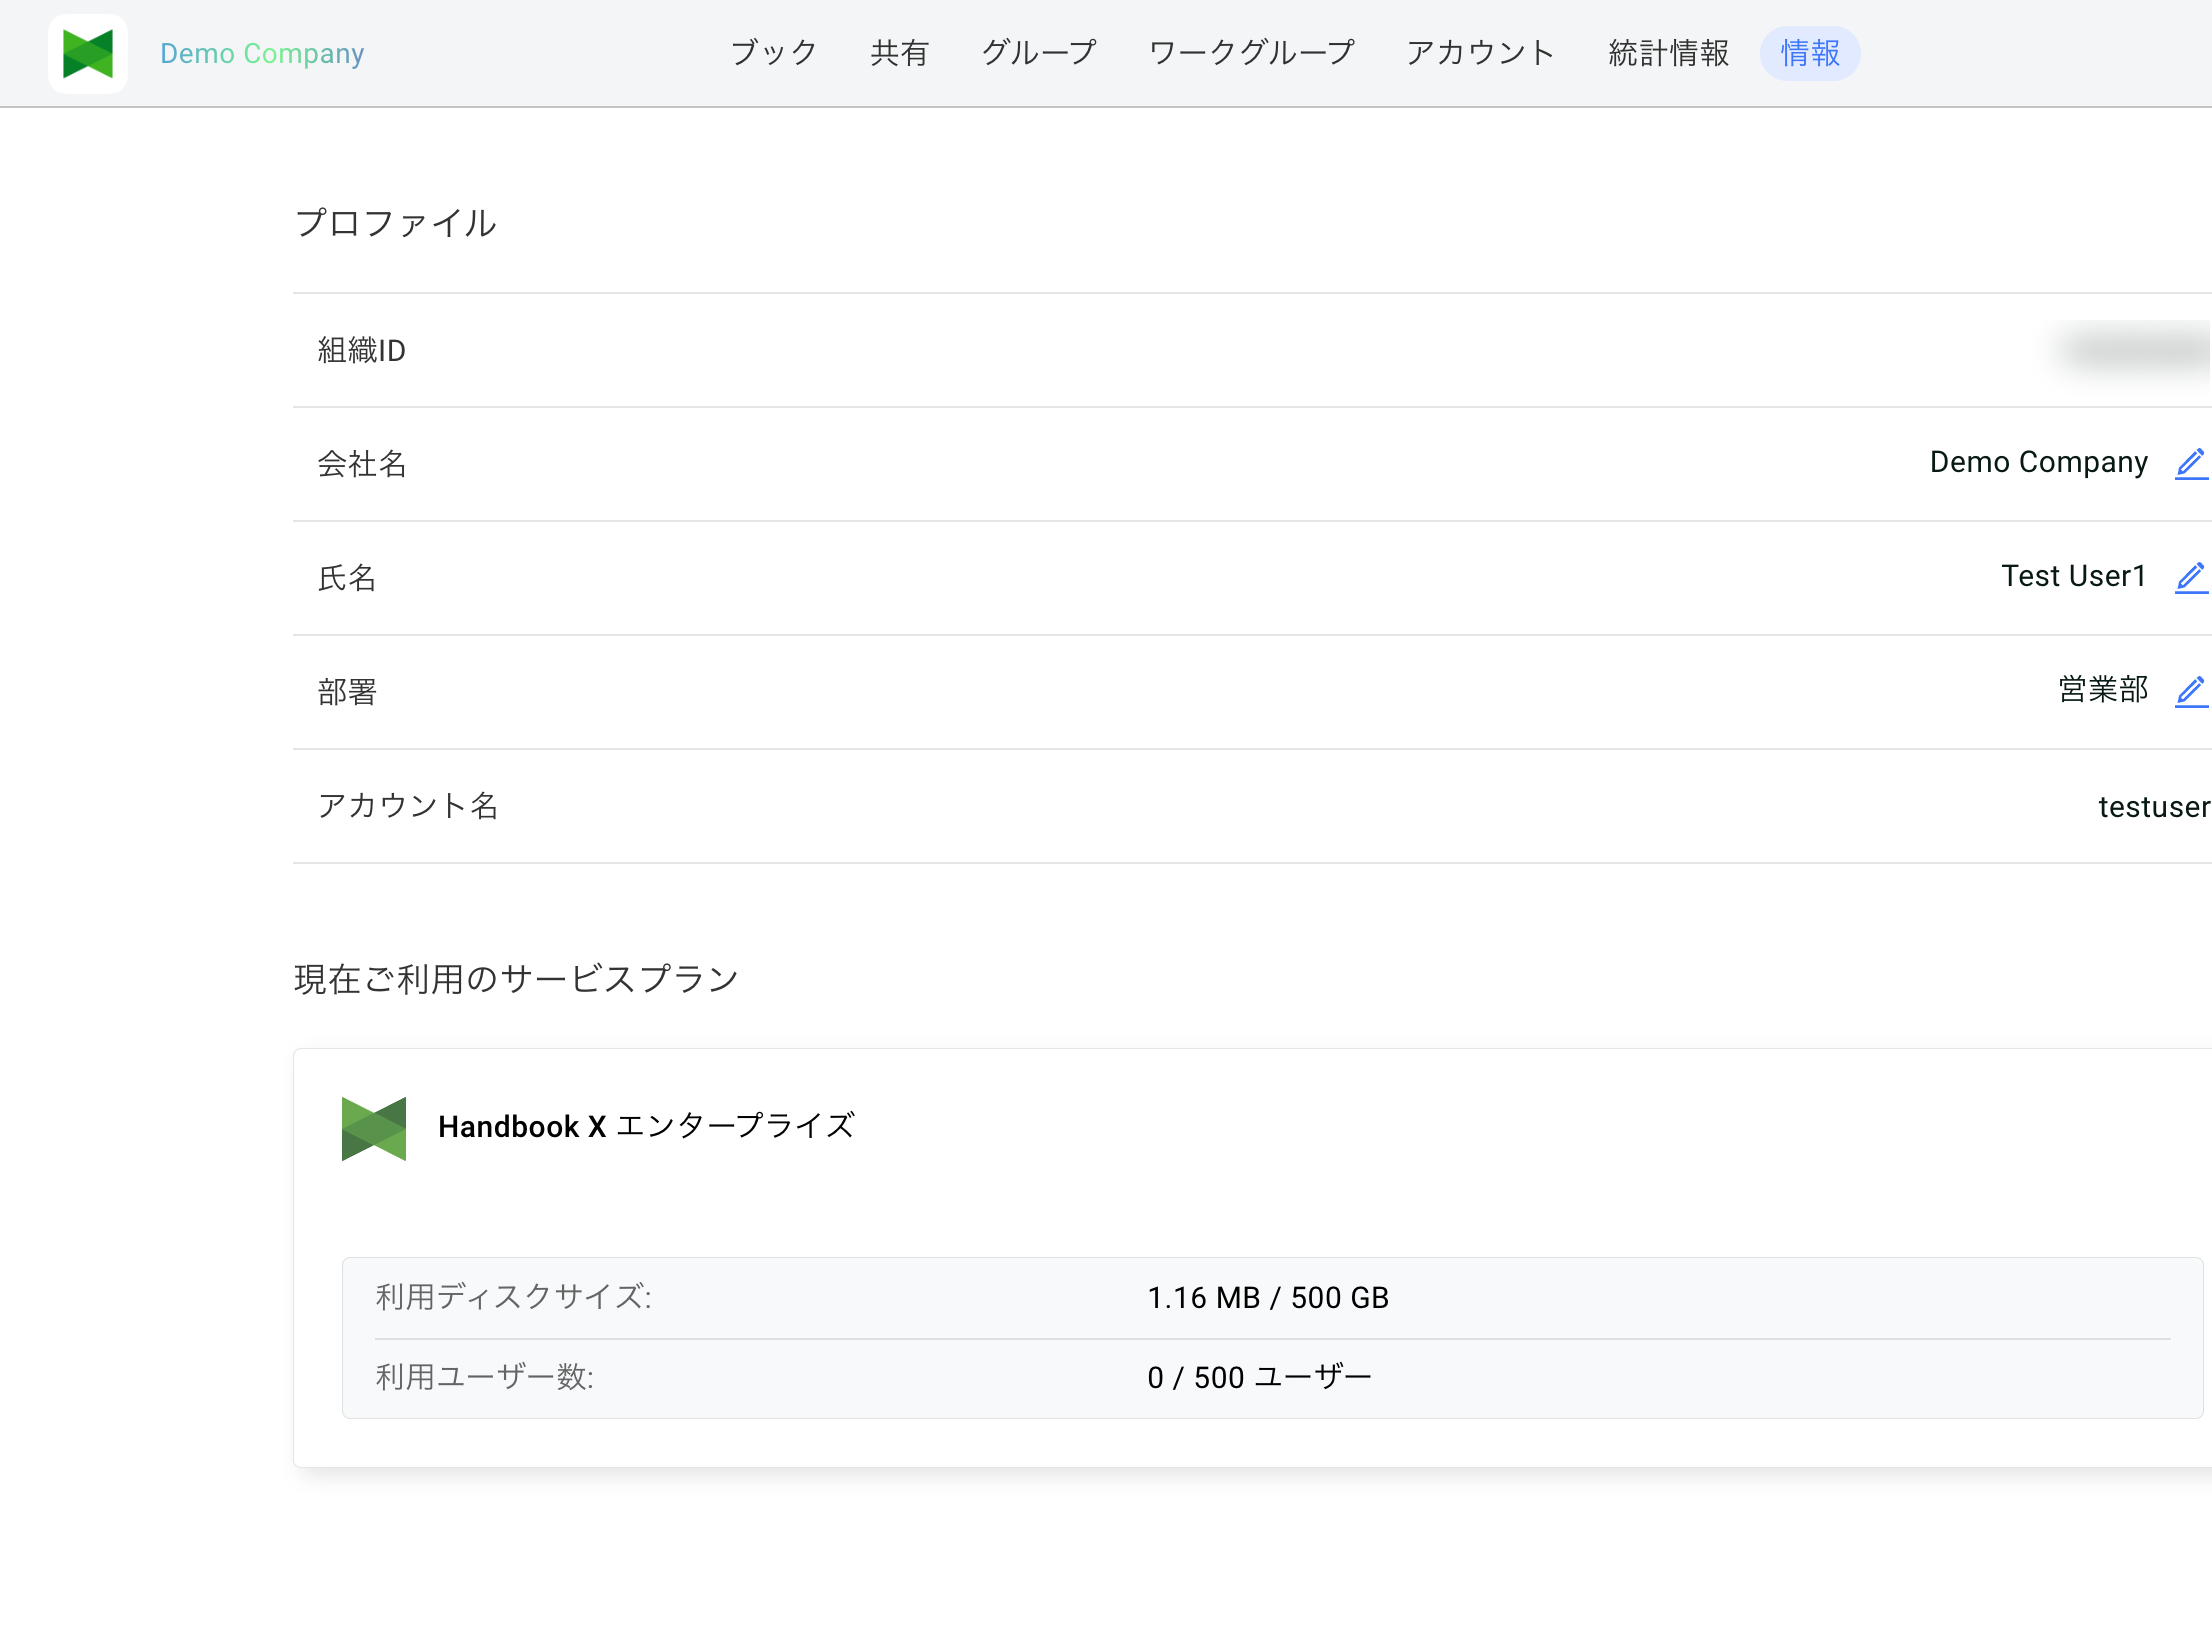
7.11 Editing Department from the "System Information" Tab
Users can also edit their own department from the "System Information" tab (called "Profile / Service Plan" on the cloud server plan). The department set by an admin from the Accounts tab and the department set by the user from the System Information tab are kept in sync.
For details, see 9.5 Editing the Department.